Tuesday, December 27, 2011

Winter Winnings and Blessings

I had a wonderful Christmas, I am so very blessed and grateful for my abundance this season and always.  The gifts I received this past month, extended beyond my typical circle of family and friends.  In the past year I have really discovered the wonderful world of blogging, and this community has shared with me several additional gifts this holiday season.

As I write this I can't help but reflect on my annual milestones.  I have hit 200 followers and I am really close to 30,000 hits on 90 posts.  What is even better than that are the 982 comments I have gotten so far. The comments you leave are precious gems to me, that continue to fuel my creative spirit.   Blogging has become a great way for me to express myself.  I love the way I can move from creating the art, to documenting my efforts (and pitfalls) and then putting it all together and publishing in a pleasing artful manner.

I pushed myself outside my box and made a video of my Winter Winnings to show off the generosity of so many people out there.  I have never done a video, so it was interesting and challenging to try something new. 

This crafty community sure is fun to be a part of.  I can't help but dream of doing this on a deeper level, designing, inventing, teaching, writing, selling...I would love to do it all!


My prizes generously came from:
Jewelry Push Pins from sweetbeadstudio won through  Lori Anderson's virtual craft fair. 
Yellow Bicycle stamps and extras, from Allie Gower.

An AMAZING Boxful of Christmas from Red Lead.


May you too be blessed with crafty abundance!

Cheers,

Rhea


Wednesday, December 21, 2011

Handmade Holiday

Just a quick post to show off a couple of jewelry pieces I  have created today.  Last minute gifts for those who will appreciate such a token.

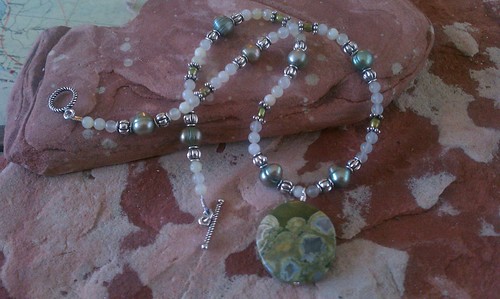
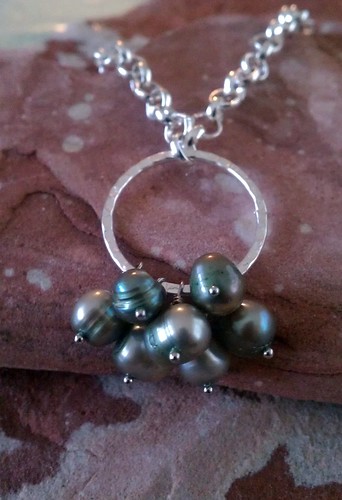
This necklace was inspired by a necklace I saw on Pinterest.  That site is so much fun!  It was really simple and quick to create and yet still looks like a nice finished piece of jewelry.  There is lots of movement to the focal charm, which I just adore. 


This next one I really like.  It is a color scheme that I really enjoy.  It is interesting how the colors are translating in photos, it looks a bit more muted in real life. 


And a close up of the really lovely centerpiece. 


I hope both of the recipients enjoy! I also made a custom pink sparkly bracelet and earrings for a special little girl, but alas, I wrapped them up.  Oh well!

Lots more last minute holiday preparations ahead!  For those of you who are finished and prepared for your festivities, I salute you!

Cheers,

Rhea

Saturday, December 17, 2011

My Christmas Configurations

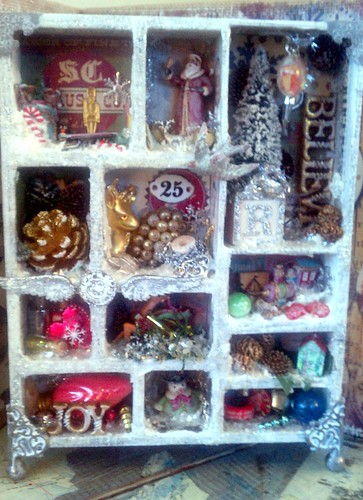
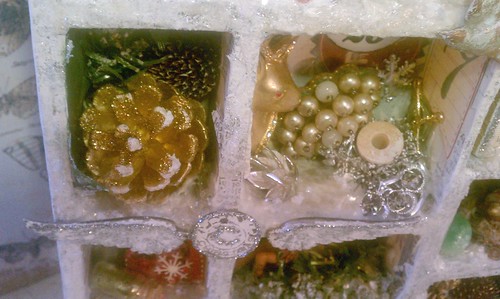
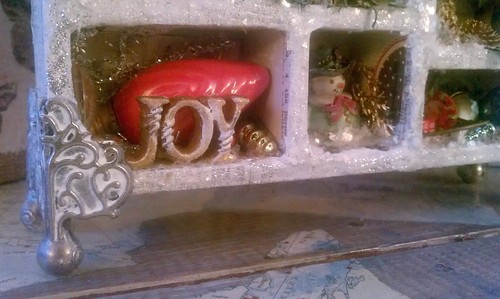
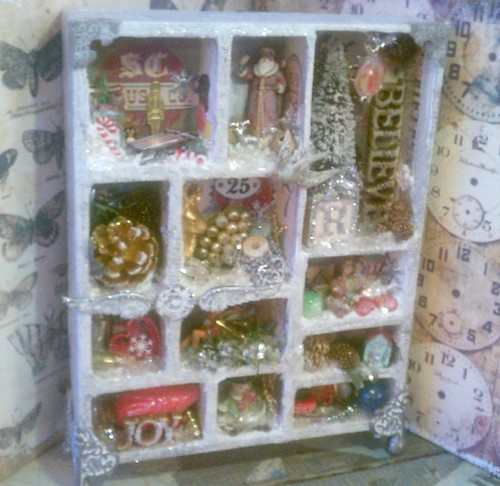
As my loyal readers may have expected, I have had a Christmas assemblage in the works.  I still can't quite figure out why I love to put these together, but I really, really do.  This piece has been getting put together in my mind for quite some time.  I started out by just gathering small items I knew would fit inside the boxes and putting them in little bowls on my craft table.  I also joined a Christmas ornament charm swap, with the intentions of using them to embellish my project.  This makes it extra special, as I have little pieces of others art tucked inside. 


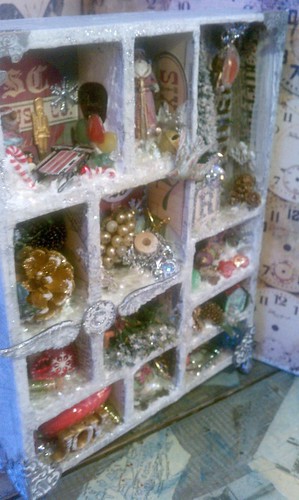
I am so grateful for Simon Says Stamp and Show, as it was their challenge this week of show some depth, that pushed me to actualize this piece.  I used several strategies to ensure that there is a lot of dimension and depth to this piece.  To that end, lots of texture was created with several different applications.  I used distress stain, acrylic paint, molding paste, fiber paste, rock candy crackle paint, vintage mica snow and stickels.  I was also sure to add several elements in each area and stage them at different dimensions.  Decorations were added to the sides and the tops of some boxes too, these details provide a lot of depth and interest.  My last secret to showing the depth here was in how I photographed the piece.


I love this little charm I made with the wings and the holiday muse token.  It reminds me of the spirit of Christmas because of the symbolism of the wings. I colored these metal pieces with picket fence distress stain and then sealed with matte medium.  Stickels were added for more depth and glimmer.


I used the white stain and acrylic paint on many of my items inside this assemblage.  This helped to create a wintry feel and keep the palette muted.  I love the shabby look of the feet from this distress technique.


I really love how I used the various art pastes to create little snow drifts.  I wish you could see the crackle a bit better, the texture on the edges is really delicious. 


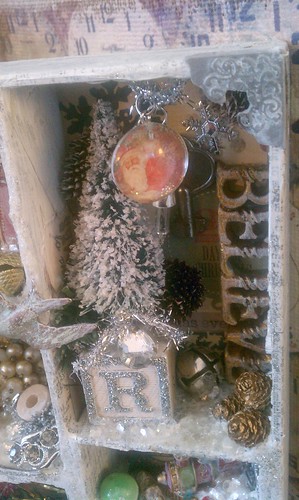
I altered the bottle brush tree quite a bit.  I used gesso, acrylic paint and stickels to make it look snow covered.  In this little area a dangling charm was added. I always like to have an element of movement in my pieces, if I can make it work.


The vintage block above was also altered.  I washed it with acrylic paint and then simply added stickels.  I think these would make charming Christmas ornaments.   This project took some patience overall, as there were many stages due to the drying times.  This picture above does show a bit of the glimmer from the vintage mica snow.  I imagine I will be finding flecks of this in my work area for some time.


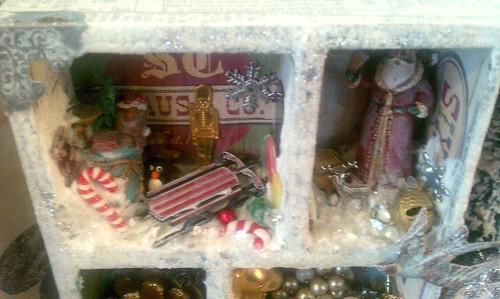
In this photo you can see that the base of the collage on the boxes is tissue tape. I love how the stain adds a whitewash look.  This toy compartment has lots of charms from my art charm group.  Thanks so much ladies, hope you like what I have done!!!


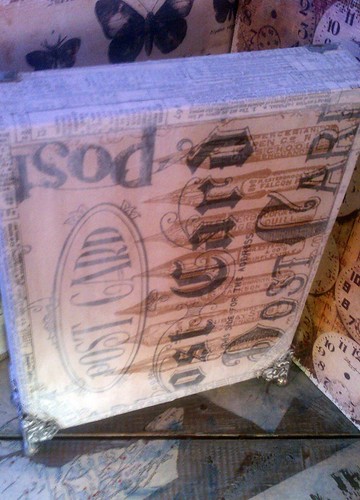
I always like to finish the backs of these boxes.  I chose my favorite piece of kraft paper from Tim's seasonal kraft stack and whitewashed it for consistency.


I hope you enjoyed peeking inside my little holiday assemblage.  I sure had fun creating it and sharing it with you.

Update:  Just after posting this project I found out that I won this giveaway from Red Lead.  Can you believe it!  How lucky am I!  Both thier store and their blog are full of inspiration, so stop on over and check out all the vintage and crafty goodness.  Thank you so much Red Lead, as you can see from above I will put the items to good use!

Merry Christmas to all,

Rhea

Tuesday, December 13, 2011

Sparkly Swap Bracelet

Here is a quick post showcasing a bracelet I created with winter in mind.  It is a collaborative project as many of the charms were made by individuals in my Art Charm group on Yahoo.  I added many of my own little dangles, providing some unity with a few beads being repeated throughout the design.  I just love the sparkle and the noise this cutie makes. 


Putting this together also makes me yearn for more bead work. I may have to revisit that genre a bit more.

Sunday, December 11, 2011

Junque Book: How to

So as promised, I am going to share with you some (poor quality) pictures depicting how I assembled my holiday junque books.  I am sorry the lighting in my craft area is so poor!  What will be shown here is just how to assemble the book, it is up to you to personalize it with what you put inside.  Here is one of the books I have finished assembling, but there is much work to be done inside.  You will see links at the bottom to see inside a few of my books.  I have also made a video tour of my completed book, if you want to check that out.
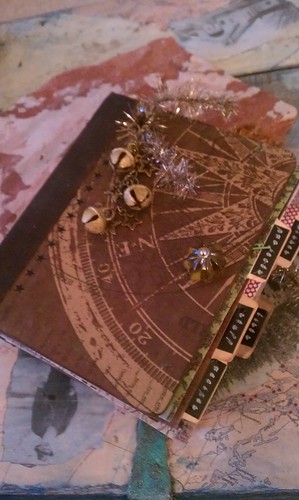


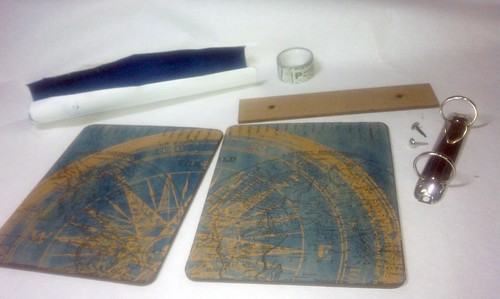
To create the basic book you will need:
Wendy Vecchi Art Parts: creative covers, size large
Tim Holtz ring binders, size large
Tim Holtz kraft paper
Ranger Sticky Backed Canvas
Tissue Tape
Yes Paste
Distress Stains
Duct Tape
Basic Craft Supplies: pen, scissors


Get your cover ready by using one piece of the cover to trace and cut out your cover design for both front and back.  I chose Tim Holtz's kraft paper.  I really like how it accepts the stains and how sturdy it is.  Cut out your paper and then color how ever you choose.  On my first journal I buffed in distress inks with an applicator, in this project I used the distress stain. 

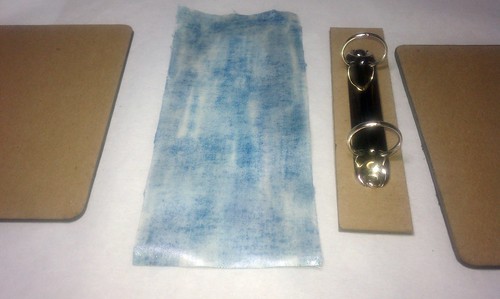
Next, prepare your sticky backed canvas.  This will act as the binding of our project.  I simply colored mine with the distress stain again.  You can add some more decorative elements here though.  You could stamp a texture stamp, paint or even emboss a design on your spine before binding if you choose.  Just remember this will eventually bend, so be sure whatever application you decide on can bend once finished.  As you can see above, mine curled a bit when I used a heat tool to dry the stain, it is all good.


Your package of Art Parts will come with extra spines. You have the choice to orientate your book either way.  Above I have laid out the proper one for this project. 


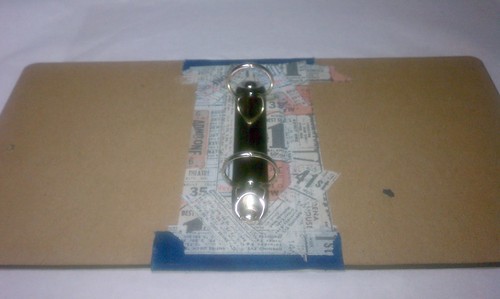
Now simply attach the binder ring to the spine using the brads provided.  I learned a trick that helps, but has not perfected the issue of being able to see the brads through the canvas.  I then added a bit of duct tape to the back of the spine.  It does not matter what this looks like as the canvas will cover it, my duct tape was camouflage in pattern.  This assists in covering up the tails of the brads.  You will still be able to see them a bit after assembling.  Next time I make one, I may try two layers of duct tape.  I found this also helps the brads to stay better as well. 


I then laid it out to plan the assembly.  The band of sticky back canvas I used was four inches.  I cut this off the bottom of one sheet.  You will need to leave a bit of a gap so that there is room for the covers to move.


 Peel the backing from the canvas and carefully place the spine on top.


Add each cover to the binding as well.  Be sure to line everything up as straight as you can.


Simply fold up the extra bit of canvas binding material on the top and bottom as shown. Burnish the canvas down well and be sure the canvas has made good contact with the art parts. 


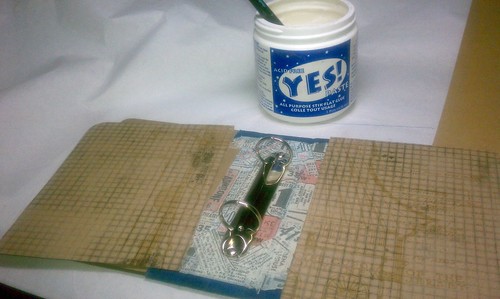
Now, I did not like the naked look of the art parts on the inside of my book.  So to solve this issue I used a very strong paper adhesive, Yes Paste, along with some tissue tape to cover this area.  The tissue tape worked well as I was able to rip bits and layer to get around all of the binder.  It is a low tack tape, so adhering this on its own would probably not stand up to the wear and tear I plan on putting on this book. I was sure to use a lot of the paste in the cracks between each book component and get every bit of the tape tacked down.   


To finish the inside, I used my assembled book as a template to cut out pieces to fit the inside.  Again I chose kraft paper as it is tough and really adheres the the covers with the help of the Yes Paste. I covered the inside almost to the edge of the spine.   


As you can gather, I ended up disliking the blue and so it ended up brown.  I simply went back over everything with more stain.  Now the blue shows through a bit and I love the layers of color.  To see inside of my book more click here.  Below you can also see the first book I made for a secret Santa.  To see inside of Beth's book click here.

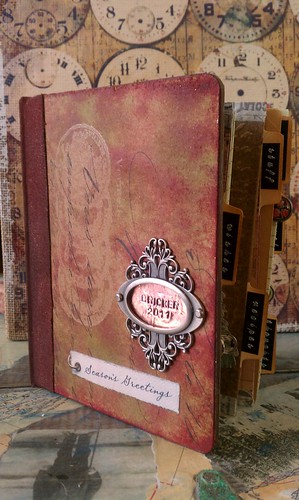
 If your playing along at home, now is the time to embellish at will.  I added a book plate with a personalized message on one, a knob on another.  You could write out a word in grunge board or chip board. Add a closure or a window peeking inside.  I took a big risk and put a hole right in the cover in order to add a large dangle of a charm complete with bells, stars and vintage tinsel. 


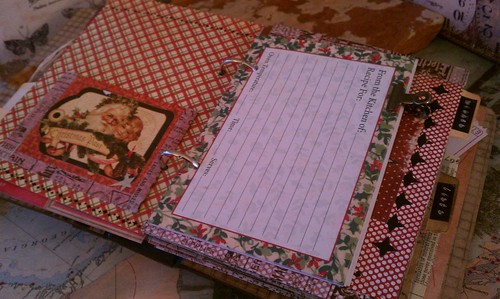
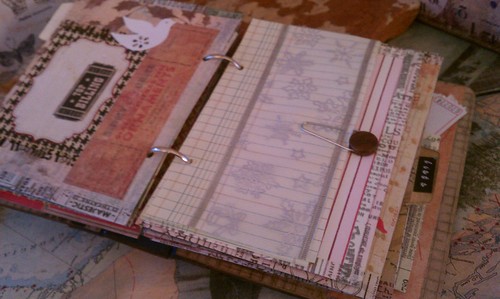
My inside pages are made from more kraft paper and other holiday paper as well. You will have to use the links above to browse inside.  Most pages I simply glued together two pieces of paper and finished the edges with tissue tape.  I added tabs, reproduction holiday ephemera, pockets, envelopes, recipe cards, junk mail, past Christmas card covers and anything that inspired me. 

Some other ideas:  Save your everyday ephemera, now is the perfect time to collect things such as tags from gifts, bits of wrapping paper, ribbons, envelopes, packaging from gifts, Christmas cards, holiday photos from family etc.  This is what will make your book uniquely yours. To make your journal ecclectic attach your junque with decorative tape, staples, paper clips, binder clips.  Keep your to do lists, holiday invitations, programs from holiday events and pieces of your kids holiday school work inside.  Make it your own and don't think twice about it, just stuff it inside and document your busy holiday season.  This will be a treasure for years to come.

I hope you found this information helpful and inspirational. 

Merry Christmas!

Rhea


Sunday, December 4, 2011

My Christmas Junque Journal

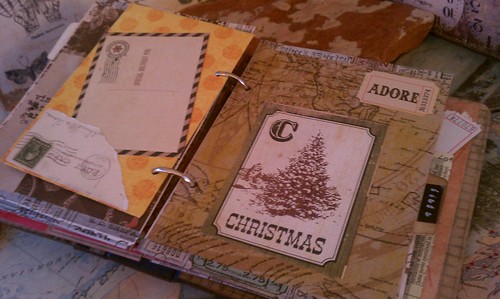
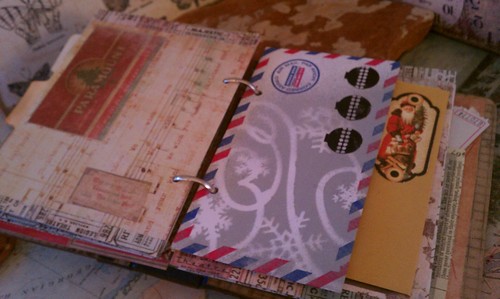
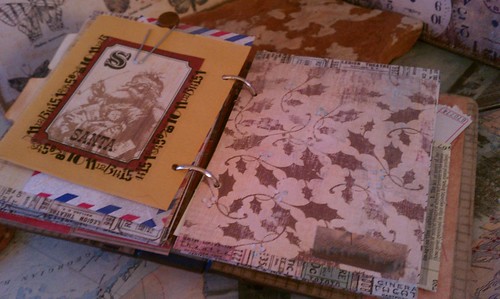
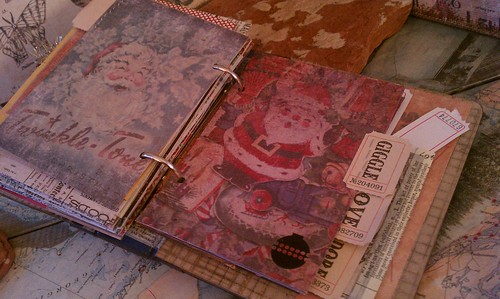
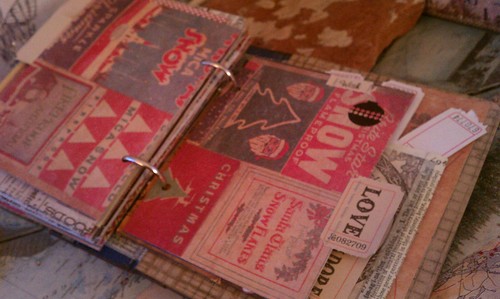
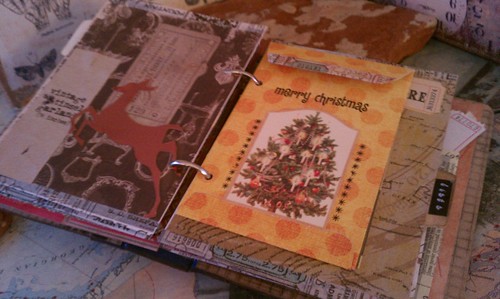
Not too long ago I posted a Holiday Junque Journal that I made for a gift.  Well, I loved it so much I had to have one for myself.  Please note, this post is picture heavy.  I really wanted to try and capture the feeling of the book.  I created a tutorial on how to assemble this book here.  I have also now made a video tour of my completed book if you want to take a peek. 


I actually started this book last week, with the intention to enter it into Simon Says Stamp and Show some tickets challenge.  I did not get enough done to feel comfortable posting.  I lucked out though as this week the challenge was to show some stars.  The compass rose on the paper is in starry form.  I love the symbolism of the compass; direction.  I added some star rub ons and a really great piece of journal jewelry that was star themed to drive the theme home.  I do love stars as you may have guessed. :)  The book has a wonderful sound to it because of the little bells too.  Just the perfect amount of movement and jingle. 


I actually colored the entire book blue to go with the star theme too.  I did not like how the stain looked on the binding, so I simply went over everything with a brown tones.  Now there are under currents of blue, which I love.  A happy mistake. 


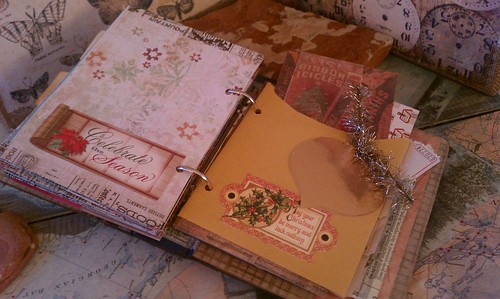
There are tons of pockets inside to tuck in lists, receipts and holiday ephemera I find along the way.


The pockets were made by simply folding a rectangle of paper in half and taping around the edges with tissue tape.  My loyal followers know...I am totally addicted to tissue tape.


I scored a few packs of recipe cards at a big box store for a buck a pack. They make for great pages in my little book.


I used holiday rub ons throughout this project too.  I am like a child like fascination with them.


Perhaps it will help me to have a countdown calendar this year....


Like my last book, I also added a bit of old ledger book paper for lists.  On the first page here, I glued on a bit of snowflake ribbon.


I really love the addition of envelopes throughout the book.  The polka dot one above was handmade by someone else, I embellished it. 


I adore the postal theme too, perhaps this is where my love of envies started. 


I used an opaque spray ink on this air mail envelope called tin type, love the flat color.


I use the envelops to tuck in bits of paper and ephemera for later work as well.  I really love some of the reproduction vintage stuff you can get these days.


In the last four sections I used Tim's adage tickets as the label, I thought this was a cute idea.  It was inspired by lasts week's ticket challenge as I had mentioned earlier.


Tim's seasonal paper stash came in quite handy too.


I used the tiny attacher to simply staple on the ticket.  Looks good and it is a sturdy way of connecting this feature as it will take some wear and tear.


The brown envie here was sent to me.  I folded it and cut it up to make a double pocket.  Recycling plus art!


This last pocket is hinged with tissue tape.  This is a very easy way to add a pocket into your projects!


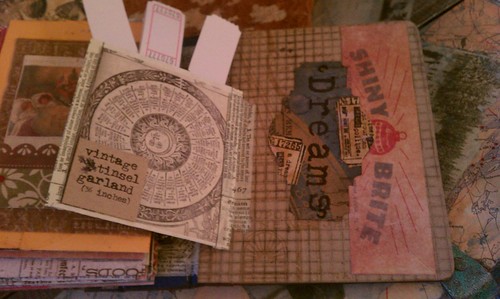
The dream label was a mistake from my dream jar.  I added the tickets to the label, but did not like them for my jar.  Another up cycle for me. 

I look forward to continuing to work on this book.  This is really just a template for lots more play and fun.  I did manage to take a few pictures of me assembling the book.  Many of you commented and emailed requests to show you how to put this together when I posted last time.  The pics are not great due to the crumby lighting in the basement, but I do plan to post a tutorial soon.  My little gift to you for the holiday! 

That is all for now.  I think I am going off to a holiday bazaar to get some more Christmas spirit.

Cheers,

Rhea


Saturday, December 3, 2011

Ornamental

I just love to make Christmas Ornaments every year around the holidays.  This year has been no different.  I still have a few more in the works, but I thought I could at least post this installment. 


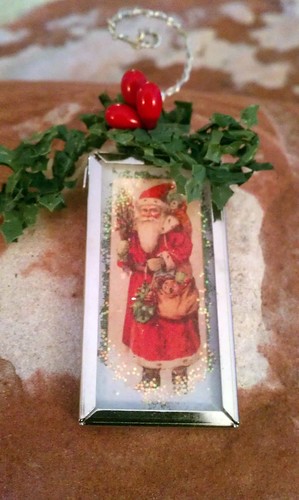
Like last time, I used white alcohol ink and a bit of stickels to embellish the glass.  The berries were torn from a holiday pick and the awesome green trim was purchased from Tim's etsy.


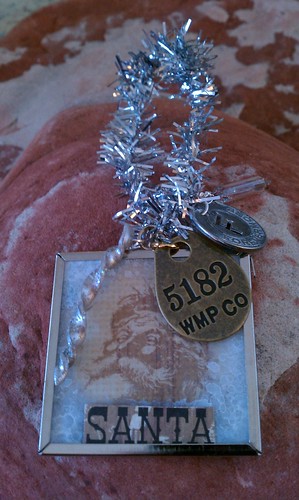
This one is a favorite of mine. I love the image of Santa.  I also adore the hand blown glass charm that was made by a fellow art charmer, Kia Dallons.  I added a rusty star and a holiday token from Tim.  This week they are asking us to show some stars over at Simon Says Stamp and Show.  I did not stop with one ornament, I added a starry touch to the one below too. 
   

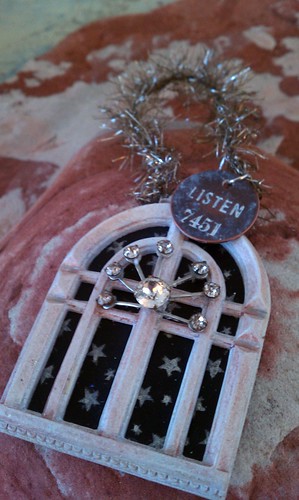
I used a star paper in the background, and made my own star burst by altering a bit of broken jewelry.  I used some vintage tinsel from Tim as well as one of his metal embellishments.  The window is from Prima and it was also inked up with a bit of Smooch. 


 Another ornament, using memory frames.  These make for the quickest projects!  The icicle is made from polymer clay, and was received in a swap for holiday art charms and it was made by Laurel Steven.  It has been great having a selection of holiday embellishments at my fingertips to use.


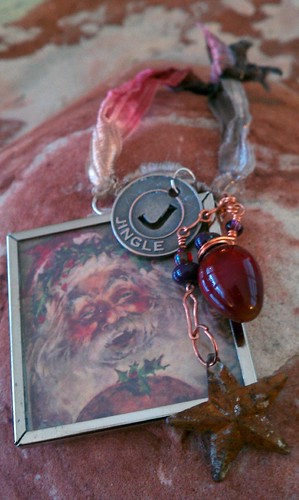
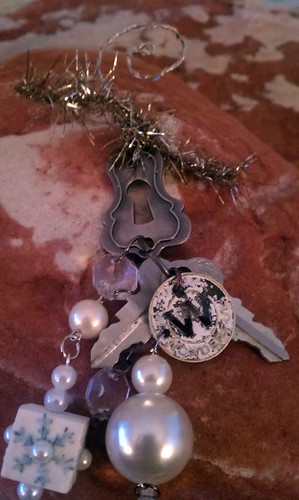
Here is another junque ornament, like my previous entry.  I decided to use one of Tim's keyholes in this one along with some other junque, an art charm, an altered token, some beads etc.  I hope the recipients of these little treasures enjoy and perhaps you find some Christmas ornament inspiration.

Cheers,

Rhea