Wednesday, August 31, 2011

A day of encaustic

So another class I took at the Create art retreat focused on a totally new medium to me, wax and plaster.  The instruction was provided by Trish Seggebruch and she was a lovely teacher.  She made encaustic look easy and she inspired me with her teaching.  I found upon trying however, that this is not the medium for me. 

I still had fun and played with the materials provided. In turn, I was exposed to some other new art supplies that I now want as well: PanPastels and Shiva paint sticks.  Another technique I used ( in several classes actually) and fell in love with...stencils.  These seem to be making a serious crafty comeback as good old Martha has a giant new selections of stencils in the big box store.

Without further ado, here are three of the five encaustic pieces I worked on. Two of them were just not worth posting on here.  There is something to be said about editing! :)


This little vintage themed one has a few goodies tucked inside the wax.  I also used a lot of transfers in these pieces and this worked pretty well. 


I was proud of myself for stepping out of my usual grungy color palette above.  I think this piece has grown on me a bit.  The purple flowers were added with stencils and the PanPastels.  Those were so much fun, I wish I discovered them earlier in the workshop. I was too busy trying to tame the uncontrollable wax!


This board was one of the ones I layered with plaster to before adding wax.  This made for very interesting texture.  I struggled with "controlling" the wax in any of these projects.  I had embedded my heart in wax (above), but it did not stay.  I turned this into an opportunity and added all the metal staples.  I also dripped resin on the heart.  This was from the overflow of resin for my assemblage pieces I just finished up from another Create class.  I hope to post both of them on here very soon.  They have the most delicious texture, you don't want to miss these.  

I hope you will stop by again soon!

Cheers,

Rhea


Tuesday, August 30, 2011

Halloween House: Part II

Since I have been in a creative mania since returning home from my retreat, I got to work on another page of my Halloween Book for my first swap over at Alpha Stamps.  Here is page two out of four.


I did not plan on the green glitter on the witch at first.  Unfortunately the black silhouette got lost on the page so I had to do something to make it pop again, so she got blasted with stickels.  I really love the moon I embossed with gears and distressed.  When I made this page I did not have the lovely bat embellishments I used below, so I freehand cut some out of felt.  It is good to be resourceful sometimes. 


The bats I used on this page were from Coffee Break Studios.  They had a booth at the Artist's Fair at Create and their stuff was just awesome.  I certainly dropped a bit of cash in that booth. I am cruising along on getting this swap done, thank goodness cause I have a bunch to do right now!

I hope to post more Create project pics tomorrow.  I was finishing up a few pieces today, but I lost the good light.  I guess fall is really on the way.

Thanks for all the comments on my Steampunk Metal Deck.  It is certainly getting some blog love from all my followers and I am grateful as always.

Monday, August 29, 2011

Steampunk Metal Deck

I have recently returned from a wonderful mixed media retreat called Create, sponsored by Cloth, Paper, Scissors.  It was an absolute blast.  I learned a ton and managed to produce a lot of art in every medium imaginable.  If I had to choose, my favorite was probably the project I am going to share with you today. The class was called The Vintage Metal Deck and it was taught by Leighanna Light


 We altered ten pieces of metal with paper, rust, gesso, stamping, distressing, image transfer, paint, ink and lots of cold connections.


I added a bunch of fibers I hand colored previously to add a softer texture to my industrial deck.


Some of the backs of the cards I just left rusty because I thought the color and texture of the rust was so lovely.


I had a tiny problem with the darker pages above and below, so I had to do some additions to save my work.  While this was a problem, it was a nice challenge to have to solve the issue in order to keep the integrity of my work.


A ton of embellishments and charms were used, I did not hold back in my "bling."


This project challenged me to let go of my perfection tendencies when it comes to wire and jewelry making techniques.  It was tough to let the wire be messy, but it was a great creative exercise.


I love the Harlequin pattern on this page.


One of my favorite new craft items after this trip: resistors.  These little buggers are wonderful.  I will be scouting out a source for these for sure. 


This was another lovely rusty back.


I experimented with rusting all kinds of items.  This is a technique I can see myself applying to many projects.


I am so pleased with the outcome of this project.  I was incredibly inspired during the entire process and I look forward to creating another metal deck soon.  If you ever have the opportunity to take this class with Leighanna I highly recommend it! 

 
Stay tuned for more of my projects from Create 2011.


Cheers,

Rhea

Sunday, August 21, 2011

Halloween House: Part I

As I said a few weeks ago, I have been bitten by the Halloween bug.  I started working on a four part Halloween House book for my first swap over at Alpha Stamps.  The participants each alter the four different pages and when we send them in we get four different pages back, resulting in a ghoulish little gallery of artists from all around.  I managed to get one of my pieces complete today and thought I would share.


I went crazy with my new stash of dresden foil.  I am going to have to pace myself on the next few pages! :)  Paper from Graphic 45 was used throughout most of the project.  I made scratched up old windows by sanding acetate packaging and attaching before adhering my images in the window.  Another element I used to make the roof pop was an Art Part from Wendy Vecchi.


You can see the dimension a little better in this shot.  You can also see the fence a little bit better.  I thought this was a cute addition to the project.  I may put it along the back side of the last page as well.  Who knows how this will unravel, stay tuned to see.  (I had to use this image, aren't my kitty's little paws so cute, she has the tiniest dainty feet.) 


I could not leave the backside unadorned, so I got started all over again.  I used this felt flourish that I had on hand.  In order for this to work, I had to cut it apart to make the pattern adapt to my needs. I added the monkeys from the Graphic 45 paper along with more dresden.  Another Art Part adds a bit of interest to the back of the roof top.

I am pleased with the first portion of the project.  One thing I know for sure, it is going to be hard to let go of. Why, o' why do I get so stingy with my finished pieces!  It will be a good exercise in letting go (again!)

Thanks for stopping by!
Cheers, 

Rhea 

Saturday, August 20, 2011

Bead Soup is on!

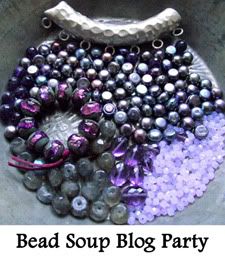
I am participating in my first ever Bead Soup Blog Party and I am loving it!


Bead Soup Blog Party


My partner's name is Kari and she has a lovely blog called Pearl and Pebble, where she documents her creative life.  She even makes her own beads from scratch!  Please stop by and check out her art. You will also be delighted by pictures of two little baby boys who are simply adorable.

Kari send me a wonderful bead soup that I can hardly wait to play with.  The ceramic centerpiece is by Muddy Fingers on Etsy.  There are also salway nuts, ocean jasper, white fossil stone and a gorgeous sterling clasp.  She is so cute, she wrote me a little bead soup recipe in the box.


Stay tuned and before too long the actual blog party starts and all of us will be posing our creations. 

Monday, August 15, 2011

A siren call

I am a big fan of mermaids, I have been since I was a child.  Since I am newer to altered art, I have not yet had the chance to use the theme in my work all that much.  Today I changed that.  This was made for a private swap,  I hope she likes what I have crafted, it is going to be a tiny bit hard to send away. 


This all started with a cork coaster.  The background is paper that was altered with a shaving cream technique.  I spritzed with glimmer mist and then added a bit of tissue tape to finish the edges.  I created layers of beachy stuff including a large slab of beach glass, which the centerpiece is perched on.  The mermaid was a charm I purchased at a big box store.  To give it some character I painted and wiped off several acrylic paints.  I did the same on the small charms to imitate a patina.  A bunch of shells and charms were added around the mermaid to create the scene.  There is a teeny tiny lobster in the corner that is too cute. 

In order to give the piece texture, a ton of distress stickels were used.  I layered two colors, frayed burlap and peeled paint. This filled in a multitude of glue oozes too.  The seaweed is actually a felt floral border I purchased on clearance.  I snipped the flowers to alter them and make them look more like leaves.  I had some little sticker bubbles that I added glittery stickels too, providing a bit more sparkle and bling.  Adding bling is the theme over at this weeks challenge at Simon Says Stamp and Show so I thought I would send my mermaid along.  I got a two-for on this one because the challenge over at Linda's for Grungy Monday, was using distress stickels!


The coaster was finished with two eyelets and a bit of silk ribbon I colored myself.  You would not believe how heavy this little guy is.  Hopefully the recipient will enjoy!

Sunday, August 14, 2011

Charmed, I'm sure

As I prep to go on my creative art retreat, I keep getting distracted.  This morning, I finished up some charms I had started yesterday.  These have been made for a swap that is going on at Create, hosted by Belinda Spiwak.


These were quite simple and super quick to make.  I started with a copper washer which I stamped with permanent ink.  The washers were glued to a reproduction sprocket or gear.  I then attached these great rusty stars.  These were wired on a garland I found in the Christmas section of a local big box store.  I used this wire to connect the two pieces and make a loop for my jump rings.  

I can't wait to see the return on this little swap!

Friday, August 12, 2011

I have been bitten

For some reason I have been bitten by the Halloween bug!  Perhaps it is the seasonal stuff recently released at CHA or perhaps a swap I just signed up for over at All Things Tim on Yahoo.  Needless to say, I am on the prowl for spooky supplies. 

One of my crafty pals Deb, lead me to a wonderful resource: Alpha Stamps.  They are having a contest this month that is to die for.   There is also a Yahoo group that hosts really amazing swaps.  I am considering joining one over there as well. 

Stay tuned for some spooky blog posts!

Monday, August 8, 2011

Once Upon a Row of Houses

I have had this delightful little template of row houses from 7 Gypsies for quite some time. A recent purchase of some Once Upon a Springtime die cuts inspired me to finally use it.


I started by covering each house in a selected piece of paper, mostly from Graphic 45.  I was sure to audition each color so that I would have a well composed piece when complete.  I used an exacto knife to cut out my windows and trim the edges nicely.


I used a trick I learned from Tim Holtz to add depth and character to each house: inky edges.  I used my foam ink applicator to darken the edges of most pieces added to this project.  This simple technique adds so much interest to each house.  Interestingly enough, the challenge at Simon Says Stamp and Show was to show off a Tim technique.  This is the application I use most from my hordes of knowledge from the legendary Mr. Holtz. 


I also used a trick learned from Tim on my butterflies, just alter it.  I was not happy with the look of these chipboard pieces, so I sanded, inked, sanded again, inked, stamped and then glimmer misted to achieve a butterfly that was better suited for my project.  


Another way I added interest on these fairy houses was with my fastidious fussy cutting.  This takes some patience people, but it is so worth it.  I used the imagery from the papers I had and added little fairies and flowers all over the place.  Too cute!

 
Another item I used for texture and interest was a bit of Tim's butterfly tissue tape.  I thought it fit in with the theme well, and well, I am addicted to tissue tape, so it wanders into most things I make somehow or another!  I also added a touch of glitter on the wings of each fairy with Stickels.  This adds just the right amount of sparkle.  Flowers from K Company were also added.  These were dimensional, so they added more depth to the piece.  I think my favorite element are the tiny birds I tucked into a few flowers.


I had put this up on my mantle to photograph it, but I think it just may stay there for a while, after all the dust bunnies up here need someone to keep them company!

Thursday, August 4, 2011

Geared for Time

So today I ventured down to my creative space with the intent to organize a bit and seriously start herding items for Create. Well of course I got distracted by a new toy.  I recently purchased a small hand drill for soft metals. This is going to be a great item to have around.  I easily cut through a few of Tim's embellishments.


As you can see, in this piece I cut a hole in the clock face. I added a few spinners, ala Tim Holtz, and a gear backdrop. I love that the spinners still move.  A few more gears were added with jump rings to frame out the focal point.  In this photo my necklace is draped over my challenge book.  One of the backs of my pages has this lovely paper from the Tattered Time stack.   


The inspiration for this piece was actually the chain that I found in one of my junque boxes.  I was gathering cool stuff for travel when I happened upon this and immediately wanted to try out a jewelry piece with Tim's stuff.  I did go "matchy matchy" and used all brass pieces. I am pretty pleased with the results.

How fun to revisit my jewelry making roots.  Looking forward to a Bead Soup adventure too. Stay tuned for that one! 

Cheers, 

Rhea 


Bead Soup Blog Party

Monday, August 1, 2011

Story Time

This week over at Simon Says Stamp and Show the challenge for the week was to create a tag.  I made this little tag in no time at all, which is what I love about tags and ATC's.


I started with Tim's new tag die, what a great resource to have. The background is fancy paper from a specialty store in Ann Arbor, MI called Hollanders.  I have only shopped there once and it was amazing.  They carry the most interesting book making supplies and tons of giant rolled pieces of really pretty paper.  The bit of paper I had from my scrap box was run through the die, unfortunately the piece was not large enough, so the advertising banner was present on the edge of the tag.  I solved this little dilemma with a bit of tissue tape which was colored with Vintage Photo distress stain.  I also did all the edges with the stain.

The flower was made with the tattered floral die.  I alternated layers of color washed ephemera and embossed, alcohol inked vintage Spriofoil.  In the center an old marquesite button was fixed with heavy duty glue.  I then cut a bird from the caged bird die from a metal sheet from Ten Second Studio.  The bird was embossed and sanded to show off the spiral design.  A metal washer from Tim Holtz and a tiny watch part finished out the bird I perched in the flower. 

A memo pin and altered adage ticket, both courtesy of Tim, were added for interest.  I used my first Ideology pen nib (I have been hording these since I finally purchased them a few weeks ago...) This tag lacked movement, which is something I always strive for in my work, so to this end I added a really cool charm from Industrial Chic.  I can't wait until Tim releases his birdcage embellishment, I am dying for this!  To finish the tag and add a bit of texture, I raided my stash of ribbons and found this piece of vintage lace.  I love how the age really shows on this bit of lace.

Thanks for stopping by!

Cheers,

Rhea