Showing posts with label art charm. Show all posts

Saturday, November 24, 2012

Transforming your stash


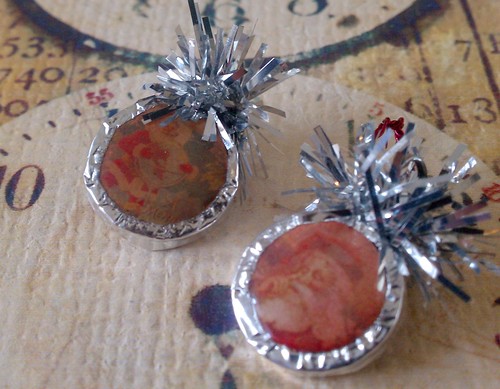
I love to alter things.  I am not sure why, but I really love to watch something transform and come to be.  I decided to write a quick post about my most recent innovation with my supply stash.

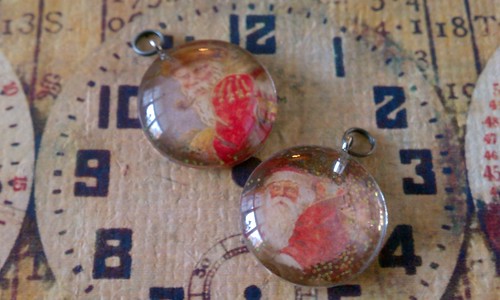
As you know I design for Alpha Stamps, an amazing supplier of crafty goodness.  When a package comes for a design kit or special mission, it is like Christmas.  I am stalking the mailman for a package today with that same childlike excitement.  Anyway, one item I have fallen in love with are paper flowers.  I recently took these little guys to another level with the help of a melt pot and UTEE (ultra thick embossing powder.)


My favorite are the red ones.  I think they almost look like glass now that they are coated.  I bet you could take them a step further and add a bit of guilders paste and add more depth now that I think about it... Another trick I used on the red ones was to pull some of the petals back before dipping them.  This helped them to have some unique shapes. 


The black ones would be nice for spooky projects. White guilders paste on the tips is all I can think about now, I can't wait to try it!


These ones did not turn out the best.  I think it is because this is a thicker, more substantial flower. It is still fun to experiment.  I bet there are lots of other embellishments that would do well with an UTEE bath.


There are tons of ways to stretch your stash.  Think ink, glitter, sprays and mists.  So you don't have the right color item, change it up and see what happens!


With this as my inspiration, I am off to make a spooky cluster of charms for one of my altered bottles for Laura Carson's big event.

Cheers, 

Rhea

Saturday, October 6, 2012

More Halloween Charm


I am participating in yet another Halloween Charm swap.  This one is being hosted by Thespa over at Vintiquities Workshop.  As always I am excited to see the return on these mini art exchanges.  I had a few stumbling blocks with this swap, so participants will be getting two charms from me.


This is the first set that I am not all that pleased with.  When I went back to review that I had followed all the rules, I realized paper was a no-no, so I had to go back and seal them all with Glossy Accents.  They now probably meet the requirements, but for whatever reason I am not all that into them.


I decided to make a second set since I did not like the first round and send both along.  This set does not meet the requirements either as each charm was supposed to be different, or small sets of five were allowed.  I hope that my stuff flies with the hostess!

Stay tuned later this month I hope to show off what I did with my charms in a little blog hop. 

Cheers, 

Rhea

Saturday, September 8, 2012

Halloween Charm


One of my favorite Yahoo groups has to be Art Charms.  I love making tiny little bits of art and trading them with artists all over.  Last year I did not partake in the Halloween antics and I really missed out, this year I was able to join up at the last minute.


The brass ghost has been altered with both black and white Guilders Paste.  Love this stuff!  I used an acrylic sealer to ensure that all my hard work would not wear off. 


The brass stamping base was colorized with Vintaj patinas.  This was my first time using these, even though I bought them ages ago because I "had" to have them.  I do love the finish they created.  It really looked like enameling before I covered it with stickels.  


On the back I also added a tiny little moon detail.  This too was touched with a bit of Guilders Paste to age it a bit.  They were charms that I simply cut the loop off of and then glued with a bit of Hypo-Cement.  Very handy glue, but I always hate that it oozes out as you try to get that needle cap back in.  Ah the joy of crafty "stress."

Stay tuned for lots more Halloween goodness, it seems it is that time of year and I am embracing it.

Cheers, 

Rhea

Wednesday, July 4, 2012

Gypsy Charm

I was absolutely thrilled to tap into my jewelry making roots when I came up with this project for Alpha Stamps.  In my opinion jewelry is really like assemblage, so I think that is why I like both of those genres of art so much.  The gypsy theme opened up so many possibilities as far as charm elements.  Hearts, birds, celestial, religious, nature, coins, really anything can fit into the traveler theme.  I made lots of bead dangles as well to fill out this piece and add color. 


I used lots of guilders paste to unite the different finishes of the charms.  I wish I had guilders paste in every color offered.  Right now I am making do with copper, black and patina. Liver of Sulfur was also used to age some of the raw brass.  It is a smelly process, but the outcome is grand. 


I used lots and lots of charms from Alpha Stamps.  They are actually on sale for a few days in honor of my little creation, how cool is that.  There are also free gifts to be had with your order until supplies run out, so check it out here.


There is more gypsy art coming soon so be sure to follow along for lots of enchanting projects.

Cheers,

Rhea

Saturday, May 26, 2012

Postal Charm

I simply adore all things postal.  I love to imagine the journey that a piece of living ephemera has taken to get where it is.  I love the stamp, the date, the age, the wear, the way the envelope was opened, the handwriting, the surprise of another bit of accidental ephemera....I could go on and on...

Well I am sure my charming friends will not be surprised that I signed up to make two sets of ten charms for one of the latest swap offerings.  I experimented with my first set by gluing two stamps together and dipping them in UTEE.  They were really cute until I attempted to add a hole and cracked them...a wonderful failed experiment.


The first set here were really simple.  I simply added an old stamp image with some glossy accents and put packing tape on the back to seal it a bit.  These domes are made of glass and they magnify the image.  I tired to find stamps with interesting postmarks.


I like the fun nature theme on this set.  I adore the one with the tree.  


This lot is filled with women.  I love the one at the top with Virgin Mary. 


No particular theme with these ones.  Just super simple, super cute little charms.  I am so addicted to making them!


In this set I played with new materials, which was so much fun.  The back of this set is scrap leather.  I picked up a few bits at an industrial outlet type store on the super cheap.  I glued on a stamp and then added a layer of mica, another new fun thing to play with.  A vintage eyelet from a recent estate sale, along with a bit of guilders paste and these were done.  


I like the color the paste adds, I think it helps add to the story of my little charm. 


Just think of all the stories, messages and words of love all these little stamps carried.  And how fun to create another little memory of my creation to the mix.  

Thanks for stopping by and sharing some inspiration with me!

Cheers, 

Rhea


Saturday, March 31, 2012

Feather your nest

I am so excited to be hosting a swap in my Art Charm group.  The theme is "Feather your nest" and the idea is to create art charms inspired by birds, wings, trees, eggs, nests, houses, feathers etc.  A perfect genre for spring.  Sign ups open tomorrow and we will be swapping in groups of fifteen.  Anyone can participate as long as your part of the Yahoo group and you follow the swap guidelines.  Check it out if you are interested!  The group was founded by the authors of Making Mixed Media Art Charms and Jewelry.  Both Peg and Chris are amazing!


I have been scouting for materials for this swap ever since I read one of the swap previews.  I love how the owners of the group let us know what is coming so we can find good deals. 


I found these cute little birds on clearance at a big box store.  I wanted to jazz them up a bit so I decided to play with my favorite new product from Alpha Stamps, Guilders Paste.  This is a wax based medium that can be used on wood, metal, clay, ceramics etc.  It is very easy to apply and adds great color and depth.  I highly recommend it to my Art Charm pals, as this was a quick way to make my charms stand out and make them unique.


Now, I knew I wanted to also have some egg charms to trade.  I searched high and low in my local stores, but could not find a true egg shaped bead.  I almost picked up some pearls, but the shape just was not right.  Then I had a flash of insight and headed to the floral department.  These little plastic eggs were super cute.  I used a candle to heat up my head pin and poke holes and make them into a bead.  It is so fun to find a way to alter a product and use it outside of the intended purpose. 


These were so super simple to put together, I really did not do any construction.  I actually forgot I had all these wings, but when I was seeking some other stuff in my crafty mess I came upon them and knew they had to be a part of this swap.  Again, I wanted to add some interest, so I dabbed on a bit of pearl color acrylic paint.  Sometimes simple can be a good thing.


This looks like a great beginning of a wonderful swap.  I think a charm bracelet may be on the horizon. 

Cheers,

Rhea


Saturday, December 3, 2011

Ornamental

I just love to make Christmas Ornaments every year around the holidays.  This year has been no different.  I still have a few more in the works, but I thought I could at least post this installment. 


Like last time, I used white alcohol ink and a bit of stickels to embellish the glass.  The berries were torn from a holiday pick and the awesome green trim was purchased from Tim's etsy.


This one is a favorite of mine. I love the image of Santa.  I also adore the hand blown glass charm that was made by a fellow art charmer, Kia Dallons.  I added a rusty star and a holiday token from Tim.  This week they are asking us to show some stars over at Simon Says Stamp and Show.  I did not stop with one ornament, I added a starry touch to the one below too. 
   

I used a star paper in the background, and made my own star burst by altering a bit of broken jewelry.  I used some vintage tinsel from Tim as well as one of his metal embellishments.  The window is from Prima and it was also inked up with a bit of Smooch. 


 Another ornament, using memory frames.  These make for the quickest projects!  The icicle is made from polymer clay, and was received in a swap for holiday art charms and it was made by Laurel Steven.  It has been great having a selection of holiday embellishments at my fingertips to use.


Here is another junque ornament, like my previous entry.  I decided to use one of Tim's keyholes in this one along with some other junque, an art charm, an altered token, some beads etc.  I hope the recipients of these little treasures enjoy and perhaps you find some Christmas ornament inspiration.

Cheers,

Rhea


Saturday, November 12, 2011

Holiday Charm

I have still been in a bit of a creative lull.  I managed to finish up a swap I started a little while ago for a charm group I am in.  The challenge was to create a tiny altered ornament, one and a half inch or smaller.  I am going to enter one set into Simon Says Stamp and Show's challenge of upcycling. 

The first set I created were made from vintage ration chips.  These are small tokens made of vulcanized rubber.  They were perfect for altering. 


I started with two chips.  They were glued together and a piece of wire was added inbetween to create a hanger for the jump ring.  I topped them off with tiny images from Tim Holtz's seasonal paper stash.  The edges were covered with metal foil tape and then I sealed the top with a layer of Glossy accents.  I added a touch of tinsel at the top for texture.  The chips themselves are smaller than a dime, so these are pretty tiny. 


I signed up for two sets of ornaments for my swap.  This is a sample of my second mini ornament set.  These were also quite simple to create.  The glass domes make for easy altering.  A bit of holiday paper was glued with a touch of Glossy Accents and a dab of stickels. I also cut a bit of aluminum flashing with a round punch to cover the paper on the back.  I considered another bit of tinsel, but decided against it.  As I look at them online I wish I added it, they are missing a texural element. 


I also indulged in a round of monthly color swapping with the Art Charm group.  This month, silver findings with white and clear beads were our source of inspiration.  I made a bunch of extras, so that I can create a charm bracelet when I receive all of them back.  This way there will be at least a few common beads throughout the piece, tying it together.  My little dangles are made from a small selection beads, but, they are not all the same. 


I also finished up a project I am using to barter.  My collegue recently requested a bracelet created with green and white.  She is a big fan of the Michigan State Spartans and she wanted an elegant way to show her support on game days.  We are swapping jewerly for antiques.  How fun is that!  She has an old typewriter for me to start. I think this is going to prove to be a very fun arrangement. 

Until next time...

Rhea