Sunday, April 20, 2014

Wooden ATC Book


I decided to whip up this little baby with my left over kit supplies from Alpha Stamps along with lots of my swag from Xyron.  I even made a Snapguide to show you how I put it together.  Here is a link to all my supplies.  


Inside there are lots of fun evelopes and pockets.


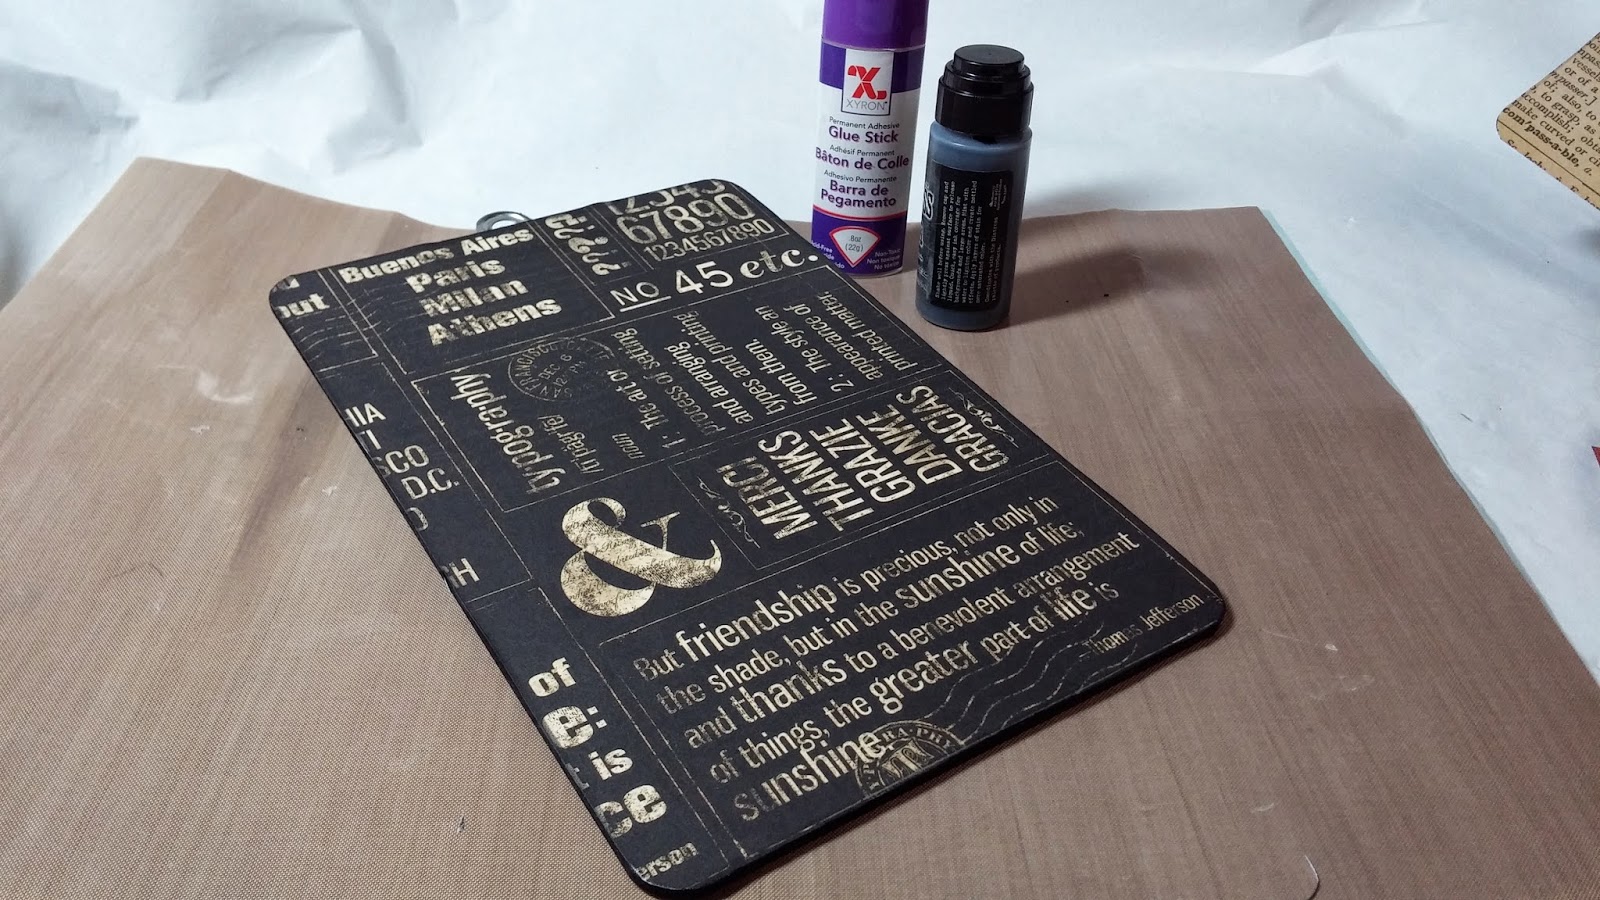
You can see that the stain gives the cover a nice uneven look.  I like that it makes each and every piece unique.


I cut up a bit of scrap paper from Graphic 45 to embellish my pages.  I found stuff to decorate this book in all kinds of unlikely places.


I am addicted to the little glassine envelopes.  I just love how you can see through them.


I like to use rub ons as opposed to rubber stamping.  I find that these are so much more reliable!


This envelope has the coolest pattern.  I tucked a bit of map inside which you can barely see.  The ATC cards are really perfect for this quick project.


I used a bit of the new Tim Holtz ephemera through this book as well.  It blends right into what I have going on.


More secrets tucked inside envelopes.


The rub ons work really nicely on the envelopes as well.


I hope you found a bit of inspiration in today's post!  Be sure to check out the Snapguide for the how to!

Cheers,

Rhea

Saturday, April 12, 2014

By the Sea Book Box


I have been dying to make one of the new smaller Tim Holtz Configuration books since they came out, so when Leslie at Alpha Stamps asked me to create one, I jumped at the chance.  

Here is a rather juicy list of supplies from Alpha Stamps.   


For the theme I decided to go with By the Sea by Graphic 45.  I had so many trinkets to fit this theme, which lead me to my choice.


My favorite things about this substrate is that you can combine collage, bookmaking and assemblage all in one.


Inside I used sand mixed with matte medium to create a sandy scape.  In order to add a bit of flash and sparkle I also added some mica flakes when it was still wet.


The inside cover is collaged with lots of goodies. I used my Xyron to ensure that each bit is covered in adhesive.


I love the beads I just happend to find right before making this, I thougth they looked like little sea urchins.


I also used a few weird treasures that have been in my stash for ages, like that rubber seagull.  He is pretty beat up and I have no idea where he came from, probably a box of junk from my dad.


Here is a close up inside another box.  Lots of layers for interest gives the eyes places to wander!

Cheers,

Rhea


Friday, April 11, 2014

Steampunk Mucha Arch


This project has been lying on my work table half finished for ages!  As I was trying to get some cleaning done in my crafty space, I was of course distracted by this little unfinished object.


The background paper is from Graphic 45's Steampunk Spells.  I also used the tiny gears from the Steampunk Spells Flowers when I was adding all the fun embellishments.


In order to add a bit of mystery, I had to use some glitter.  I added some highlights with stickels glitter glue in two different colors.  Also used were some gear die cuts someone gave me as I still need to purchase this one.  To give the gears texture I misted them with Perfect Pearls.


The base of the project is from Gina's Designs. It was painted with black gesso and then dusted with a bit of copper gilders paste. Of course I had to add lots of metal do dads to give the piece some weight and interest. 

I just love how this one turned out! 

Cheers,

Rhea

Tuesday, April 8, 2014

Typography Clipboard Tutorial


I decided to alter this tiny clipboard I had on hand with Typography by Graphic 45.  It was quite easy and I used a clever solution to cover this tricky item as you will see in the tutorial below.


Supplies:
Washi Tape Set
Distress Stain, Black Soot
Clip board blank
Xyron Glue Stick For Corners
Xyron 1/2" Double-Sided High Tack Tape
Petaloo Flowers
Embellishments and Charms


I used stain along the edges of the clip board so that there would be cohesiveness with the intended color palate.  Since I was planning to cover the rest of the board, I only did what I needed too.  


After tracing the backing for the board, I connected it with the Xyron Glue Stick for Corners.  Be sure to get all the edges, and especially burnish where the brads are. 


To keep things looking finished, I added more stain after adding the paper.  It is a tiny touch, but it really makes a difference. 


On the front of the board the metal clip is in the way of easily attaching paper.  I decided to use the new washi tape and it worked perfectly.  I did add another layer of glue.  Most washi tapes are very low tack (not all that sticky) so this extra layer of glue will ensure my edges stay down and my piece looks finished.  


I added strips of tape extending past the edges.  


Then I used small scissors to trim the edges.  I could not find my bone folder, so I used this Popsicle stick to burnish the edges.  This is important to really get everything stuck in place.  


Now I planned for my focal and chose a few layers of mattes.  I used the high tack tape to adhere them.  


Here you can see my base, all set for embellishing.  Now I had thought about keeping it simple and only adding a few bits at the top...but knowing that I just cannot stop shopping my stash, it ended up covered in all kinds of junk.  


Now I had thought about keeping it simple and only adding a few bits at the top...but knowing that I just cannot stop shopping my stash, it ended up covered in all kinds of junk!


I thought this was the perfect spot for my big feather embellishment.


I love the use of gilders paste to make the letters stand out on these embellishments.


I hope you enjoyed today's post!

Cheers, 

Rhea


Sunday, April 6, 2014

Graphic 45 2014 Final Audition


Once again I am absolutely thrilled to have made it to the finals for the Graphic 45 2014 Design Team!  In the video below I have chosen to take you on a tour of three projects that I think represent me as a designer including assemblage, mixed media and book making.


Since the Botanical Tea Printer Tray is new, I thought I should also post a few pictures of that.  I made this project just for this audition, so I would have a little something fresh and new.


The spring theme is perfect as the weather finally slowly turns.  It has been nice to get outside and catch a few rays of sunshine. There are additional bits of embellishments within the peice that have special personal meaning to me.  I love this aspect of assemblage and collage.  


I even saw a few real spring blooms on my walk today, a sure sign it is really on the way!


I just adore all the details inside of each cubby.  I was sure to even cover the tops and sides of each box to ensure that the patter repeated itself consistently.


I could not resist adding a few eggs to the mix, as they were perfect for this theme.


Thank you as always for stopping by!  No matter what the outcome of this audition, I have to say it has been a great year Graphic 45, and I have immensely enjoyed the journey.  

Cheers, 

Rhea

Saturday, April 5, 2014

Cartographer Journey Journal


I was super excited to make this project for Alpha Stamps using all the newest Tim Holtz goodies alongside a lovely paper line called Cartographer by Prima.  Everything was made easy with the use of Xyron.  Here is a full supply list with all my goodies!  P.S.  There is a video tour at the end if you are so inclined.   


On the cover I used different forms of vintage photo to color my cover.  Even though Tim does a nice job of aging it, I love the effect of the watered down stain and ink.  The spinners still move around which adds a fun element.


Inside I used lots of travel themed ephemera and added lots of pockets.  It is my usual busy haphazard collage style.


I love the hot air balloon images.  There is something that intrigues me about these, perhaps I will have to take a ride some day.


This layout is filled with lots of images from Alpha Stamps.  The vintage Paris postcard collage sheet was a perfect addition to this project.


The new ephemera sets from Tim and the found relative cards are simply amazing and made for great vintage additions to my sturdy book.


Each page is actually made of chipboard to ensure stability as I like to layer lots of stuff and add embellishments.


The philosophy tags I added inside can still move as I matted them with stickers that came with the cartographer paper.  It makes me so happy to have interaction and movement in my work.


On the back I included lots of envelops and pockets to tuck things in.  This is yet another form of interaction that I often enjoy in my work.

I hope you found a bit of inspiration in today's entry.  This project is one of my favorites in a while, so I think I am off to make a video to add to this post shortly!

Cheers,

Rhea

And here it is, a real peek inside:


Tuesday, April 1, 2014

Botanical Tea Frame


What a perfect day to reveal this little spring project I created with the delightful Botanical Tea paper from Graphic 45!  I just love the vibrant green tones in the Walnut Hallow frame and how the color plays off the pretty papers.  


Supplies:

 Botanical Tea 12x12
Botanical Tea 8x8
Shabby Chic Ornate Metal Keys
Shabby Chic Ornate Metal Keyholes
Shabby Chic Ornate Metal Brads
Shabby Chic Drawer Pull
Paper Flowers
Botanical Tea Banners
Botanical Tea Flowers
Botanical Tea Stickers
Walnut Hallow Frame
Perfect Pearl Mist: Pearl

Note:  To color the Walnut Hallow frame I used a combination of Distress Stain in Peeled Paint and Shabby Shutters, Green Gelato and silver gilders paste.  


A layer of paper flowers was added behind the flowers on the face of the frame.  This added a great layer of dimension.


I love the banners that you can make as well.  Here I simply glued them to a ribbon to make a festive embellishment.


I adore the new shabby chic staples too.  The finish goes quite well with what I have going on here.


A final look at the layers I achieved.  Since this frame had a full back, I popped out the central image a bit in order to create more depth.

Thanks for stopping by!

Cheers,

Rhea