Showing posts with label necklace. Show all posts

Saturday, November 8, 2014

Traverse City inspired Necklace Suite


I recently traveled to Traverse City, Michigan for a conference for work.  While I was there I stopped in a delightful bead shop that I usually check out when I am in town Nawbin Beads.  They have the most lovely shop.  


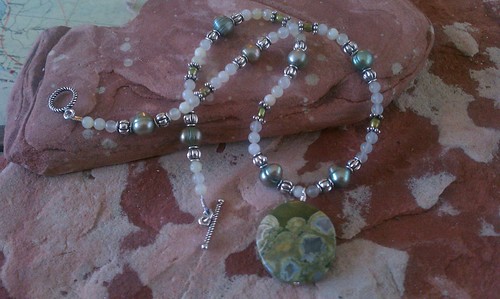
I was really attracted to several strands of jasper and jade.  They reminded me of the fall leaves combined with the beachy nudes and blues.


I purposely made several necklaces, meant to be worn layered or singly.  I even tried out asymmetry on the one above, which is always a challenge for me. It actually turned out to be my favorite one.


The focals on both of these statement necklaces were what started the whole project.  I simply found beads to compliment and match.


This last piece is more of a complimentary necklace, meant to be worn with one of the other two as a layer.  It certainly could be worn alone as well.


And here is the entire suite!  Super fun to get back to my jewelry roots.  It has been a while.

Cheers, 

Rhea

Thursday, October 17, 2013

Ice Resin Bee Necklace


I have been so excited to use the bezels Spellbinders sent me as they are a product partner for Graphic 45.   One of the focals I created includes this amazing Victorian bee brass stamping from Alpha Stamps.


In the background I have layered some text, which really ended up obscured by the mica I added.  I did manipulate the mica a bit to add texture, it really adds depth and dimension that is hard to see in this photo.


On the bee I used many products: gilders paste, Vintaj onyx patina, stickels and permanent marker.  The centerpiece was sealed with Ice Resin.  I had to do this in two settings to achieve the doming effect I was after, and get all of the body of the bee under resin.


I added the focal to a simple chain.  When I wore it for the first time today, this was how I styled it.  I can also chose to wear it in the center.  I tried to add several different elements, but I always ended up editing them out.  Sometimes it is good to keep things simple. 

It was so fun to get back to my jewelry roots, I suspect there is a bit more of that to come now that my dining room table has been transformed into a jewelry making station.

Cheers, 

Rhea

Wednesday, August 21, 2013

Adorned Relics with Kristen Robinson


I was blessed to have the opportunity to take three workshops this past weekend with Kristen Robinson at a super cool spot called Smitten Dust.  The first class I had was called Adorned Relics.  Here we learned how to create beautiful faux mercury glass while playing with resin.  I absolutely fell in love with Ice Resin!


In order to add some of my usual touches, lots of gilders paste was used along the way...surprise, surprise...


A lot of trinkets, charms and filigree used were from Alpha Stamps as I have been designing for them for some time now.  I am so grateful for their support, especially when I am rooting through my amazing Alpha stamp stash!


I think this one is my favorite because it is so different for me.  I think you can really see the faux mercury glass well in this necklace too.  The stone used is picture jasper, there are so many lovely patterns and colors within each and every bead.


This is another bezel that I was excited about.  I simply added paper rhinestones and a Graphic 45 ornate key.  It made for a fantastic focal that was perfect for some vintage embellishments.


I took apart an old three strand necklace and re purposed bits and pieces to create a new necklace.  Bits and bobs were also added to the bottom for balance and movement.


The top portion of this necklace had already been made.  It was not laying correctly with the last focal I had attached.  I was happy to be able to simply add the focal and shore up the chain and I had a finished piece.


On this last one I kept it simple by adding a chain to my enhanced bezel.  I tried my hardest to make something asymmetrical out of these centerpieces, but for whatever reason, my meticulous brain has a hard time not making my jewelry balanced.


I actually have many more bezels to show off, so stay tuned for more art inspired by this class.  I will also be posting from my two other classes from Kristen soon. 

Cheers, 

Rhea


Monday, December 17, 2012

Time to Fly Again!

Hello Dear Readers!

I know, I know I have been off the map!  Please feel free to read to the end of the post and I will let you in on a wonderful little secret that may help shed some light on my absence 

The reason for this post is to ask a favor, if you are so inclined.  You see back in February, I entered a Mixed Metals Design Challenge for Vintaj on a whim and I won.  Because of this, my piece Time To Fly, is entered into their End of the Year Design Contest along with all the other winners over the year.  Of course this event is determined by popular vote, so I would love your support!


VOTE FOR #2: Mixed Metals

Thank You all SO much!  I won!!!


And now for my little secret...I have totally fallen in love. This has left me artistically distracted at the moment.  Yes, it is wonderful and awe inspiring and so very special.  It has been a very long time and I am enjoying every minute of it.

The creativity can come back anytime though!

Thanks as always for your loyal readership.  I appreciate the time you took to vote for me and share in the joy of love!

Cheers,

Rhea

Tuesday, October 2, 2012

Radiant Raven: Vintaj


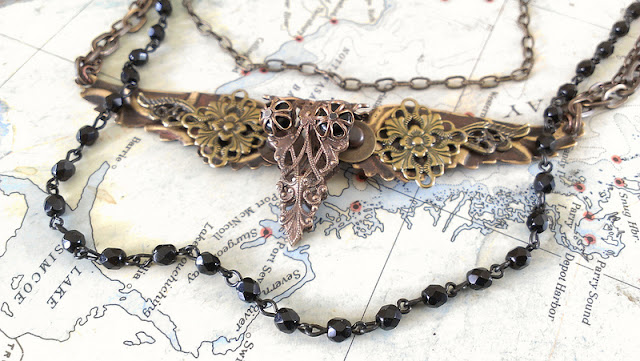
I came across another Vintaj challenge that piqued my interest, so I decided to make a little something for the "Radiant Raven" contest.  My intent was to take simple filigree pieces from the Vintaj line and use them to make something that resembled a raven.

Please consider voting for my piece HERE. Mine is #9, there are some really amazing pieces that will be tough to beat!


The wings were embossed with a spiral pattern and I used guilders paste to grunge them up a bit.  


The head of the raven is a piece of filigree that I simply folded in half.  Eyes were added with headpins, bead and Vintaj bead caps.  I love how it gives it a bit of a clockwork look. 


Some of the elements used in this piece were from Alpha Stamps.  They have a delightful selection on all kinds of jewelry stuff.

Thanks for stopping by and taking the time to vote for me!
Cheers, 

Rhea


Friday, August 10, 2012

Gypsy Necklace

I was thrilled to be asked to create a bit more gypsy jewelry.  I just cannot get enough of this theme.  All the yummy jewelry stuff at Alpha Stamps makes it really easy to make good stuff.

My start was with this fantastic crescent moon focal. I immediately envisioned a bunch of gypsy junk hanging off of it, although that is not how the project turned out.  I found that it got too busy, so I edited it a bit to keep it simple.


So to start I chose my chain and my clasp.  These were very easy to add by just opening a link on the chain.  


Tip:  when opening a jump ring or bit of chain, you always want to use a back and forth motion.  In other words don't "spread" the link, as it will mar the wire and make it look deformed. 


Now to embellish the centerpiece.  I decided to use fancy star bead caps as they are so super cute.  In my opinion, you really can't go wrong with any bead cap!


I wanted this to be symmetrical, so I worked from the outside in.  I was sure to use an odd number of links in each dangle as well.  Odd numbers tend to work better in art. 


You could always add more stuff if you were going for the eclectic look...more dangles, charms, bits of chain, anything really. 


I hope these easy instructions inspire you to make a focal with all kinds of dangley goodness!

Cheers, 

Rhea

Saturday, March 3, 2012

Time for the Bead Soup Blog Party!

Hey there loyal followers and hopefully some new ones! 

Welcome to my little corner of the Bead Soup Blog Party (BSBP).  I am super happy to post my big reveal for Lori Anderson's BSBP.  Please head over to Lori's blog for a full list of participants in order to be able to fully enjoy the experience of the hop. 

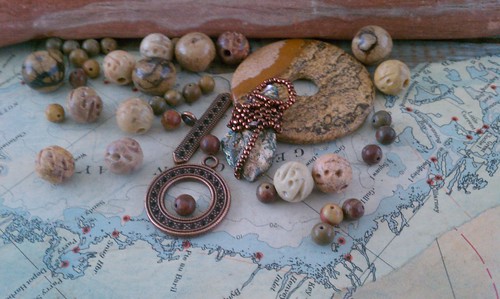
Here is a picture of what my partner Cory sent along to inspire me.  I have to admit, this was a major challenge for me!  She sent me lots of items that were of a larger scale than I typically work in.  Also, in the past, I have not necessarily embraced the gemstone donut as a viable centerpiece.  I love how this exchange offered me the opportunity to stretch myself creatively.


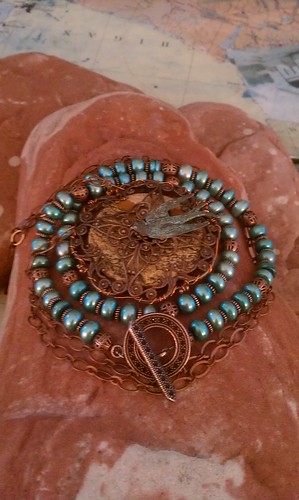
My favorite part of my soup was the clasp she sent.  I am not used to working with metals in a finish other than silver, I love how this experience pushes us to try new things.  I did decide that I was going to make something that could utilize this clasp as a focal, so here is what I made.
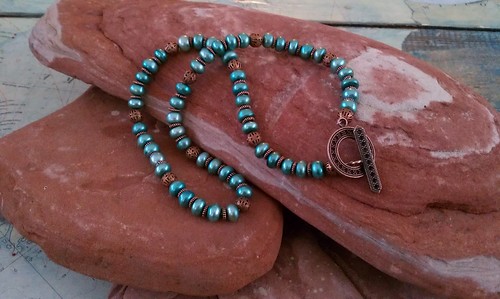


I really love the color combo on this piece.  Again, this is not something I would usually do in terms of color palate.  Typically I have been wearing this piece with the clasp in front but off center, but I could easily wear the clasp in the back for a different look.   I was amazed at how difficult it was to find beads with a copper finish in the mainstream shopping experience.  I had to seek out a local specialty bead shop in order to find adequate supplies.   


And then there was the donut...I am not going to lie, for me this was difficult to use.

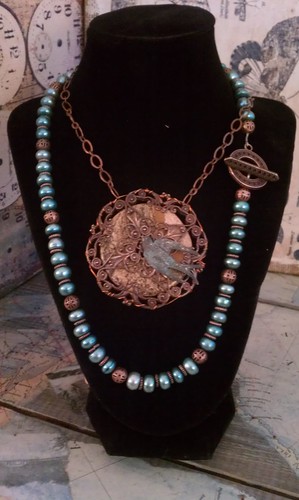
I was able to use the focal by utilizing lots of other fun materials from Vintaj.   Again, I was stumped on size.  After lots and lots of consult with my artsy friends, I embraced my giant modified focal and added a simple chain.  The necklace is quite long as I used 36 inches of chain. 


And here, a nice close up of my focal.  I really love the look of the patina on the bird.  This little detail also actually ties the two pieces together quite well. 


Here you can see how nice they look together.  Surprisingly, they coordinate very well.


I still have some left over soup to continue to challenge me.  I really love those cream colored carved beads, but everything I tried to make with did not work due to the size issue.  I do not give up easily.  I am confident my extra beads will end up in a project soon.  There is a special place I am going to use Cory's handmade bail, so stay tuned to see the completion of a really cool mermaid project soon.  

Thanks as always for stopping by!  I hope you will use the links provided above to visit other blogs on the hop!

Cheers,

Rhea

Wednesday, December 21, 2011

Handmade Holiday

Just a quick post to show off a couple of jewelry pieces I  have created today.  Last minute gifts for those who will appreciate such a token.

This necklace was inspired by a necklace I saw on Pinterest.  That site is so much fun!  It was really simple and quick to create and yet still looks like a nice finished piece of jewelry.  There is lots of movement to the focal charm, which I just adore. 


This next one I really like.  It is a color scheme that I really enjoy.  It is interesting how the colors are translating in photos, it looks a bit more muted in real life. 


And a close up of the really lovely centerpiece. 


I hope both of the recipients enjoy! I also made a custom pink sparkly bracelet and earrings for a special little girl, but alas, I wrapped them up.  Oh well!

Lots more last minute holiday preparations ahead!  For those of you who are finished and prepared for your festivities, I salute you!

Cheers,

Rhea

Sunday, May 22, 2011

Back to my creative roots

I have to say that making all these Chotski pins had me hankering for bead work.  This is where I started on my creative path.  In fact, I have a very clear memory of the first time I beaded as a young girl.  I was at a baby sitters house and I made a white and clear seed bead bracelet on a piece of dental floss. 


Pictured above are some of the Chotski Pins I pins I have made.  I seriously can't stop making them.  The one on the bottom I had "completed" previously, but after blogging about it and seeing the pictures I decided it was not done.  I use hardware such as washers, nuts and bolts alongside charms, broken jewelry, Tim Holtz embellishments and found objects.  I have also used odd watch parts and hardware that I have no idea what the correct use is.  They are so fun and eclectic.   

As promised I will be randomly choosing one lucky winner for one of these pins, as promised on a previous post.   I will be doing the drawing this evening, so there is still time to enter. I think I may join in another round of swapping these dandies over at Red Lead too.

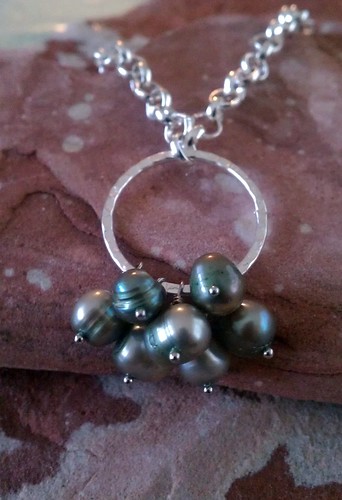
Since I was so inspired from the use of all my old tools, I stopped in a local bead shop and picked up a few strands of affordable pearls.  I whipped this out in no time and hope to make an additional complimentary necklace today. 


A huge thanks to Red Lead for all this inspiration!