Showing posts with label found objects. Show all posts

Wednesday, April 8, 2015

Printery Shadow Box


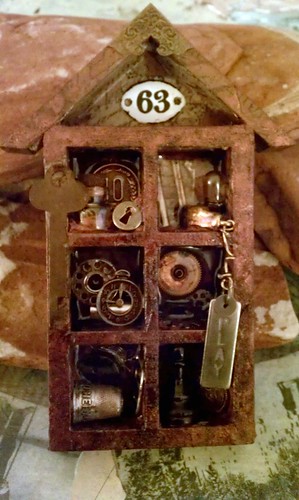
Wow, was I inspired with this one!  In this project I challenged myself to use lots of goodies from Prima Marketing.  The Printery paper line was the source of inspiration for this shadowbox.  


The base is a 7 Gypsies shadowbox tray. I chose to have the small cubbies on the side, as you can really orientate the tray in any way you want for different looks.  


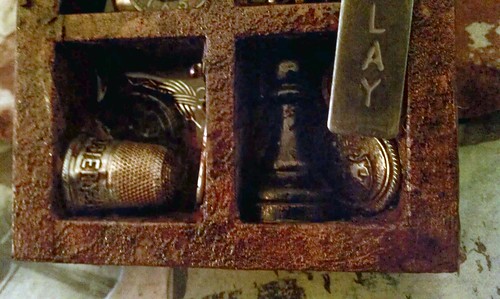
I have paired a fair number of Prima metal trinkets and junkyard findings along with a few special treasures to make a fun nostalgic collection.


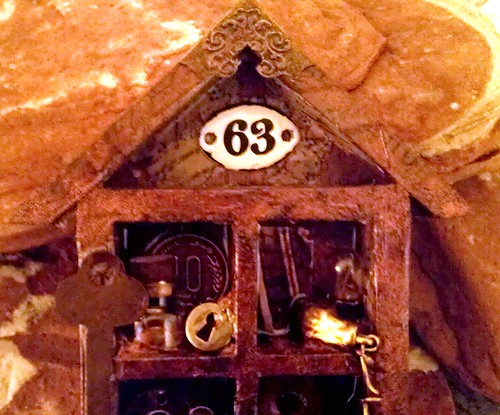
To achieve texture in this piece I chose to blend my edges and corners with a treatment of black glass glitter from Finnabair.  I love how this adds some sparkle, but still looks grungy and industrial.


I found myself drawn to using symmetry more than once as I pieced this together.  I framed out the outside corners of the box as well as the large inset. 


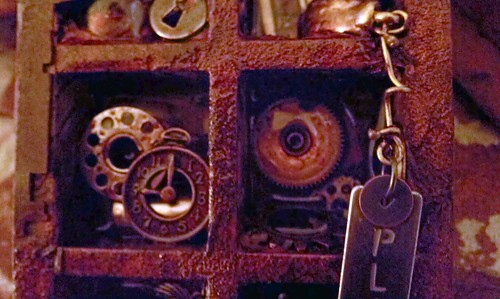
One trick that I often use to alter things is to layer them.  By adding the tiny gear inside of the hexagon and framing it out with the watch fobs, it created a whole different embellishment.  You can also see my layering technique below with the faucet wheels. 


The special touch of a few trinkets that are vintage also give this piece a bit more of a story.  A vintage clip, a skeleton key, found safety pins from button cards, anything like this can give a piece personal meaning.  I also love these old jacks and how the color has been worn off of them through years of play!

Cheers,

Rhea


Saturday, September 7, 2013

House of Grace with Kristen Robinson


I finally had a moment to post the last of my classes with Kristen Robinson.  Her inspiration will stay with me a long time though.


In this class we played with mold making, something I have never done before.  It really was quite simple to make them, and I can see it opening a whole new realm of possibility in terms of using those things I really treasure in a new way.


Kristen brought a paperclay heart already dry for us to work with.  Since I decided to do a series of three hearts, I made a few more hearts from her molds in class.


I decided I wanted to add some metal elements, so I rooted through my junk and found lots of fun objects: wings, keys, a pen nib and eclectic scraps.


On this last heart I actually stamped right into the clay when it was wet.  This was a fun technique that evolved as we played in  class. 


I would highly recommend any class that Kristen ever offers in your area.  She was a very kind and generous teacher.

Cheers, 

Rhea

Saturday, December 17, 2011

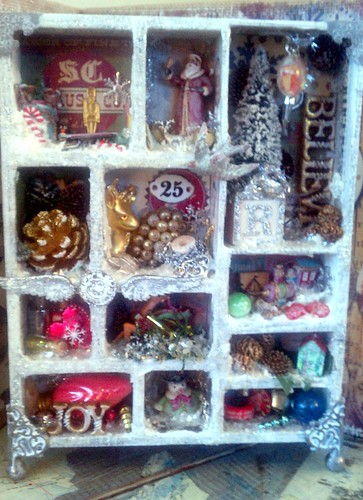
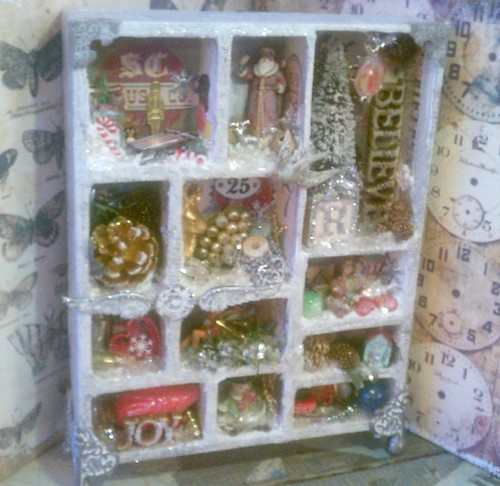
My Christmas Configurations

As my loyal readers may have expected, I have had a Christmas assemblage in the works.  I still can't quite figure out why I love to put these together, but I really, really do.  This piece has been getting put together in my mind for quite some time.  I started out by just gathering small items I knew would fit inside the boxes and putting them in little bowls on my craft table.  I also joined a Christmas ornament charm swap, with the intentions of using them to embellish my project.  This makes it extra special, as I have little pieces of others art tucked inside. 


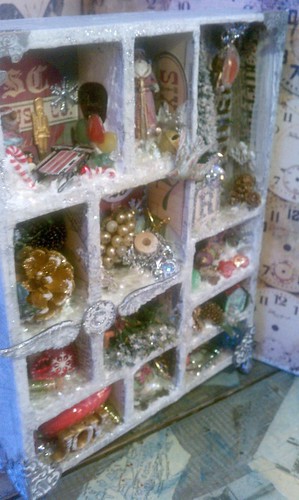
I am so grateful for Simon Says Stamp and Show, as it was their challenge this week of show some depth, that pushed me to actualize this piece.  I used several strategies to ensure that there is a lot of dimension and depth to this piece.  To that end, lots of texture was created with several different applications.  I used distress stain, acrylic paint, molding paste, fiber paste, rock candy crackle paint, vintage mica snow and stickels.  I was also sure to add several elements in each area and stage them at different dimensions.  Decorations were added to the sides and the tops of some boxes too, these details provide a lot of depth and interest.  My last secret to showing the depth here was in how I photographed the piece.


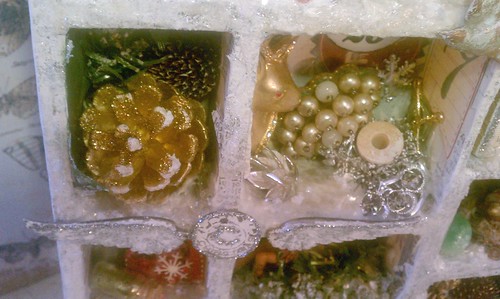
I love this little charm I made with the wings and the holiday muse token.  It reminds me of the spirit of Christmas because of the symbolism of the wings. I colored these metal pieces with picket fence distress stain and then sealed with matte medium.  Stickels were added for more depth and glimmer.


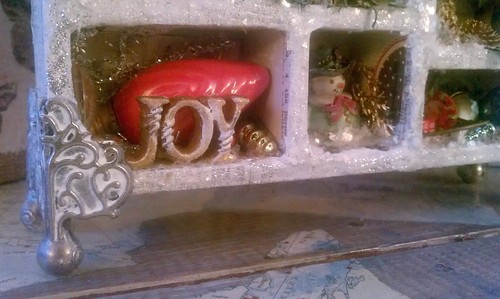
I used the white stain and acrylic paint on many of my items inside this assemblage.  This helped to create a wintry feel and keep the palette muted.  I love the shabby look of the feet from this distress technique.


I really love how I used the various art pastes to create little snow drifts.  I wish you could see the crackle a bit better, the texture on the edges is really delicious. 


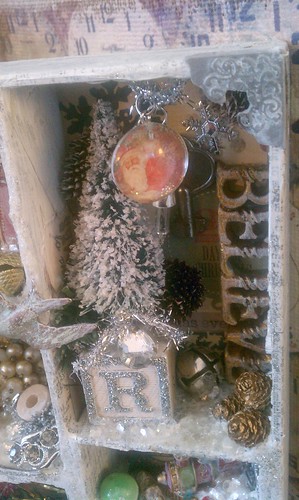
I altered the bottle brush tree quite a bit.  I used gesso, acrylic paint and stickels to make it look snow covered.  In this little area a dangling charm was added. I always like to have an element of movement in my pieces, if I can make it work.


The vintage block above was also altered.  I washed it with acrylic paint and then simply added stickels.  I think these would make charming Christmas ornaments.   This project took some patience overall, as there were many stages due to the drying times.  This picture above does show a bit of the glimmer from the vintage mica snow.  I imagine I will be finding flecks of this in my work area for some time.


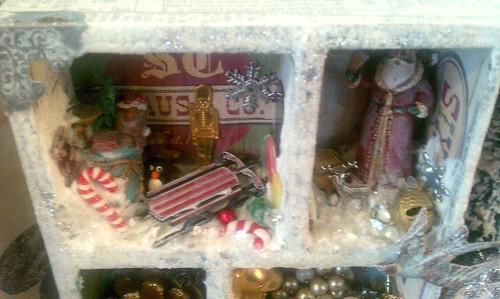
In this photo you can see that the base of the collage on the boxes is tissue tape. I love how the stain adds a whitewash look.  This toy compartment has lots of charms from my art charm group.  Thanks so much ladies, hope you like what I have done!!!


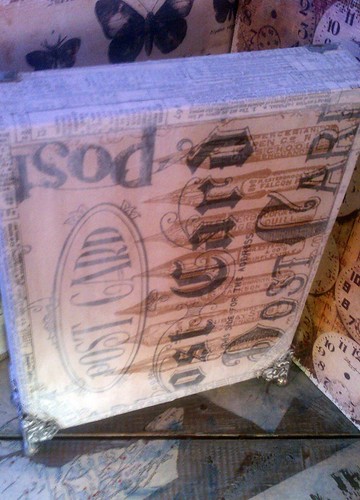
I always like to finish the backs of these boxes.  I chose my favorite piece of kraft paper from Tim's seasonal kraft stack and whitewashed it for consistency.


I hope you enjoyed peeking inside my little holiday assemblage.  I sure had fun creating it and sharing it with you.

Update:  Just after posting this project I found out that I won this giveaway from Red Lead.  Can you believe it!  How lucky am I!  Both thier store and their blog are full of inspiration, so stop on over and check out all the vintage and crafty goodness.  Thank you so much Red Lead, as you can see from above I will put the items to good use!

Merry Christmas to all,

Rhea

Wednesday, November 2, 2011

A house of junque

I am very happy that Simon Says Stamp and Show managed to help me get my mojo back.  This week their challenge was to create something with a house, and I took the bait.  I was surprised to find that I had several house items I could alter.  I started all three, but two proved to be problematic.  At least I finished up this little guy. 


I found this small house at a garage sale or flea market somewhere along the way, I think I paid a dollar for it. The first layer was two types of  tissue tape and some torn scraps of paper.  I then followed up with spray inks in several colors. 


The found objects, which I lovingly call junque, were added with coarse modeling paste in some places and glue in others.  More ink was added to color the paste and then wiped off of a few of the objects. 


Then for the fun part.  I flooded each little area with resin.  I have to say I just love how this adds another glossy layer to the piece and keeps your junque sealed in.  The pictures I have are not that great so it may be difficult to see.  Winter blogging is going to be tricky, it gets dark so early and I really don't like how a flash shows online.  My editing skills in picnik have some room to grow, I know these last two shots need some help.


I just love doing assemblage work.  I am always on the hunt for little things to alter, you will be surprised what you can find once you start looking.  I am hopeful I can resurrect or fix the two other house projects I managed to destroy while finding my mojo.  Stay tuned to find out!

Cheers,

Rhea

Saturday, September 3, 2011

Resin + Assemblage = Love!

This is another installment on my projects from the Create Retreat sponsored by Cloth, Paper, Scissors.  This class was called Resin Flooding Assemblage and it was taught by Belinda Spiwak.  Belinda was a very generous teacher and she created a calm easy going creative space for us to play in. 


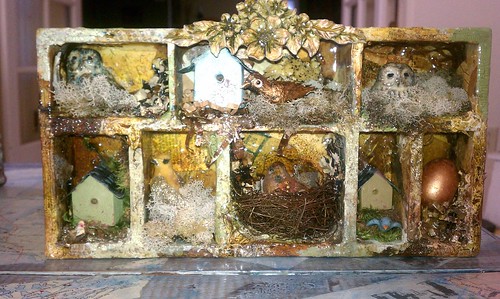
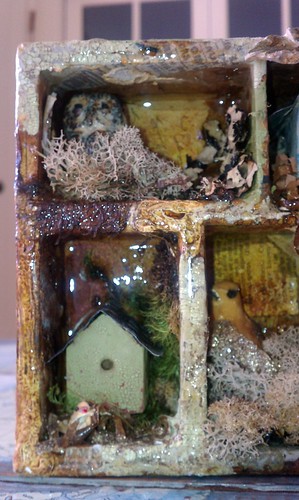
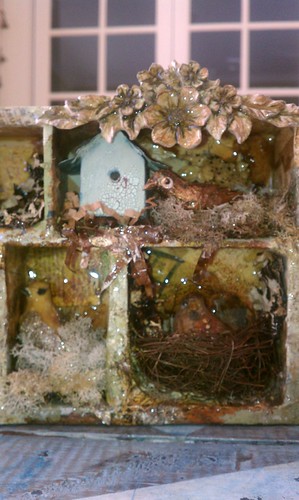
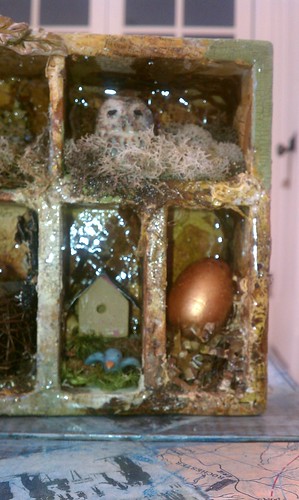
I managed to start two pieces in the class that I have now completed.  The first one was made with a bird theme.  I love how the moss and bark I added provided such rich texture.  It is really hard to see the yummy finish the resin created on these assemblages.  I did photograph with a flash to try and capture the amazing texture and sheen both pieces have.


I fell in love with Tim's crackle paints.  These added a nice old looking crackle where they were added.  I wish that I had "blobbed" it on a bit more as Belinda had advised in her instruction.  


I found this project very freeing.  I was able to be a bit messy and haphazard in my background collage and I loved this aspect of the creation process. 


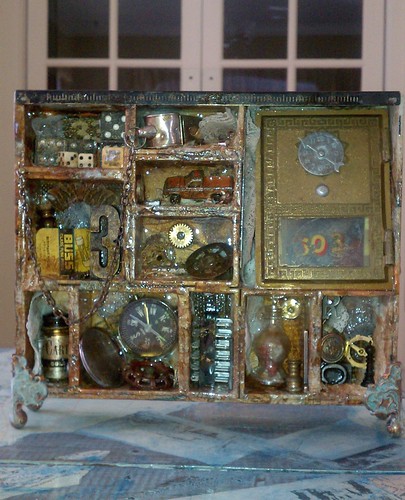
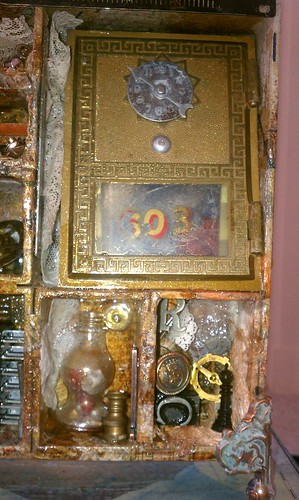
My second piece tapped into a bunch of vintage junque I had on hand.  I did get the large post office box plate from Belinda...as I said, a very generous instructor!  As many of you know, I love all things postal. 


I used my new rusting trick on Tim's feet and I love it.  Both of the boxes are Configurations from Tim's line of products as well.  I can't get enough of Mr. Holtz and his goodies.  I also discovered the joy of molding paste in this class.  While it is great to discover new products, it gets expensive! I left Create yearning for a bunch of new stuff. 


I often find it difficult sometimes to use my little treasures, but I just have to get over it.  After all, I still get to enjoy them, just in a bit of a different way. 


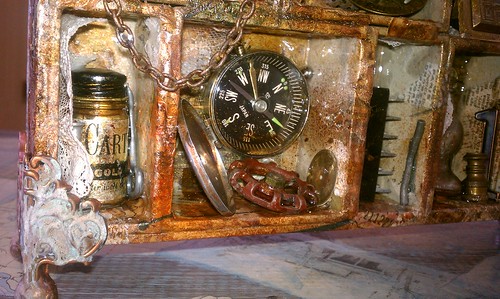
I finally used a piece of a typewriter I tore apart along the top of the piece.  The whistle has a long chain that I left free.  This was tricky to arrange while curing, but I love how it adds movement to the piece. 


There are so many goodies stuffed in these little compartments.  This piece is super heavy.  One thing I will not worry about is anything moving or falling off, the resin provides a super seal. I used Little Windows resin  in the bird piece and it was lovely, way easier to mix than the Easy Cast I used in the vintage one.   


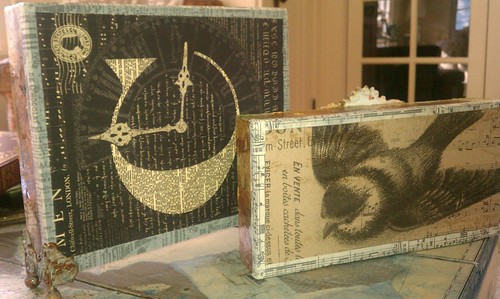
I had to finish the backs of these pieces because they were a mess.  We had to pour the resin at home due to curing time, I did not think to check the backs, so needless to say I had some issues.  Nothing a bit of pretty paper and tissue tape can't fix.  

This was such a fantastic class.  I look forward to using resin a lot more in my work now that I have been exposed to how easy it really is.  I hope you enjoyed sharing in my Create experience. I have one more project to share with you, coming soon!

Cheers,

Rhea

Monday, July 25, 2011

Life at Home

I started some of the elements for this project over the weekend.  I had stopped in one of my local scrapbook stores and they just started stocking Studio 490 Art Parts.  I have been wanting to try these for quite some, so I caved and purchased the Residential kit.  They are really fun to use.


The canvas was covered with several spray inks as well as a color wash.  I sprinkled in some perfect pearls when the ink was still wet.  I love the speckled texture this provides.  This layer was then sealed with a matte spray.  I edged the canvas with tissue tape, providing a finished look to the piece. 

I played with my layout a bit by experimenting with several elements from my new stash of altered art parts.  I used the trick of adding packaging to the window again.  While you probably can't tell in the photos here, it does add a really nice finish to the small butterfly from Tim's Crowded Attic paper stash in the window. You can also see Tim's goodies on the roof top, in the charm and in the kraft paper flowers. 


Other items I used were found objects.  A tiny gear for a door handle and watch pin for a hinge and a few other oddities from the bottom of my craft stash add interest to this little piece of "Life at home."

Since this week at Simon Says Stamp and Show has a theme of "anything goes," this is it folks. 

Thanks as always for stopping by!
Rhea

Tuesday, June 14, 2011

Found

Well folks, fate indeed.  The piece I posted previously has already sold!  I am so blessed and happy about this progress.  The only problem is that I had intended to send it along to the crafty market for my experiment.  The solution was to try and get busy creating post work today.  Typically I am a weekend artist, but with this little deadline, I changed my typical habit and I am glad.  I am calling this one "Found."


I was inspired to add this week's challenge over at Simon Says Stamp and Show of incorporating distressed torn edges to this project.  I used some torn inky bits of really lovely paper I purchased at a speciality paper store and attached them to my vintage wooden spools.  I used lots of found objects, vintage finds and a few of Tim Holtz's goodies too.  Assemblage is just so much fun. It gives me a reason to search for all kinds of random stuff.  Hopefully this piece will sell and fund another shopping trip. :)

My intention is to turn out a few more pieces by Friday so stay tuned.


Sunday, June 12, 2011

Fate it is...

In my life I have heard the question many times, but in the past month the volume has significantly increased.

"Do you sell your art?"

I typically say no and list a few of the many excuses my ego makes up.  Well not this time.  I am going to say yes for once and see what happens.  I imagine it will be fun, simple and easy. 

This is the first piece I have made with the pure intention of selling.  I am calling it Fate.  Sometimes it is hard to let go of my work, this time I am.  It can also be difficult to let go and just trust fate, this time I am. 

Don't you just love a beautiful metaphor? 


I love the imagery and the thought of "home."  I also am finding I like to weave this theme into my work.  This was the jumping point of this assemblage.  The clock, ever present in my art, represents time as well as the proverbial biological clock.  The box contains a tiny secret of mine.  The light represents ideas and energy.  The crow for me is the spiritual aspect of death, change, transition.  I chose the small compass to symbolize direction and forward movement.  The pencil, a reminder that you can always rewrite your life, as I am doing now by starting a new chapter.  I have had a "thing" for the winged heart since back in the 80's.  To me this is love in motion, a joyful spirit, divine love. 


The bottles each contain some tiny bits.  One of them, another nod to time with watch parts. This also reminds me that there are many pieces that make up the whole, or all that is.  The other bottle contains a little sand and a bit of parchment.  The number 13 to me is like the crow, it is the spiritual aspect of rebirth.  While many may think of the bad omen of both these totems, I choose to see them in another way, much like the junk I uses in my art. The key to me is a nod to knowledge, a rite of passage, mystery.  The jacks are there to remind us of simplicity and fun.  I topped the piece off with a quote that befits the piece well, "Sometimes fate and your dreams can collide."  Will they this time?


I am going to do my best to make this a joyful experience and I will try to not be attached to the outcome.   After all, if it does not sell, I get to keep it and I happen to think it is pretty cool.  I think this will be a fun experiment. 

I will be sending this, along with a few other pieces off with some friends at the Rusty Rabbit who are going to be doing summer sales the French Markets in the Chicago area.  Stay tuned to see more pieces heading out...and see what fate has in store for my inner artist.   

Saturday, June 11, 2011

Down the rabbit hole

Wow, it feels like it has been a while!  I guess my creative mojo took a little break, probably because my work life has been a bit challenging of late.  I made the time to check out  Linda's Grungy Monday challenge which is always inspired by none other than Lord Tim.  This week was a Distress free for all and I really enjoyed it.

I was inspired to make this project for a swap I am enrolled in, but this is another project I kind of grew attached too.  It just may live with me for a bit, we shall see as I have some time.  I just love how I was able to really flesh out this theme with supplies I had on hand.  


I started with this box I had on hand that was ready to alter.  This was sent to me in a swap and had been filled with a ton of lovely hand carved stamps.  I still have to move the hangers on the back because I had to change the orientation in order for the images I had to fit properly.  As I look at this, I realize quite a bit of the materials used were from swaps.  People send me the coolest stuff! 

The background paper was glued inside of each part of the background.  Tim Holtz's tissue tape frames out the inside of each square.  Then came the Distress inks. I used a bunch of brown tones and buffed them into the front and sides of the raw wood.  Since Distress inks react with water, I spritzed the inks to get them to intensify and blend more.  I also added a touch of rub and buff along the front for a little sheen. 


At this point, I added some metal corners from Tim.  Then it was stash scavenging time, fun.  I had just received the faux Alice stamps in a mail art swap.  They were a bit bright for the project, so enter a bit more Distress inks along with some additional colored pencil.  The mushroom was recently picked up at an antique show for a dollar.  The faux moss also just arrived in the mail from a swap as did the tiny bottle filled with "the sands of time" (shielded by the open door.)  I really like to have movement in my work.  To this end I also attached the heart shaped lock with a tiny eye bolt, yep, someone sent me that lock too.  


In the middle area I knew I wanted to use some of my small brown bottles.  I bought oodles of them at a good discount.  I bit of paper, some ink and a "drink me" label and I had some potion for my project.  A philosophy tag from Tim also goes with the theme.  I looked and looked for something that said "dream," but I could not find anything on hand.  I later did add this word from a bit of paper on an inner wall (not seen.) I knew I also wanted a playing card  in this piece too.  Due to the waxy coating it would not accept ink, I got around this by sanding and I love the texture this process achieved.  A few random wooded chess pieces that arrived in my mailbox (from a swap) fit perfect with the theme.  The metal heart was a garage sale find I believe.  I really wanted to fill the metal heart with red distress stickles. I did this, but I lost my patience as they take a while to dry, so I altered my plan and moved forward.  The flourish was sent to me and the key, I think I had.


Now, I have a tiny heavy metal printers "Q" that I wanted to use, but I was supposed to send this internationally, so I did not add it.  It probably made a good choice as the scale of the large grungboard letter works better.  It was colored with Distress Inks and coated in stickels.  I glued it down when the glitter was still wet, I am so impatient with my art at times! A cheap plastic heart shaped locket was tucked in and a royal button add some interest in this taller box.  

I knew I wanted something to do with time.  I used a Spare Part clock face and a few spinners from Tim.  The tiny teacup I just received in a swap as well.  In fact, I think this little cup and the faux postage really inspired the whole project.  When trying to add elements, I read the wiki entry of the plot synopsis to refresh my memory of both Alice in Wonderland and Through the Looking Glass.  I found that Alice in sighted "rule 42" at the royal court. I searched my vintage bingo pieces and lucked out.  

There is room for a few more trinkets in my opinion and there are a few story elements I would like to add.  Some red and white roses and a rabbit would be nice for sure.  A tiny pair of gloves or a fan would also complement the theme.  This is an image rich tale for sure, there are so many things I could see doing with this theme in the future.  So this is what the "Alice" hub-bub is all about!  Now that I have fallen in love and plan to keep it, I just may be able to continue my search and find the finishing touches.
 

Saturday, May 28, 2011

Home Sweet Home

This little piece was quite the adventure.  You would not believe how many layers of ink, paint and glimmer mists are under that paper background.  I learned a lot failing quite a few times before getting something I was happy with. 

I made this with the Simon Says Stamp and Show challenge in mind.  This week Wendy Vecchi was the inspiration. Now, I did not know a ton about this artist and this style, so it was super fun to do some research.  I decided to try to incorporate some elements I thought fit her style: a house, polka dots, flowers and lots of texture. 


As I said, I messed with the background for a long time before resorting to simple torn paper.  The house was cut from a manila folder and embossed with a garage sale find, a polka dot embossing folder by Cuttlebug.  Distress inks were used to color the house.  I added a ticket, vintage watch face and a spinner as the focal point.  A tissue tape ruffle was added after it was misted with Glimmer Mists.  Trim and chain were attached to define the roof.  I love using metal elements, thus the gear flowers, a frame, letters and as well as a corner frame at the roof top.


Tim Holtz tissue tape finishes the edges.  I also added a touch of acrylic paint, which I wiped off to define the words on the metal tiles.  I actually added the paint and another layer of trim after taking the first set of pictures I intended to post here on my blog.  In taking the photos I was able to see that there were a few details that still needed to be added to really finish the piece.  I think I will send this away as a random act of kindness to a really wonderful gal.  I hope she enjoys!

Monday, May 23, 2011

More Jewelry and Charms too

Well I finished up my complimentary necklace for the pearl one I recently posted.  I despise having my photo taken, but I did it so you all could see how they work together. I really enjoy making sets of necklaces like this so that can be worn together or separate.  I also love how you can move the clasp around to change the looks. Very versatile!  I guess I did get a little bit of sun yesterday while doing some of that pesky yard work.


I also recently finished up a charm swap for a local group of crafty pals.  They ended up getting two from me, as I did not reread the swap requirements before setting down to make them.  My original charms were the metal found object ones made with Tim's stuff, watch parts, and various odd metal items.  Unfortunately they were bigger than the size limit of 1.25 inches.  I am just glad I caught it before getting a bad swapper reputation with my gal pals.  The participants get the prize anyway, as I am sending them both along.  The second charm was made using these fantastic glass domes, Graphics 45 paper, stickels and metal flashing tape.  I punched a circle of flashing tape to "seal" the back of the charm.  I hope everyone enjoys!


Lastly, for my trusty readers, thanks again for participating in my blog giveaway!  I had an amazing 59 entries in my contest to win a Chotski Pin.  I used Random.org to choose a winner.  The 27th commenter was B-Jo.   I have notified her via email and hopefully she will respond soon.  If I don't hear from her within a week, I will draw again. 

Cheers,

Rhea