Wednesday, November 19, 2014

Cigar Box Inspiration Kit


This month's kit at Alpha Stamps is all about Cigar box sweeties, and I just loved this theme.  I decided to create a fun gift for an artsy pal with my goodies.  


I wanted the receiver to have a bit of art made by me, but I also wanted to include some items as an inspiration kit for him/her to then make something on their own.


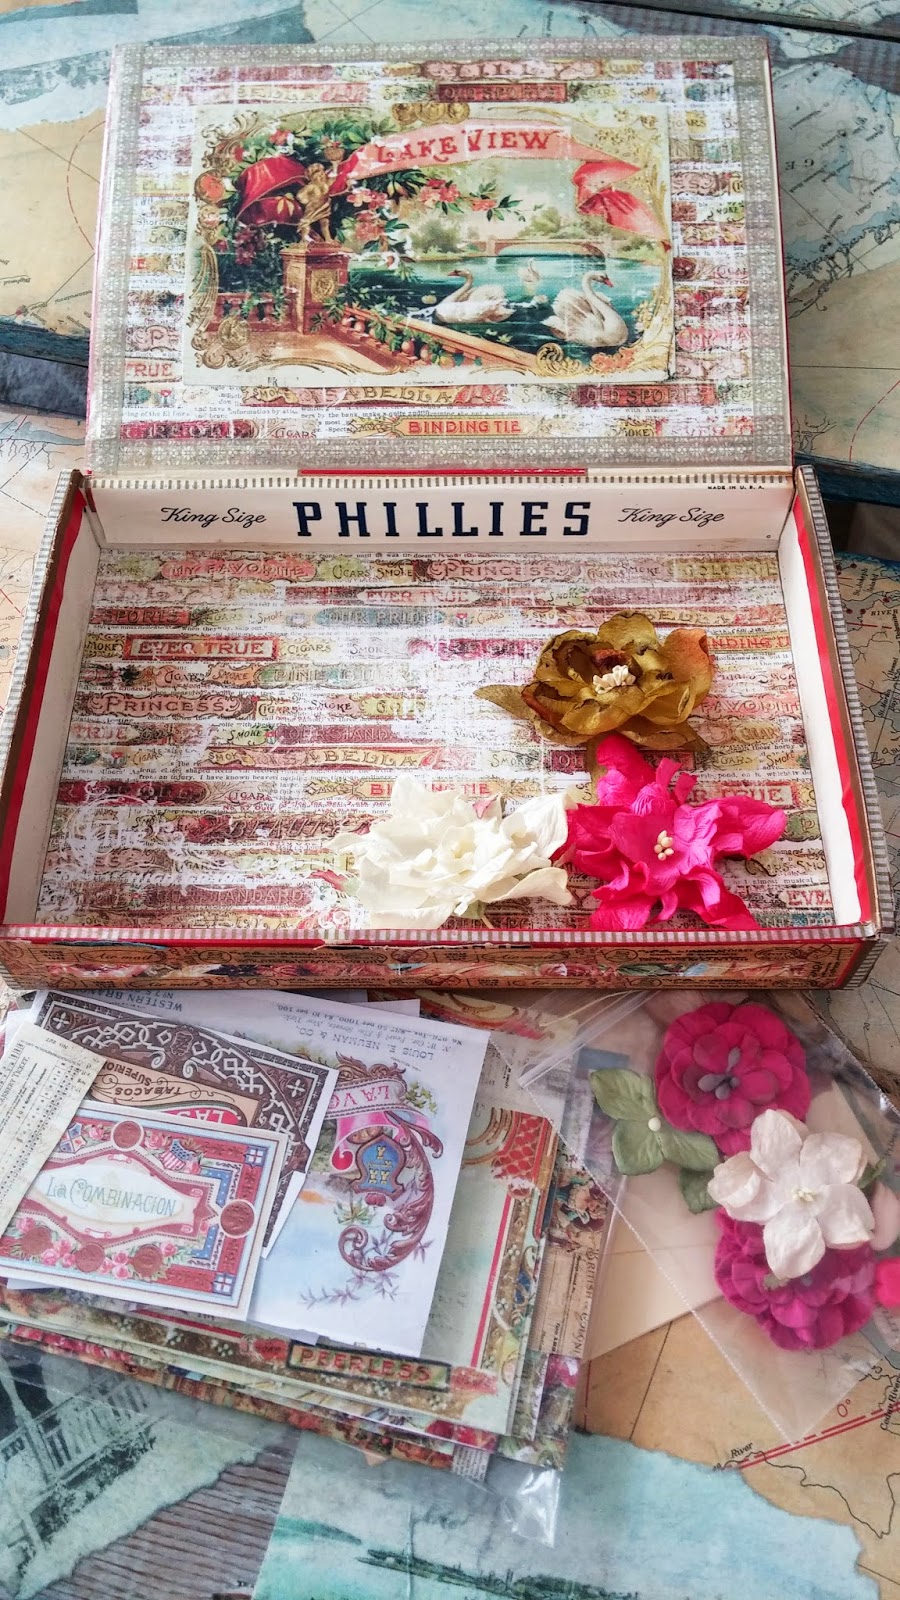
I upcycled an old cigar box that I had picked up at a garage sale to hold my kit.  You can see that the box was slightly warped on the left hand side, but I still made it work.


I used lots of new decorative tapes to alter my fun little kit.  Love all the new tiny ones.  The gold striped one is only 3mm thick.


Another item I used here was some of Tim Holtz's cute new arrows.  It is sometimes hard to use the good stuff, but it is worth it in the end.


Inside I have included some embellishments, collage images, scraps of paper and some tags.  I plan to add some more ribbons and such as I get the gift ready to give.


Here you can see the inside of the box a bit more.  I was sure to leave some of the cigar box showing as I like to be able to see the history of the how the piece evolved.  


I hope you enjoyed this post!  It was sure fun to make something while also hopefully inspiring someone to make something else.  

Cheers,

Rhea

Industrial Typography Box


So I always love when I get a design team challenge.  This was the case when tasked to work with Core'dinations card stock along side Graphic 45.  I don't typically use plain paper, so of course I got to altering it pretty quick! The card stock stood up very well to several different techniques.


The gears were cut from the black Core'dinations paper and then embossed.  I also used gilders paste in silver to bring out all the raised images.  Finally I misted them with Perfect Pearls spray ink to add a bit more of a metallic look.


In order to make the saying inside pop, I used some recycled foil embossed wrapping paper.  I thought that the reflective quality of the paper would keep the inside of the box from getting dark.


The gears were attached on both sides of the opening of the box to add dimension.


I also finally used these coveted wheel pulleys by Tim Holtz.  I have had them in my stash for a while and I thought this was the perfect project to use these on.


In these images you can also see the great metal texture I achieved on bare kraft matchbox with stain and ink.  I used water to make them react and leave behind lots of interest.


I could not resist adding a bit of actual metal.


I really loved taking on this challenge.  You should see what the rest of the team has come up with today!  Please stop by the Graphic 45 Blog and Cord'inations Blog for lots of great inspirations and chances to win lots of prizes.  You can even enter right here too!


a Rafflecopter giveaway

Sunday, November 16, 2014

Time to Flourish Mini Gratitude Box


This little box came together as I was working on elements for other projects.  I just could not resist assembling this cute mini cigar box almost as soon as I got it.  Of course, to be quick and efficient at covering this little item, I used several decorative tapes.


I intend to add scraps of paper with things I am grateful for inside.  I believe that in recognizing our gratitude it expands the space for more things to be grateful for to enter your life. The new Time to Flourish paper from Graphic 45 was perfect for the fall palate and sentiment.


On that note, in my creative life, I am so grateful for Alpha Stamps and Graphic 45 for being such amazing sponsors of my design work.  I am happy to report that another company will be added to that list, but I am keeping a lid on that for now.  

Cheers, 

Rhea

Wednesday, November 12, 2014

Come Away with Me Printer Tray


Oh how I love to create these printer trays!  This one was made for Graphic 45 with their Come Away with Me paper line.  The palate of this paper collection is really lovely.  


Within each cubby I used lots of the coordinating chipboard and stickers.  The product line mades it so easy to be able to complete one of these.


Lots of travel themed charms were added as well to add interest and flare to each little spot.


I think that one of the reasons I like to make these is that there is always so much to look at.  


Another way that I added interest was through the use of paper flowers as well as ribbons on the small tags.  


You can see here that I also used my favorite, gilders paste, to alter the wood.  The edges were trimmed with lace in order to change up the look a bit.  I have made so many of these!


Thank you so much for taking the time to check out this post!  

Cheers, 

Rhea


Saturday, November 8, 2014

Traverse City inspired Necklace Suite


I recently traveled to Traverse City, Michigan for a conference for work.  While I was there I stopped in a delightful bead shop that I usually check out when I am in town Nawbin Beads.  They have the most lovely shop.  


I was really attracted to several strands of jasper and jade.  They reminded me of the fall leaves combined with the beachy nudes and blues.


I purposely made several necklaces, meant to be worn layered or singly.  I even tried out asymmetry on the one above, which is always a challenge for me. It actually turned out to be my favorite one.


The focals on both of these statement necklaces were what started the whole project.  I simply found beads to compliment and match.


This last piece is more of a complimentary necklace, meant to be worn with one of the other two as a layer.  It certainly could be worn alone as well.


And here is the entire suite!  Super fun to get back to my jewelry roots.  It has been a while.

Cheers, 

Rhea

Sunday, November 2, 2014

Come Away With Me Gift Bag and Card with Tutorial


Sometimes the simplest of tasks can prove to be a challenge!  This was especially true for me as I stepped out of the mixed media zone and into gift bags and cards for Graphic 45.  My mantra for this was simple, just keep it simple.  I have such a tendency to layer on so much stuff that would probably not hold up to the heavier use of a gift bag.  


Supplies:

Come Away With me 12x12
Come Away With me Patterns and Solids
Come Away With Me Stickers
Come Away With Me Journaling and Ephemera Cards
Twine
Distress Ink
Xyron Double Sided Tape
Paper Flowers
Recycled Cellophane Packaging


This project was created with a travel theme in mind.  I had planned on making a book or journal to go with this project, but did not have the time unfortunately.  Perhaps that project will still come to be!  I think that a junk book with these papers would be just lovely.


I pictured the recipient either moving away or heading out on a long voyage.  The Come Away With Me papers were a perfect choice for this idea.


Since I took the time to make a handmade card, I decided to showcase it a bit by making it part of the decoration on the paper bag.


A little bit of cellophane left over from craft supply packaging made for the perfect pocket for my note card.


Here you can see how it looks inside the pocket.  I just love finding useful ways to use my garbage/packaging in crafts!


I also created a snapguide on assembling this simple project.  Enjoy!