Showing posts with label wings. Show all posts

Thursday, September 3, 2015

Steampunk Heart Hanging


The inspiration continues after learning so much from Finnabair!  I have also used a lot of her product in this project as well since I am on such a kick.  It was great getting back to a classic steampunk look, my absolute favorite!


The focal of the piece is actually a Masonite kit from Retro Cafe Art that I have been hording for some time.  I added Finnabair's silver micro beads and lots of layers of resin to achieve really great dimensional wings.  For the mica heart I made a great discovery.  I was able to dye my mica with alcohol inks prior to using them to customize the color.  This opens up so many possibilities with the mica I have on hand!


The heart also has lots of Finabair's mechanicals which were also coated with resin.  I love to layer the metal pieces to achieve different looks.


The base of this hanging is a burlap panel.  I love how this provides for a natural texture to begin with.  I also used lots of die cuts, Masonite shapes, metal bits, found objects and wooden embellishments in the collage.  All of it was brought together with the use of gesso, a dusting of metallic finishes and some mica flakes.


I made this piece specifically to keep my big designing dreams alive.  I have not been active with a team for a while and it is part of my creative life that I truly miss!

Cheers, 

Rhea

Monday, March 24, 2014

Xyron Shadow Box with Tutorial


I am so excited to begin my journey with Xyron!  For this assignment we were asked to recreate a project that was "Not Xyron, but should be."  This framed scrabble tile sentiment was a great inspiration for my little shadowbox.  I loved the simple graphic in the background paper, as well as the re purposed use for the scrabble tiles.

How darling!


And here is what I ended up with:


Supply List:
Frame
Scrabble Tiles
Xyron 1.5" Sticker Maker
Xyron Mega Runner
Xyron 3/8" High Tack Adhesive Dots
Xyron 1/4" Double-Sided High Tack Tape
Xyron Glue Stick For Corners
 Graphic 45 Paper
Embellishments


The inspiration project had a simple frame without glass, however, I could not find something along those lines in my stash, so I committed to trying to use what I had.  I find that this can be so rewarding, and it can save you money too.


Since I had a deep inset with not too much planned for the inside I decided to use some decorative tape to add interest to the inside of the frame.


Be sure to burnish down your tape.  Many of these are very low tack (not very sticky.)  I used a ruler to push down each edge and smooth over my tape.


Next up I added a piece of scrapbook paper to the back of my box.  I used my Mega Runner for this, and it made really quick work of the task.  Here I chose a pattern with a similar flair as the inspiration project.


Here you can see I started to play with layout.  I decided after a few trials to matte my letters in order to add more grounding to the text.  Because of the depth of the frame, I decided this was best.


The Xyron Glue Stick for corners worked perfect to create the small mattes.  I went to my scrap box and found a few bits of Couture I had left over.  I am always so happy to utilize those small scraps!


I must admit, this part was fun.  I simply added the tiles to the Xyron Adhesive dots and I had my letters all lined up and ready to go in no time.


The double sided tape was used to hold each word element down to the background.


A note on my embellishment.  I made it from scratch.  It is a bit of burlap that I coated in gesso and let dry. Then I free form cut out my heart and wings.  The bits were then altered with all kinds of stuff until I liked the look: stain, ink, gilders paste, marker...I finished it off with a few old transistors to give it that industrial touch I like so much.


Once I put my piece together I realized it needed just a little something more.    I added tape to the outside of the box.


Then I decided to use some Dresden I had on hand.  I must say that the Xyron Sticker Maker worked great to stick this down.  I always struggle with glue showing when I use wet glue on Dresden.


One trick though:  rub down lots and peel slow in order to ensure that the adhesive comes up with the Dresden.


And that is it.  Simple and fun and using the stuff I had on hand!


I love how the decorative tape adds so much texture to the whole piece.


Here is a close up of the fun heart embellishment I was able to create from scratch.


I hope you enjoyed!  Thanks for stopping by!
Cheers, 

Rhea

Sunday, April 21, 2013

Tiny Steampunk House


Why is it that artists are so drawn to house shapes and imagery in art?  Just like birds, this type of imagery and subject matter seems to often ripple throughout the creative world.  I cannot help but join in from time to time.


As usual, lots of metal bits have been added to the project.  Sometimes I just experiment and odd things I would not usually put together end up on a piece creating a cohesive focal, as in this case.  To see all kinds fun goodies I used check out this link for Alpha Stamps.  


The roof of the house is actually UTEE that I stamped into when it was still warm.  A rubbing of copper gilders paste brings out the texture from this technique.  I love how this element turned out.


Another trick I tried for the first time, coloring glitter.  I wanted to use a coarse grain and I did not have the proper color.  I used alcohol ink to dye it, and it worked really well.  

I really like how this tiny house turned out.  Working on a small scale can be rewarding as it can yield results quicker and I am such a hasty artist sometimes.  

Cheers, 

Rhea

Saturday, March 31, 2012

Feather your nest

I am so excited to be hosting a swap in my Art Charm group.  The theme is "Feather your nest" and the idea is to create art charms inspired by birds, wings, trees, eggs, nests, houses, feathers etc.  A perfect genre for spring.  Sign ups open tomorrow and we will be swapping in groups of fifteen.  Anyone can participate as long as your part of the Yahoo group and you follow the swap guidelines.  Check it out if you are interested!  The group was founded by the authors of Making Mixed Media Art Charms and Jewelry.  Both Peg and Chris are amazing!


I have been scouting for materials for this swap ever since I read one of the swap previews.  I love how the owners of the group let us know what is coming so we can find good deals. 


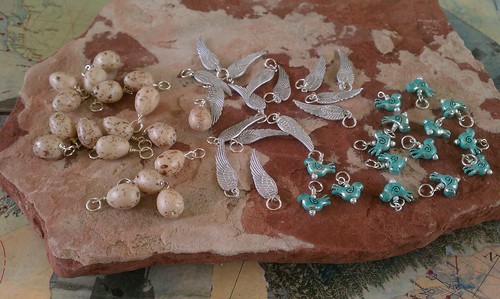
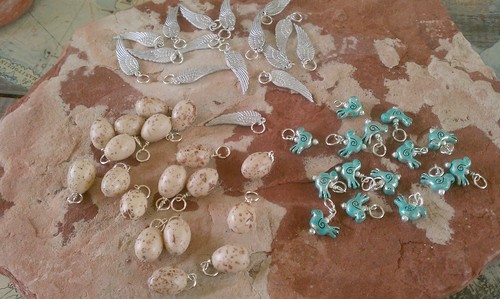
I found these cute little birds on clearance at a big box store.  I wanted to jazz them up a bit so I decided to play with my favorite new product from Alpha Stamps, Guilders Paste.  This is a wax based medium that can be used on wood, metal, clay, ceramics etc.  It is very easy to apply and adds great color and depth.  I highly recommend it to my Art Charm pals, as this was a quick way to make my charms stand out and make them unique.


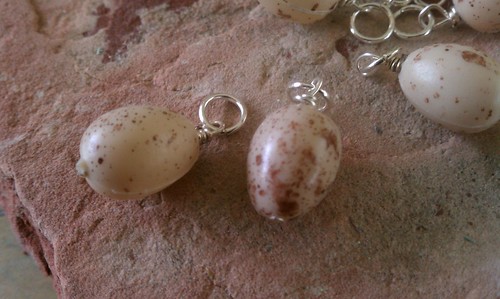
Now, I knew I wanted to also have some egg charms to trade.  I searched high and low in my local stores, but could not find a true egg shaped bead.  I almost picked up some pearls, but the shape just was not right.  Then I had a flash of insight and headed to the floral department.  These little plastic eggs were super cute.  I used a candle to heat up my head pin and poke holes and make them into a bead.  It is so fun to find a way to alter a product and use it outside of the intended purpose. 


These were so super simple to put together, I really did not do any construction.  I actually forgot I had all these wings, but when I was seeking some other stuff in my crafty mess I came upon them and knew they had to be a part of this swap.  Again, I wanted to add some interest, so I dabbed on a bit of pearl color acrylic paint.  Sometimes simple can be a good thing.


This looks like a great beginning of a wonderful swap.  I think a charm bracelet may be on the horizon. 

Cheers,

Rhea


Saturday, January 28, 2012

The charm of Ancient Egypt

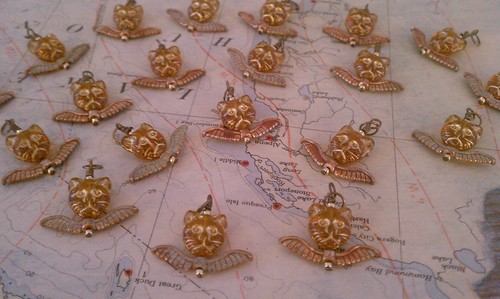
My art charm group is currently running a swap with ancient Egypt as the theme.  I was intrigued by this idea as soon as I heard it was coming about.  I ran across similar cat beads late last year and immediately knew what I wanted to do for my charms. This idea has literally been rattling around in my brain for months. 

The Egyptian cat God Bast, is a symbol of protection, motherhood and fertility.  Cats were so revered in ancient Egypt, that they were often mummified.  I thought that the wings were a nice symbol for the transition to eternal life.  Plus, I think it just looks cute!  I also love the serious look on the cat's face.


The wings were silver and did not really go with the brass findings required for the project.  To attend to this, I altered them with a rusting product.  I also added an additional patina agent to one side of the wings.  You can see above that some of the charms are showing a bronze side and others have a bit more of an aged patina look.  Another cool aspect of these little guys is the movement.  The wings really spin if you flick them, fun. 


I hope the gals in the swap like them.  I always look forward to seeing the outcome of my art exchanges.  The past few I have participated in have assisted me in embellishing up a few great art projects.  I am grateful for the ability to share my work, while appreciating the work of others.  Stay tuned, I am sure someday I will have a cool project showing off all my ancient goodies.

Cheers! 

Friday, October 14, 2011

Time Flies

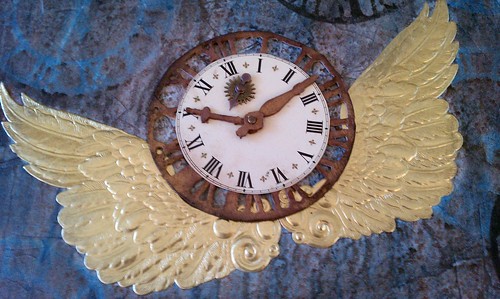
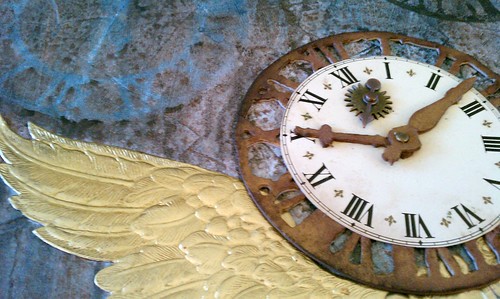
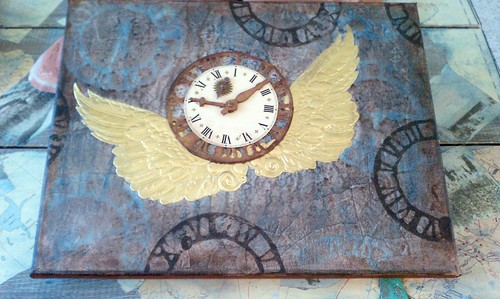
For this piece I was inspired by the weekly challenge over at Simon Says Stamp and Show.  Their theme this week:  things with wings.  This piece has been lingering in my mind ever since I splurged on those giant Dresden wings which were purchased at Alpha Stamps.  I knew one of the vintage clock faces I had from an estate sale would make a perfect match, at least in my mind. 


The face was a bit too large, but I was able to cut the thin metal with shears.  I felt it needed some sort of border and I had a light bulb moment, thinking of my weathered clock die from Tim. I created the frame with heavy chipboard, distress stain and gold rub and buff.  A few trinkets add some interest and cover a hole in the face, perfect because the spinner can still move.  I love incorporating movement and interaction in my art. 


The background was tons of fun.  There are a bunches of layers and techniques.  I used dictionary pages, gesso, distress stains, acrylic paint, stencils and stamps.  I managed to use the same die in three totally different applications in this project.


I hope you enjoyed taking in a part of my process.  Thank you so much to all my readers for stopping by, it really means a lot to me.  My blog provides me much joy, I appreciate that you choose to share the experience.

Cheers,

Rhea

Tuesday, April 19, 2011

Grungy Monday No. 4: Winged Tag

Oh, how I enjoy these challenges.  This week Linda inspired us to use Tim's texture fade technique.  This is a clever way to apply ink while embossing.  I used a new folder I purchased with a gear pattern, made by Cuttlebug.  I chose old ledger paper to do the texture fade technique, but you can hardly tell because I altered the paper so much.  I also buffed in Distress Ink, sprayed on Glimmer Mist and then sanded.


When I was sanding, I encountered a problem.  I tore my edges all up due to the brittleness of the vintage paper.  Since I try to just "make it work" (love you Tim Gunn), I decided I would cover up this mistake.  Well I had just read Tim's blog and he posted a lovely idea that was new to me, alcohol ink on tissue tape.  So I directly applied Butterscotch to one of his new tapes and fell in love!  The color is so rich and intense.  I have used Distress Inks, spray inks on tissue tape but never alcohol inks until today.  Thank you Mr. Holtz for schooling me once again!

I then moved on to the embellishment, my favorite part of creating.  I used a hitch post to create a place to hang my swivel clip of goodness, which was tied into place with a bit of lace.  I added a cool ruler charm, a button pin, a gear and a charm I made. 

At this point I knew I needed something else along the edge of the tag for balance.  Since wings are something I can never get enough of, I chose this image.  It was stamped on grungeboard, inked and misted with copper Perfect Pearls. Another little industrial touch was added with a pair tiny washer backed spinners.

I love the outcome for this tag has and it was a wonderful creation process as always.  My only problem now is to figure out how to add it to my tag ring, I may have to go back and move the hitching post a bit lower and add an eyelet to the hole so that I can keep it with my growing collection. 

Thanks as always to my each and every one of my followers. It really means a lot to me that you stop by read, comment and gain inspiration.  The feedback you provide fuels my creativity and affirms my creative spirit.  For this I am deeply grateful. 

Saturday, April 2, 2011

Grungy Monday No. 1: Steampunk Journey Tag

As many of my readers probably know, I am a big Tim Holtz fan.  Because of Tim, I recently stumbled across Linda Ledbetter's blog.  She is posting a series of Tim inspired challenges, every "Grungy Monday."  I am excited to be able to participate this time around, thus my first entry. 


For this tag I started with the gear and clock mask.  I spritzed various spray inks I had on hand.  A few additional colors were buffed in with my sponge applicator.  I stamped the wing image onto grungeboard, cut and coated with a thin coat of stickles. 

The bottom piece of ephemera is an engine positioned right under a very cool acetate suitcase.  I tucked my pin underneath the strap of the luggage and then added a ticket from my stash.  The tag needed some texture so I used bits of rub ons I had on hand.  The vintage clock face was adorned with a muse token and a spinner, courtesy of Tim.  Finally a bit of lace adds a lovely bit of texture. 

I am looking forward to additional entries in this very inspirational series!

Saturday, February 5, 2011

Love Shrine

I created this little shrine for a swap and I think I love it too much to send it along!  I am certain I can create something else just as lovely for my partner and I am lucky that I have plenty of time and supplies.

I started this project by putting an old Altoid tin in my fireplace while enjoying a fire.  I really like the effect this had on the tin.  Old sheet music and scrapbook paper are the base for this mixed media collage.  The heart was purchased at a local craft store and the wings were actually scored in the bead area of that same store.  I simply cut the loop right off the wing.  I do this often in my altered projects as I have a lovely unique little bead shop in town too.  I used a small grungeboard crown and a few gears from a great clock that I tore apart.  Bits of filmstrip, tissue tape, stickels and Perfect Pearls were also used to embellish.


I had every intention of decorating the outside more.  Now that I plan on keeping it and displaying in a little nook, I am going to leave it just as it is!