Showing posts with label watch parts. Show all posts

Monday, February 6, 2012

Time to Fly: Vintaj

Secretly, deep down inside I dream of making my abundance as an artist, teacher and healer.  Since I have recently made some small art resolutions to move towards that dream, I am putting myself out there in the design world just a bit more.  I thought the recent offering of a "Mixed Metals" design challenge over at Vintaj would be a great opportunity to take one small and fun step in that direction. 


Update:  Thanks to your support, I finished in the lead!
Thanks to all of you, this piece will also be entered in the annual contest. 

The inspiration for this piece was the lovely pocket watch.  This vintage Elgin was found by a friend of mine while she and her family were letterboxing.  Now that I am more open about my artistry, people find and give me the most amazing things!  When I popped off the back of the watch, I fell in love with the movement.  My plans to take out the inside an make a small assemblage inside went out the window at that point. 


There is amazing workmanship inside of this little guy.  It really does make a nice steampunk focal.  I had been "saving" this for a "special" project and I am glad the inspiration struck to finally use this gem instead of just coveting it!
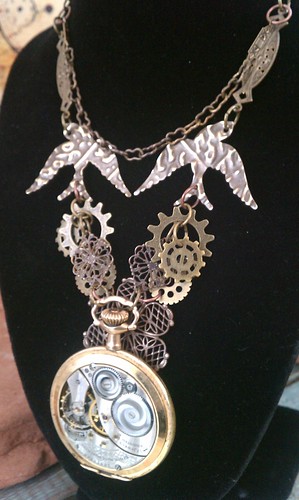


Another element I really like in this piece are the birds.  I added the texture seen using one of Tim Holtz's embossing folders.  Vintaj's metal accepts these prints amazingly well.  I also find their jump rings can be opened and closed several times and don't seem to lose their shape or get brittle as other base metal findings do.  Their products are pretty dreamy, I cannot wait to get my hands on the new patinas!  Some of my Vintaj findings were purchased at a new place in town called The Beading Bar

Thank you so much for stopping by as always dear readers.  Extra super duper thanks for voting, if you chose to help me out.  I really cannot express enough, how much it means to me. 

Cheers,

Rhea

Sunday, October 9, 2011

A bit of time

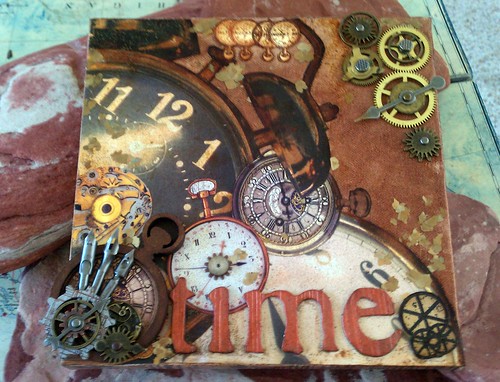
I finished up a mixed media canvas today that had been stalled for quite a while.  A swapping pal of mine sent me a bunch of goodies, and this parcel was just the stash I needed to complete this project.  One of the items I received was a Wendy Vecchi art part shaped like a pocket watch. I got this just in time to have something to enter into Simon Says Stamp and Show's challenge this week, as the theme is Wendy Vecchi style.


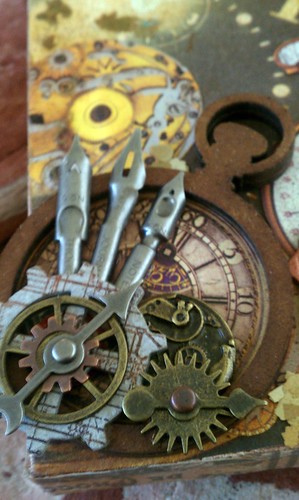
Here is a close up of the art part pocket watch.  I really had fun layering all kinds of goodies inside.  A bunch of the watch images I used were from an amazing sheet of paper I purchased at a specialty paper store in Ann Arbor called Hollanders. 


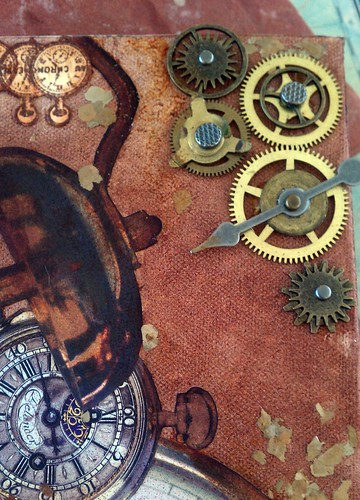
I used these great little mica flakes here and there to add texture.  I also raided my depleting stash of clock movements to add more metal elements. It was worth the sacrifice, but I am definitely going to have to find more of these.   


I am so happy to have finished up a UFO...unfinished object. :)  I challenge you readers to do the same.  Find something that you have been stalled on and see if you can find the inspiration to finish it up!

Cheers,

Rhea

Monday, May 2, 2011

A show of hands...and a few other details

Well folks, I have to say, the response to my late night post yesterday has been simply amazing!  I was blessed with 25 comments from my lovely readers when I arrived home from work tonight. Wow!!!  It just means the world to me to get feedback on my art.  I also recieved several personal messagess asking to see a few parts a bit closer.  I thought I would post again as this will provide opportunity for me to enter this piece into Simon Says weekly challenge and allow me to share a few more details that I left out in yesterday's post.  I was just so excited to share what I had been working on!


This week the theme for the challenge is hands.  My piece has vintage clock hands actually embedded right into the canvas. I topped off the hands with a cute little watch part that looks like a flower.  As I look at this area of the collage, I think it would be really cool to try and find a fine chain to wrap around those two gears. 


I did get a request to try to show off my "alternate" Grungy Monday dimention technique with a bit more detail. Sorry Tim, but I had a terrible time with the techique Linda challenged us on, so I reinterpreted the idea.  Anyway,  the picture in the previous post really did not capture what I accomplished.  Hopefully this image will allow you to see the effect this technique had on the piece.  It really is easy, if you can get your detailed cutting done well.   Again, I simply used two sheets of the same paper, cut the central image out and mounted it on top of the other sheet of paper.  Craft foam serves as the barrier to provide the dimension. 


I received another reader request to see a closer view of the other mosaic piece that inspired this whole project. I love to sprinkle Perfect Pearls and set them exactly how they fall.  You can see a bit of this technique on the background of my mosiac piece.  I  have also included a close up of another Art Nouveau gal, complete with gears in her hair.  I don't think you could see this very well in the larger pictures and she is another one of my favortie images from this collection.


Well, that takes care of the requests and the questions. Here are two more close ups of the tiny chipboard pieces I added to spots that just needed "something" but were too small for another canvas.  Yet again, a piece of craft foam helps to provide just the right amount of depth to these small additions.  The embossed chipboard was really fun to ink up too.  I just love the texture it adds. 


Thanks for stopping by!

Cheers,

Rhea

Sunday, May 1, 2011

Steampunk Mosiac

I started this project by making this tiny canvas.  I had no idea, at that point how this piece would evolve.  I had a bunch of die cut tags from Graphics 45 and the scale was perfect for Tim Holtz's fragments.  I made a bunch of them and needed to do something, so i made mosaic on a tiny canvas.


I had enough to make another so I did.  That is when I had the thought to mirror the idea of a mosaic with canvases.  I had a stash of Steampunk Debutante paper that I had been "saving" and this seemed to be the perfect project.  I had a random few pieces of 12x12 and I also had an 8x8 stack.  


I recently hit an estate sale for a clock repair man where I found a ton of steampunky goodness, some seen in this piece.  My favorite image from this collection of paper is the gal with the gears in her hair.  It was a simple game of match up and her hair was soon embellished with real vintage gears. Many of my canvases also have altered tissue tape surrounding them.  This is a technique I recently discovered with alcohol inks with perfect pearls and it achieves amazing results.    


The next panel I made with Linda's recent Grungy Monday Challenge in mind.  I struggled with this technique for sure.  This was probably due to my thin foam frame.  I still made it work and also used the technique in another way.  I used the craft foam to make the image pop off the page to add dimension.  It may be hard to see here, but the girl on the top with the hat shows this alternate interpretation of the dimension technique. Since I had two sheets of paper, I fussy cut one of the images of the lady and backed it with foam before mounting in on another sheet of the same paper.   


I found a few ways to add texture.  Bits and pieces of clocks are scattered all over the piece.  I also used a few scraps of fiber to soften things up.  


I scored a bunch of the apothecary bottles from 7 gypsies at a really good deal.  I used a few of them along the top of one canvas and filled them up with the metal sticks that many of the gears were once pressed into.  The bottles were embellished with some scraps of paper.  A few of my gear sticks were also bundled with wire and used to frame out one of the images as well. I was pleased to use some bolts and screws since I had planned to toss them. 


I love the clock hands I embedded in this panel too.  I had to poke a hole in the canvas to get them to lay properly.  I also made another time charm with a pair of wings, and old clock face and a spinner.  

One thing that really stuck me when creating this layout was a memory of Yearbook class from junior high.  I recalled some of the principles that were taught in terms of the direction people are looking for good design.  How funny for me to remember that!


Thanks for stopping by!


Sunday, April 10, 2011

Grungy Monday No. 2: Time

This is installation number 2 in a series of inspiration challenges from Linda Ledbetter with Tim Holtz's techniques.  I also entered this piece into this weeks challenge over at Simon Says Stamp.  I was again surprised at the outcome.  Each time I have tried these resist techniques I am shocked at how well it works. 


The resist was done with a foam stamp I made from a foam door hanger.  It was not large enough for the entire Weathered Clock die, but it was still effective.  I probably would have taken the stamped image off the page anyway.  I used a regular matte medium to stamp the clock and let it dry.  The background was then colored with several colors of Distress Inks.  I sprayed and splattered with water.  I also added a few pinches of copper Perfect Pearls.  I like the way it looks when you sprinkle by hand.  More water fixed the Perfect Pearls in place.  I edged the page in Tissue Tape and added a few bits of map scraps I had on my table from another project I am working on.  The clock images came from a few lovely sheets of paper. One of them was by Bo Bunny and the others came from a large piece of paper I purchased at a specialty paper and book binding store called Hollanders.  There is a plastic clock by Maya Road and a timepiece and game spinner from Tim.


I knew I wanted to make a special embellishment for this page. The charm started with a small capsule I filled with tiny watch parts. I started adding gears, a word stick, a key and a few washers with jump rings.  A hole was created and set with a grommet to tie my charm to the page with a bit of vintage ribbon.  

I started this piece with a left over piece of chipboard from a swap I am currently working on.  I decided that while doing this series of technique challenges I will either do a tag or a chunky book page and then bind them when I am complete. 

Thursday, March 10, 2011

Yet another first

I just love trying new things.  It seems like I am always doing "something" for the first time.  Here is a picture of my first altered scrabble tile pendants. 


I started by creating a small collage on my tiles.  In these, I used napkins and postage stamps.  I intended for these to be finished at this point, so I added foil tape around the edges.  I experimented with folding the extra foil on both the front and the back of the pendant. After completing this experiment, I prefer the cleaner look of folding the extra on the back side. 

The bail was then added to the back. I had some trouble finding them, but Hobby Lobby proved to be the spot.  I purchased two types, one found in the bead area, and another type found with the glass bead making supplies.  I prefer the later, however they are a bit more expensive.

These pendants were then sealed with Glossy Accents.  I did not get a very good finish with my first coat of Glossy Accents.  I think this was user error and lack of experience.  Due to my poor application, I decided to add a second layer.  When I was adding the additional Glossy Accents, I remembered that I had just received an order of watch parts.  I added them last minute, and I love the way they turned out!