Showing posts with label Day of the Dead. Show all posts

Wednesday, October 31, 2012

Sweet Sugar Skulls and Texture Tutorial


Recently I made some delightful replicas of sugar skulls.  The base of  these pieces has a really nice crackle texture, which was achieved with a fantastic product called Kroma Crackle. It is a product that is hard to find, but Alpha Stamps was able to source it.

In this post, I will break out each step to achieve the texture, once I have covered that, the decorating is on you.  Yes, I know it is hard to see the crackle effect, but with so much good stuff from Alpha Stamps, I could not help decking these gals out!  You will see some testure close ups later in the post.  There are lots of great supplies from this tutorial for your very own projects here.


And here are a few more cuties!


To start off, I gave my pieces a good thick coat of gesso.  This helped to give each piece a bit of tooth and made for a good white base to work off off.  Tip:  Use a good artist quality gesso.  There are some really affordable ones out there, but I would pass them by, because you just don't get good coverage with the cheap stuff.


Once you have your gesso down and it has dried, it is time to paint.  Choose the color you want to show through the crackle.  Again, here, white was the best choice for me.  Now the manufacture label advises to use high quality acrylic paint.  I followed suite and used Golden Titanium White, but I have to say I have used this stuff with cheap acrylics and it worked just fine.  


Of course I did not realize I missed painting a few spots on the teeth until I wrote this...  That is a good artistic tip by the way, if your wondering how composition is going on a project, take a picture and look at it.  You will be able to see right away if there are areas that need to be edited or spots that need a bit more embellishment. I can't tell you how many times I need to re-shoot images for my blog because the photos revealed scale issues, glue blobs and all kinds of errors. 


Now it is time to get crackling.  Add a layer of Kroma Crackle to your dry pieces.  The thicker you apply, the larger your cracks will be. You will notice in the picture above that the smaller skulls appear to have color changes.  I think that the product reacted with Masonite in some way.  I did not mind because I was going to be getting them all grungy anyway. 

Please note, this product does take a long time to dry.  There is an "instant" way to crackle that has been made famous my Michael deMeng as outlined here.  I have yet to try it out for a silly reason, I always forget to buy Elmer's school glue...


Here is a close up of the crackle texture on a different project I am working on.  This is a book and the only base I have on this is gesso, I totally forgot to put the acrylic paint on it...but it still worked!  You will notice in some areas, where it was perhaps too thick, the crackle is curling.  It is possible that some of the texture could come off, therefore no matter what, you need to use some sort of sealant at this point.  Use dry brushing with layers of paint to add color.  Or on the book below, I used spray inks.  Again, you would not want to use too much of anything thick as you would lose that yummy crackle.  

The next step is to seal with something pretty fluid as you don't want to lose all of your hard work.  The manufacturer advises to use acrylic fluid medium.  I watered down regular gel medium and it worked just fine.  I also got creative with sealing on the book pictured above as you will see below.   


It occurred to me that there had to be another way to seal the crackle.  I have been on such an UTEE (Ultra Thick Embossing Enamel) kick, that I thought this may be the answer and indeed it was!  I added lots of layers of clear embossing powder with a bit of gold embossing powder sprinkled in as well.  Now I wonder what this little book is going to turn into...stay tuned in to find out.


I hope you enjoyed this little tutorial on texture.  My intent is to always inspire and share my love of good fun products with you.  I hope I achieved that goal today!

Cheers, 

Rhea


Wednesday, January 11, 2012

Day of the Dead Shrine

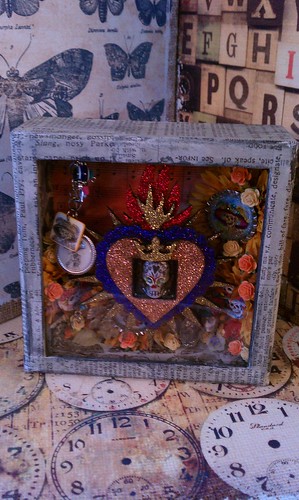
This project has actually been in the works for quite some time.  Loyal followers may recall that a few months ago I did a charm swap with a Day of the Dead theme.  In doing this swap I found a love and respect for this genre of art.  I had received so many awesome charms from my fellow charm lovers and had no idea what I was going to do with them.  This is what I finally came up with and I am pretty happy with the results.

The theme over at Simon Says Stamp and Show this week is a "red letter day." I think Day of the Dead is a very clever take on a red letter day indeed. I love the imagery and art associated with this day of remembrance.


I actually made the inner shrine some time ago as well.  It is made from Masonite and it comes from a wonderful company called Coffee Break Design.  You can also purchase their line of goods from Alpha Stamps.  I simply used stickels to color the shrine and then I added in an extra altered skull I had from making my charms for our swap.  As you may be able to see, I did not get the best results "filling" in my niche with Glossy Accents.  Even though I let it dry and added more material several times, I still ended up with a very inconsistent "resin" type background.  Oh well! 

It was difficult to get good pictures of this piece as I decided to use the acetate that came with this small configurations box from Tim Holtz to "seal" in my shrine.  Because of my artistic choice, I could not get a good picture without a glare.  In the picture above I was trying to get a little closer so that you can see some of the the clever work from a few of my fellow Art Charmers. 


I did do a few things to create depth in this piece.  I added some charms from the top of the box for movement, I mounted my "inner shrine" on a wood block so that it would not sit flush with the back of the box and I also did that with some of the other charms. 


The outside of the box is covered in Tim's new tissue paper from his District Market line.  I LOVE this stuff!  I was daunted by the price tag at first, but I will say, this is a worthy crafty investment.  It was aged with Tim's distress stains in black soot and antique linen...the stains are amazing too.  I resisted investing in them for a while, but it is pointless...the product is amazing.  

I hope you enjoyed seeing this artistic collaboration with my charming friends.  Thanks for stopping by as always!

Cheers, 

Rhea 

Wednesday, October 19, 2011

Sugar Skulls

A recent theme I have been enjoying in my creations is Day of the Dead style art.  This all started with one little charm swap that I recently participated in.  While researching, I learned a lot about this holiday and found tons of inspiration in the theme.  It also reminds me to celebrate my ancestors, who have passed and I don't think I do that enough. 

While shopping one day at a big box store I noticed some paper mache skulls that were on sale in the Halloween section.  I did not purchase them at that moment.  Upon going home, I could not get the idea out of my head to create my own "sugar skull" with one of these.  I went back the next day and bought two skulls all for the bargain price of three dollars.  I knew I wanted to incorporate some flowers for dimension, so I also bought a few stems that were on sale.  Here is what I created.


I started by simply coating the skulls with a very heavy duty gesso.  I then aged the skulls with a "magical potion" that was given to me by a colleague at work.  I have no idea what it is, I only know that it is a homemade concoction that she uses in her Mexican folk art.  It provides the perfect aged look to any piece. 


I then planned out my use of flowers and glued them on.  Very simple really.  


Then came the stickels, and I mean a lot of stickels.  I wanted these pieces to have a lot of texture and a bit of shine, so this is the medium I decided to try.  This took some time and some patience.  Stickels take a long time to dry, so I could only add a little "doodling" at a time, for fear of messing it up.  I did not plan the whole design out, just added my different line patters bit by bit.  


I hope this entry inspires you to try something new with stickels or skulls.  I am truly amazed that my perception of skulls has changed so much due to learning more about Day of the Dead and by creating beauty from something I would not normally gravitate too.  Because of this project, I am also using stickels in a few more works in progress and I am really happy with the results.  What do you think???

Cheers,

Rhea 

Sunday, September 4, 2011

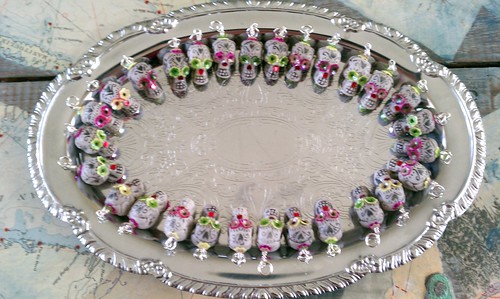
Dia De Los Muertos Milagros

I am happy to be participating in my first swap with a lovely little charm group.  The theme for this swap is Day of the Dead.  I found the subject matter intriguing so I decided to join in.  I am excited to see the result when everything is swapped out.  I will certainly post when the exchange is complete. 

I now love Milagros.  In researching these little babies I fell in love with all kids of imagery and subject matter related to this topic.  I love learning through my artistic experiences.


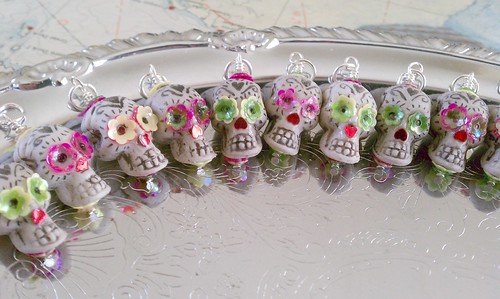
The skull beads were scavenged from a Halloween stretchy bracelet found in a big box craft store.  I thought they were perfect for altering. 


I really lucked out with supplies.  The little sequins were actually in my goody bag from Create.  We got two little samples in our early registration goody bags.  I lucked out and was able to snag a few extras when the promoters were cleaning house.  I think they worked well for the project.  The colors were not my first choice, but I made it work. 


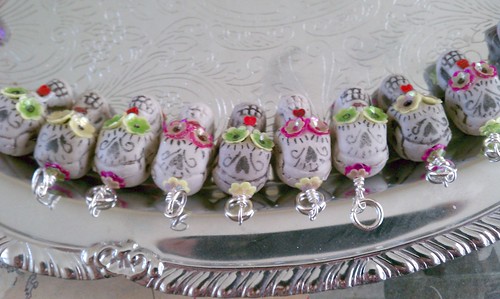
I am tempted to doodle the backs of the skulls.  I think it would add such a nice touch, but it will be time consuming for sure. 

I can see these charm swaps being very addicting.