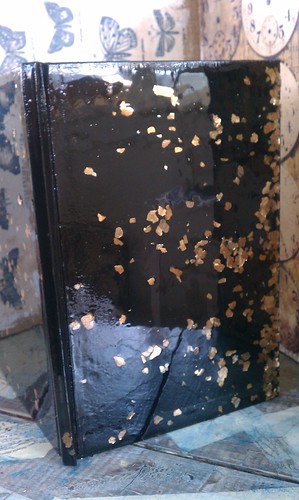
Can you believe that this was once a Bernstein Bears book! The cover has a bit of an issue. I tempted fate and covered it with resin. For my first time ever, I must not have mixed my resin properly. It does not seem to have set up, so the cover accepts dents and fingerprints. My plan is to try and add another coat of resin as I have no other idea of what to do. If any of my online art friends have an answer for me, I am all ears! It did turn out nice looking, I love the mica flakes I embedded in the resin.

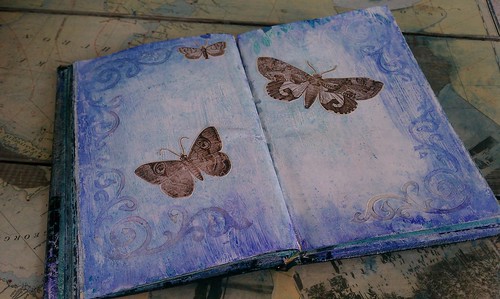
All of our pages were covered in amazing texture. This one above was one of those "happy accidents." I used wax paper in between pages and I used a heat gun to dry things due to impatience. I ended up with a pretty serious wax resist, which was not intended. The birds seen are Kari's custom stamps. I wanted the set so bad, but since I did not indulge in buying them, I did stamp a few images to preserve in my book. The one above was colored with distress stain before being added to my journal.


This is the start of a very large art journal. There are about forty pages in my book, none of them complete but I wanted to share at least a sample. Here I used a stencil to mask the tree and then followed up with some smooch inks add color.

Here are a few more of Kari's birds. Love! In class the background of the stamped image just disappeared for the instructor, unfortunately I was not able to achieve the same results when I tried it at home. Kind of reminds me of going to the hair dresser...I can never get my hair dresser's techniques to work either! :)


The embellishment here, some of Tim Holtz's stickers I had on hand. Some of them (not pictured) I colored with stains before adding to my work in process.

I adore the texture here. If you look closely, you can make out a faint image of some of the graphics that lie underneath my background art. This imprint is another one of the instructor's special stamps. She has giant beautiful stamp sheets with the most wonderful textures. I did not get the chance to try some of the really neat lettering techniques she demoed, but I look forward to trying it out as I add to my book.

Here is another shot of that lovely, but still sticky, resin cover. Please, please art friends, advise if you have a solution, please share!
Oh how wonderful!! And you have given me so many new ideas. I can't wait to see it when you are finished!
ReplyDeleteBig Smiles,
Jenny
I've covered unset resin with a coat of Diamond Glaze, and had it set up nicely.
ReplyDeleteAlso, gorgeous album! I love what you've done with that book!
ReplyDeleteIt has become so beautiful (and I was there to listen to your frustrations with it). You make me want to work on mine.
ReplyDeleteWonderful work of art. Must have been a fabulous class.
ReplyDeleteYour background colors and patterns are so beautiful. I'm especially taken with the butterfly page. I hope you find a solution to the resin problem. I'm really lovin' the shiny covers and the flecks of gold. Can't wait to see it in person.
ReplyDeleteI hope Kia's solution works. I had the same thing happen once when I was making resin paper. I don't think I mixed it long enough.
ReplyDeleteOn the other hand your book looks awesome Rhea!
Hugs Lynn
Rhea,
ReplyDeleteThe one time I tried resin, I had a problem with it remaining sticky and becoming one big fingerprint. I wonder if more resin would just do the same thing. I would be tempted to try the diamond glaze. I love your pages. It will be hard to write your first words.....
I love repurposing children's books. They are so sturdy...but wouldn't have EVER thought to try resin for a cover. Thanks for the info......I'm new to your blog....
ReplyDeletequestion...what tree stencil did you use?