Showing posts with label junk book. Show all posts

Sunday, June 14, 2015

Art all weekend with Kristen Robinson


So I am totally blissed out on art!  I have just returned from a lovely art filled weekend at Smittendust, a beautiful art studio in Diamondale, Michigan.  Dusty, our hostess, had Kristen Robinson teaching classes all weekend long and I indulged in every one of them.  


Dusty made each class participant a name tag filled with relaxing lavender.  What a great token to remember this weekend!  Above you can also see a super sweet tiny house made by Kristen that I won in a raffle.


Day one was right up my alley with the first offering called A tale in my heart - plaster, wax and paperclay shadowbox.  We actually made two pieces as the class progressed.  Kristen is so generous in her teaching and her super duper class kits. 


I love all the interesting texture achieved my mixing all the techniques offered.  I am definately inspired to play with plaster and wax in the future for sure thanks to my exploration during this class.


Day two was Divine Bangles and the title was aptly named.  We did so many different things through the course of the day such as etching, soldering and adding patina.  We also fold formed and did some basic metal working techniques.  As you can see not everything is complete, I have a bunch more wire and some assembly to do soon and I am really looking forward to it.


Then on to day three with Grunged up and Glamorous - Upcycled Journal.  I had so much fun playing with these ideas and techniques.  


There are lots of transparent elements through the use of packaging, upcycled materials and glassine. I loved adding lots of stitching with a sewing machine too.  Thanks to my art gal Joanne for sharing and a few teaching moments on her machine too.


One of the stickers from our cute kit boxes wandered into my book.  It is a sweet reminder of the day and this little junk journal is the perfect home for it.


These pages are filled with all kinds of fun.  I used resin paper, strings, feathers, tatted butterflies...whatever I could find to create texture and interest.


I was able to utilize lots of resin elements I had on hand.  Finding the opportunity to incorporate previously made components is always a good thing.


Here is another peek at my fantastic book as a whole.  It is really something that needs to be seen in person, the pictures just do not capture how special it really is.


Thanks to all who actually made it to the end here!  It was such a great weekend and it really did deserve a nice long homage!  If you are ever offered the chance to take one of Kristen's classes, I highly recommend it.

Cheers,

Rhea


Saturday, April 5, 2014

Cartographer Journey Journal


I was super excited to make this project for Alpha Stamps using all the newest Tim Holtz goodies alongside a lovely paper line called Cartographer by Prima.  Everything was made easy with the use of Xyron.  Here is a full supply list with all my goodies!  P.S.  There is a video tour at the end if you are so inclined.   


On the cover I used different forms of vintage photo to color my cover.  Even though Tim does a nice job of aging it, I love the effect of the watered down stain and ink.  The spinners still move around which adds a fun element.


Inside I used lots of travel themed ephemera and added lots of pockets.  It is my usual busy haphazard collage style.


I love the hot air balloon images.  There is something that intrigues me about these, perhaps I will have to take a ride some day.


This layout is filled with lots of images from Alpha Stamps.  The vintage Paris postcard collage sheet was a perfect addition to this project.


The new ephemera sets from Tim and the found relative cards are simply amazing and made for great vintage additions to my sturdy book.


Each page is actually made of chipboard to ensure stability as I like to layer lots of stuff and add embellishments.


The philosophy tags I added inside can still move as I matted them with stickers that came with the cartographer paper.  It makes me so happy to have interaction and movement in my work.


On the back I included lots of envelops and pockets to tuck things in.  This is yet another form of interaction that I often enjoy in my work.

I hope you found a bit of inspiration in today's entry.  This project is one of my favorites in a while, so I think I am off to make a video to add to this post shortly!

Cheers,

Rhea

And here it is, a real peek inside:


Saturday, May 25, 2013

Junk Book: Ribbon Binding Tutorial


After many requests, here is a photo tutorial for how to assemble this simple junk book with a ribbon binding. With the right stuff on hand, I was able to put this together in  just a few hours.  Here is a link for all items used over at Alpha Stamps.  I have also included a video tour at the end, if you are inclined to listen to me blather on about this fun little book.


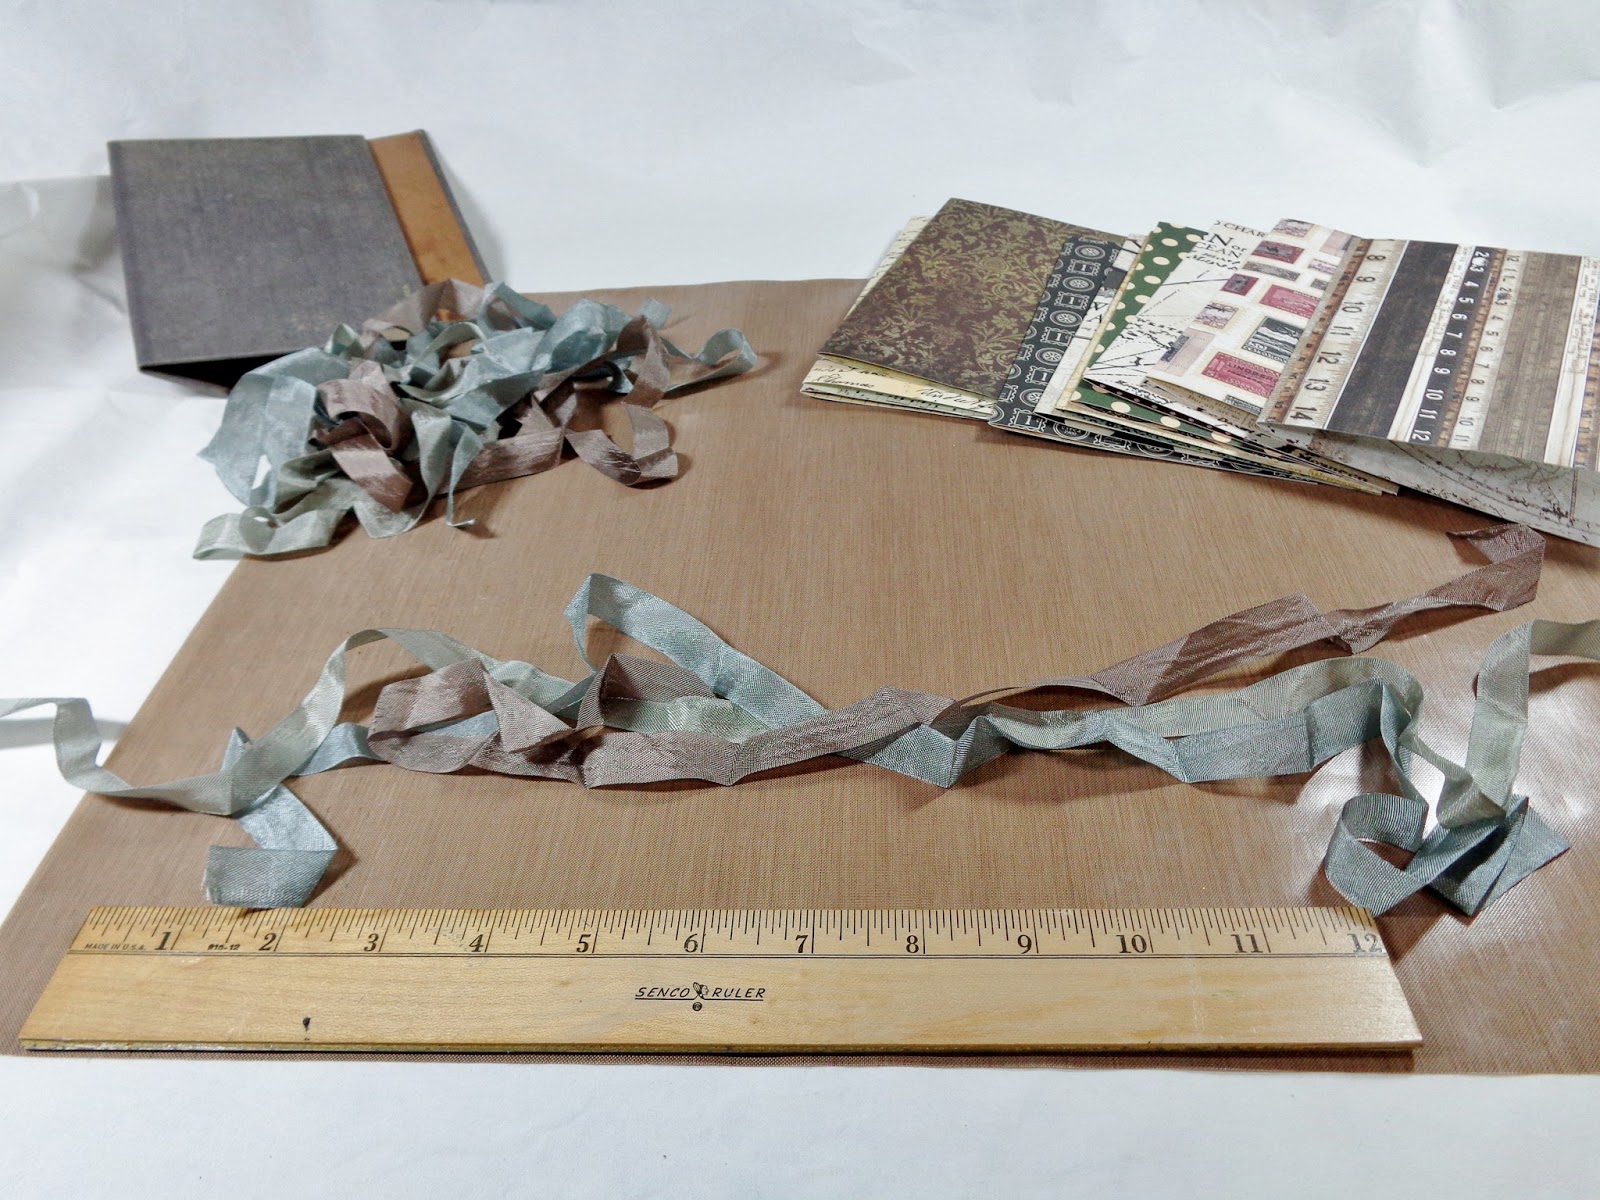
I started with a few supplies from Alpha Stamps:

Tim Holtz Worn Cover
Seam Binding
Charms
Sturdy Card stock Scrapbook Paper
pockets, tags, 
Dazzles, Tim Holtz Rub ons.
Tim Holtz mini cling stamps. (fell in love!)


To start off, I cut 10 pieces of quality scrapbook paper to measure 8 3/4 inches long by 6 1/2 inches tall.


I creased each of them in half with a bone folder to make my initial ten signatures.


I cut each piece of seam binding randomly to achieve a staggered look.  The strands of ribbon will need to be twice the height of your book plus extra for tying and hanging.  I would say each of my pieces are at least twenty inches.  I tend to work around measuring when I can.  You will need one strand for each signature, for this book, I had ten.


In order to mimic gilded pages, I added silver gilders paste to the edges  It works very nice on paper as well as metal and wood.  


Each signature is tied into the book with a bit of seam binding or ribbon.  I tie a double not and be sure that the ribbon is lying where I want it.


Charms are then added to some of the ribbon strands.  It is also a good idea to trim up the ends to make it appear balanced and finished.


And then you begin to embellish.  I just love the new fairy vials, I simply added a postal stamp inside this one to make a clever charm.  If you would like to take a closer look inside, and to find a few tips and tricks, I have included a video tour.


Cheers, 

Rhea


Wednesday, May 22, 2013

Travel Junk Book


I just had to make another great junk book with a ton of great stuff from Alpha Stamps.  The response to my last one included many requests as to how to put on of these together, so here is a tutorial and video tour. The new worn cover by Tim Holtz, allowed for a super simple version of this book, which I created on one Sunday morning.  Yes, indeed, you heard that right, I made this in a morning craft session...from start to finish.


This time I chose to got with a travel theme for my book.  I chose a few charms and talisman to give my book a bit of movement and soul.  I love the capsule where there is a postal stamp tucked inside.  I also love the compass rose and the Eiffel Tower, great nods to the theme. 


In this version of my junk book I used three different colors of seam binding instead of dying my own silk ribbon.  This took off a lot of time and mess off the project and still provided a great result with varying color.  


Inside I used all kids of fun stuff.  I would go through my packages of stuff in my stash, choose a pile of ephemera, and then flip through and apply everything I chose from that selection.  


Here is just a tiny sample of what lies inside.  Lots of pockets, bits of tape, things tucked inside and tons of postal goodness.  I just adore the postal theme.  I seriously can't get enough.


Stay tuned.  Later this week I will be posting a video tour of this book along with a photo tutorial on how to assemble.

Cheers, 

Rhea

Wednesday, April 17, 2013

Graphic 45 Audition, Take II: Junque Book


I have already learned so much from the audition experience for Graphic 45's 2013 Design Team and I am so blessed to be able to participate.  For part two we have been asked to make a video. I chose to highlight three different projects that represent me as a designer.  At this point, I think that I have done what I can to put my best efforts out there into the universe and not matter the outcome, I have benefited from this journey so very much. 

In order to show my ability to produce, I decided to make a new piece. I wanted to put my energy into the project that showcased their product, but also captured my intention and hopefulness about taking my art to the next level.   


I chose all kinds of fun bits of junk to the binding.  Each of these has special meaning to me personally.  I talk about their significance in my video audition. 


I forgot to mention in my tour my brilliant use of gilders paste.  I used it to literally gild the edges of my pages and I just love the effect. 


This book turned out way thicker than I imagined!  There are 36 pages of Graphic 45 goodness.


And here is the video tour below.  I talk a lot more about my book and you get to see inside.  Please consider subscribing, who knows, I just may be posting tutorials for one of the very best paper companies soon!


Thank you so much for all the wonderful supportive energy.  It makes my heart swell to know that I have many people rooting for me!

Cheers,

Rhea

Thursday, April 12, 2012

Mail Art Junque Journal

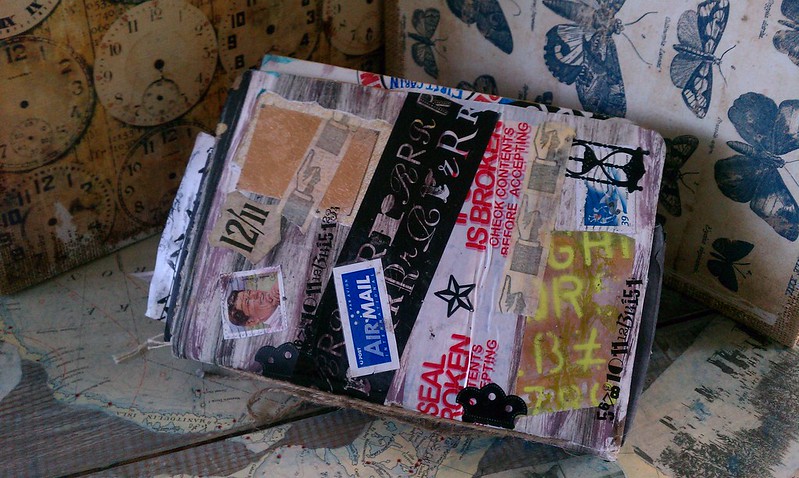
I am delighted to be able to finally show off this treasure.  At one point I thought this lovely little book was lost forever, but it resurfaced and I am so grateful.  This journal started out as a Mail Art journal,  round robin style swap through Swap-bot.  When it was returned to me there were still several pages unfinished, so I just added more of my own mail art and lots of other paper junque.  It is so fun and packed with goodies. 

I am showing off a few pictures to entice you, but I am also posting a You Tube video, as I think this will better capture all of the yummy mail art goodness inside. 


Lots of people contributed to the cover and I love this aspect of the journal.  It is hard to imagine what it looked like before I sent it out into the world.  I wish I had a "before" shot to share with you.  I picked up a few of these handmade books at an art student's garage sale.  In hindsight, I should have grabbed more than the three I did. 


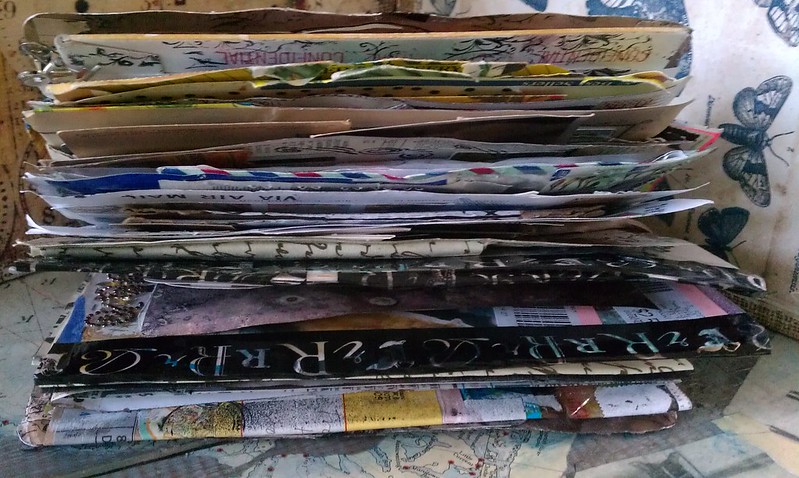
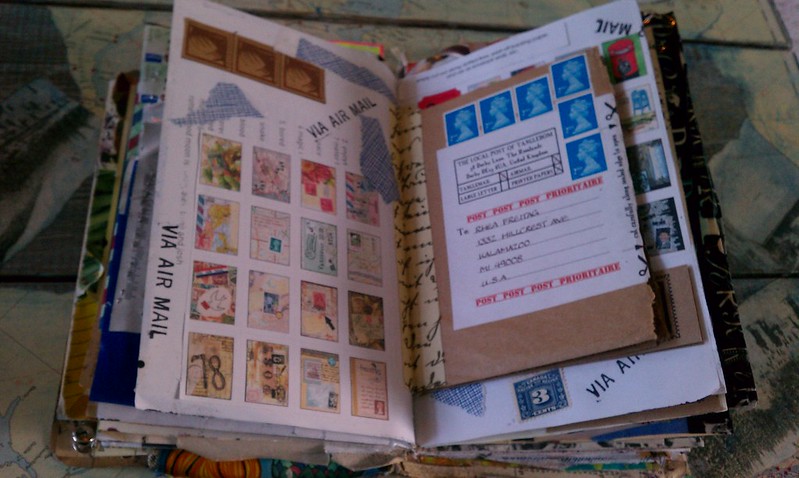
Here you can see how thick this book really is.  There are a ton of flaps and fold outs I made simply by creatively attaching envelopes with  decorative tape.  You would not believe how much decorative tape there is in this book. It makes for really good collage fodder.


These are two pieces of mail art that I had received and added to the book before sending it out.  I just adore the mermaid envelope!


Here is another great spread that is true to the original theme.  These pages were completed by Mandy, aka Farstarr.  She has a lovely etsy shop worth checking out!


Here is another one of my favorite spreads.  I made this one from wonderful mail art items I recieved from Su, aka, TangleCrafts.  She also has a wonderful etsy, filled with zines and all sorts of mail art fun.  The brown insert is actually a self mailing zine that is all mail art themed and just filled with lots of useful information and inspiration.  I thought this was a clever way to add this to my book.  I made a simple hinge with gaffer tape from 7 gypsies.

Hopefully I have teased you enough to want to take a gander at the full tour of my fun journal!  Enjoy!


Sunday, January 1, 2012

Junque Book: Video Tour

So I have found these little videos to be a fun way to interact with my readers.  Surprise, surprise because I hate to be on camera.  For some reason, I feel okay behind the scenes and I am going with it. 

I decided to post a video clip showing off the inside of my very chunky Christmas Junque Journal.   Sometimes it is hard to capture the true feel of a piece in a blog entry with just photos and words. This way, readers can hear the wonderful little jingle of the bells, learn about some of the secret bits of junk and hopefully get a little inspiration to save or repurpose something for your own art journal. 

You can read more about my first junque book journey here.  I liked that one so much I had to make my own, which is detailed here.   There were so many comments, inquiries and such overall positive feedback about this project that I also did a tutorial here.  Hopefully you have enjoyed sharing my journey, I know I have found joy in sharing it!


Thanks for stopping by today and always.  I appreciate my readers so very much.  Happy New Year to each and every one of you, may 2012 bring you your soul's desire!

Cheers,

Rhea

P.S. Nails done with Sally Hansen Salon Effects: Misbehaved.  LOVE this product! 

Sunday, December 11, 2011

Junque Book: How to

So as promised, I am going to share with you some (poor quality) pictures depicting how I assembled my holiday junque books.  I am sorry the lighting in my craft area is so poor!  What will be shown here is just how to assemble the book, it is up to you to personalize it with what you put inside.  Here is one of the books I have finished assembling, but there is much work to be done inside.  You will see links at the bottom to see inside a few of my books.  I have also made a video tour of my completed book, if you want to check that out.


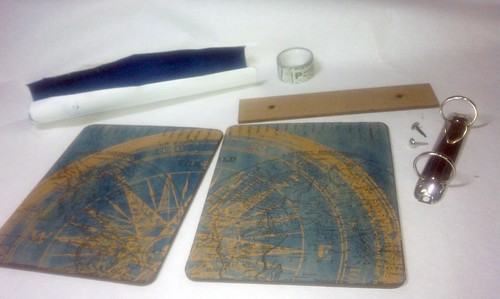
To create the basic book you will need:
Wendy Vecchi Art Parts: creative covers, size large
Tim Holtz ring binders, size large
Tim Holtz kraft paper
Ranger Sticky Backed Canvas
Tissue Tape
Yes Paste
Distress Stains
Duct Tape
Basic Craft Supplies: pen, scissors


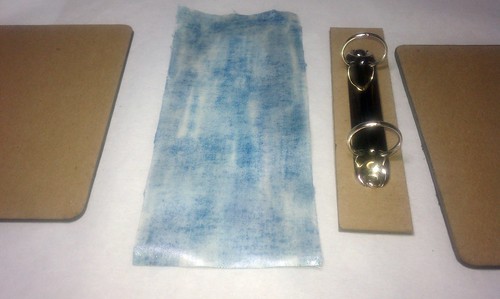
Get your cover ready by using one piece of the cover to trace and cut out your cover design for both front and back.  I chose Tim Holtz's kraft paper.  I really like how it accepts the stains and how sturdy it is.  Cut out your paper and then color how ever you choose.  On my first journal I buffed in distress inks with an applicator, in this project I used the distress stain. 

Next, prepare your sticky backed canvas.  This will act as the binding of our project.  I simply colored mine with the distress stain again.  You can add some more decorative elements here though.  You could stamp a texture stamp, paint or even emboss a design on your spine before binding if you choose.  Just remember this will eventually bend, so be sure whatever application you decide on can bend once finished.  As you can see above, mine curled a bit when I used a heat tool to dry the stain, it is all good.


Your package of Art Parts will come with extra spines. You have the choice to orientate your book either way.  Above I have laid out the proper one for this project. 


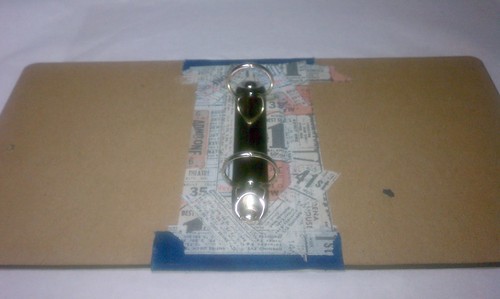
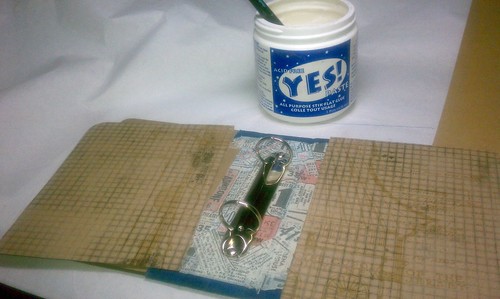
Now simply attach the binder ring to the spine using the brads provided.  I learned a trick that helps, but has not perfected the issue of being able to see the brads through the canvas.  I then added a bit of duct tape to the back of the spine.  It does not matter what this looks like as the canvas will cover it, my duct tape was camouflage in pattern.  This assists in covering up the tails of the brads.  You will still be able to see them a bit after assembling.  Next time I make one, I may try two layers of duct tape.  I found this also helps the brads to stay better as well. 


I then laid it out to plan the assembly.  The band of sticky back canvas I used was four inches.  I cut this off the bottom of one sheet.  You will need to leave a bit of a gap so that there is room for the covers to move.


 Peel the backing from the canvas and carefully place the spine on top.


Add each cover to the binding as well.  Be sure to line everything up as straight as you can.


Simply fold up the extra bit of canvas binding material on the top and bottom as shown. Burnish the canvas down well and be sure the canvas has made good contact with the art parts. 


Now, I did not like the naked look of the art parts on the inside of my book.  So to solve this issue I used a very strong paper adhesive, Yes Paste, along with some tissue tape to cover this area.  The tissue tape worked well as I was able to rip bits and layer to get around all of the binder.  It is a low tack tape, so adhering this on its own would probably not stand up to the wear and tear I plan on putting on this book. I was sure to use a lot of the paste in the cracks between each book component and get every bit of the tape tacked down.   


To finish the inside, I used my assembled book as a template to cut out pieces to fit the inside.  Again I chose kraft paper as it is tough and really adheres the the covers with the help of the Yes Paste. I covered the inside almost to the edge of the spine.   


As you can gather, I ended up disliking the blue and so it ended up brown.  I simply went back over everything with more stain.  Now the blue shows through a bit and I love the layers of color.  To see inside of my book more click here.  Below you can also see the first book I made for a secret Santa.  To see inside of Beth's book click here.

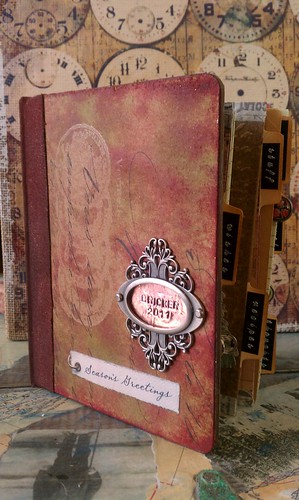
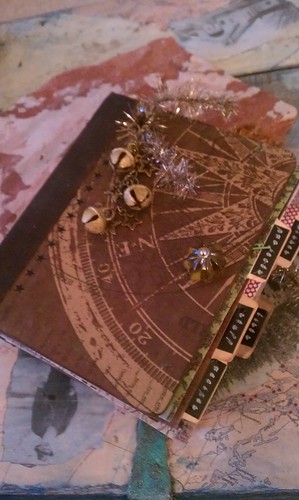
 If your playing along at home, now is the time to embellish at will.  I added a book plate with a personalized message on one, a knob on another.  You could write out a word in grunge board or chip board. Add a closure or a window peeking inside.  I took a big risk and put a hole right in the cover in order to add a large dangle of a charm complete with bells, stars and vintage tinsel. 


My inside pages are made from more kraft paper and other holiday paper as well. You will have to use the links above to browse inside.  Most pages I simply glued together two pieces of paper and finished the edges with tissue tape.  I added tabs, reproduction holiday ephemera, pockets, envelopes, recipe cards, junk mail, past Christmas card covers and anything that inspired me. 

Some other ideas:  Save your everyday ephemera, now is the perfect time to collect things such as tags from gifts, bits of wrapping paper, ribbons, envelopes, packaging from gifts, Christmas cards, holiday photos from family etc.  This is what will make your book uniquely yours. To make your journal ecclectic attach your junque with decorative tape, staples, paper clips, binder clips.  Keep your to do lists, holiday invitations, programs from holiday events and pieces of your kids holiday school work inside.  Make it your own and don't think twice about it, just stuff it inside and document your busy holiday season.  This will be a treasure for years to come.

I hope you found this information helpful and inspirational. 

Merry Christmas!

Rhea