Showing posts with label vintage. Show all posts

Saturday, April 25, 2015

American Vintage Assemblage


I was inspired to create this project as soon as I saw the new American Vintage paper line come out from 7 Gypsies.  I slowly began to gather found objects as well as my coveted 7 Gypsies metal elements that I knew would complement the theme in order to create this fun vintage letterblock tray.


It takes some patience to make a project with this many elements, the key is to be patient and do it in stages.  Sometimes walking away from the project to let glue dry will allow you to come back and see the whole things with fresh eyes. I find this tactic really helps me to fill in every inch of my art, which contributes to my own personal style.  After coming back to my work a niche will be calling out for extra junk and the search will then start for another element to add.


When I make these assemblage style trays, I try to attach things at many different layers of depth.  In this project I used some scrap cardboard to prop up some of my ephemera and make it stand out.


Another little secret I will share is to mist your project with a sheer Tattered Angels Glimmer Mist at the end to cover up any glue that may have escaped. This trick will not totally cover the glue, but it will distract from it at least a little bit.


I mixed in lots of great elements from the 7 Gypsies line along with my own found elements and treasures to pull this piece off.  I love how the old and the new blend seamlessly together. It is fun to root through your junk drawers and your craft stash to come up with fun personal things to add to your tray. Another great idea would be to plan to make one of these before a road trip and then purposefully seek out your own pressed pennies, ticket stubs and ephemera to capture a memory in a whole new way!


You may have noticed that the base of my tray has been altered a little bit as well.  I used a scrap of paper towel to buff on a layer of patina colored gilders paste to add a weathered look to the wood.


I hope that this post has inspired to go through your trinkets and create a letterblock tray that captures a special trip or memory!

***This post was also featured here!***

Cheers, 

Rhea

Saturday, March 21, 2015

7 Gypsies Serengeti Receipt Holder


Today I took some time to finally play with some of my new goodies from Canvas Corp.  I created this mixed media receipt holder with the Serengeti paper as the springboard for inspiration.


In order to add a layer of texture I used a few fun things. One is resin covered tissue that has been ripped and torn.  I also used some tissue tape.  The tissue tape was added over the edges to break up the hard lines of the receipt holder.    


Yet another fun element in this project are the patches.  I added them with vintage pins in the brass color.  


I am always trying to fill in every nook and cranny.  To that end, I also added some labels that I embellished with rub ons.  


I was able to sneak in a bit of twine by attaching it to a few of the global tags.  This adds more texture and a bit of movement.  


 Lots of the mini ephemera and vintage photos were used as well. 


This project was so super fun and it really came together quick.


As I created this I thought of an old friend of mine.  She is doing everthing she can right now to find a way to volunteer in Africa to save animals, specifiacally rhinos.  I wish her the best in achieving her mighty dream!


I hope you enjoyed today's post.  As always I treasure being able to share my goods with you all.  It inspires me so!

Cheers, 

Rhea


Saturday, May 3, 2014

Spring Time Book for Alpha Stamps


I absolutely love all the new spring time goodies I got my hands on from Alpha Stamps!


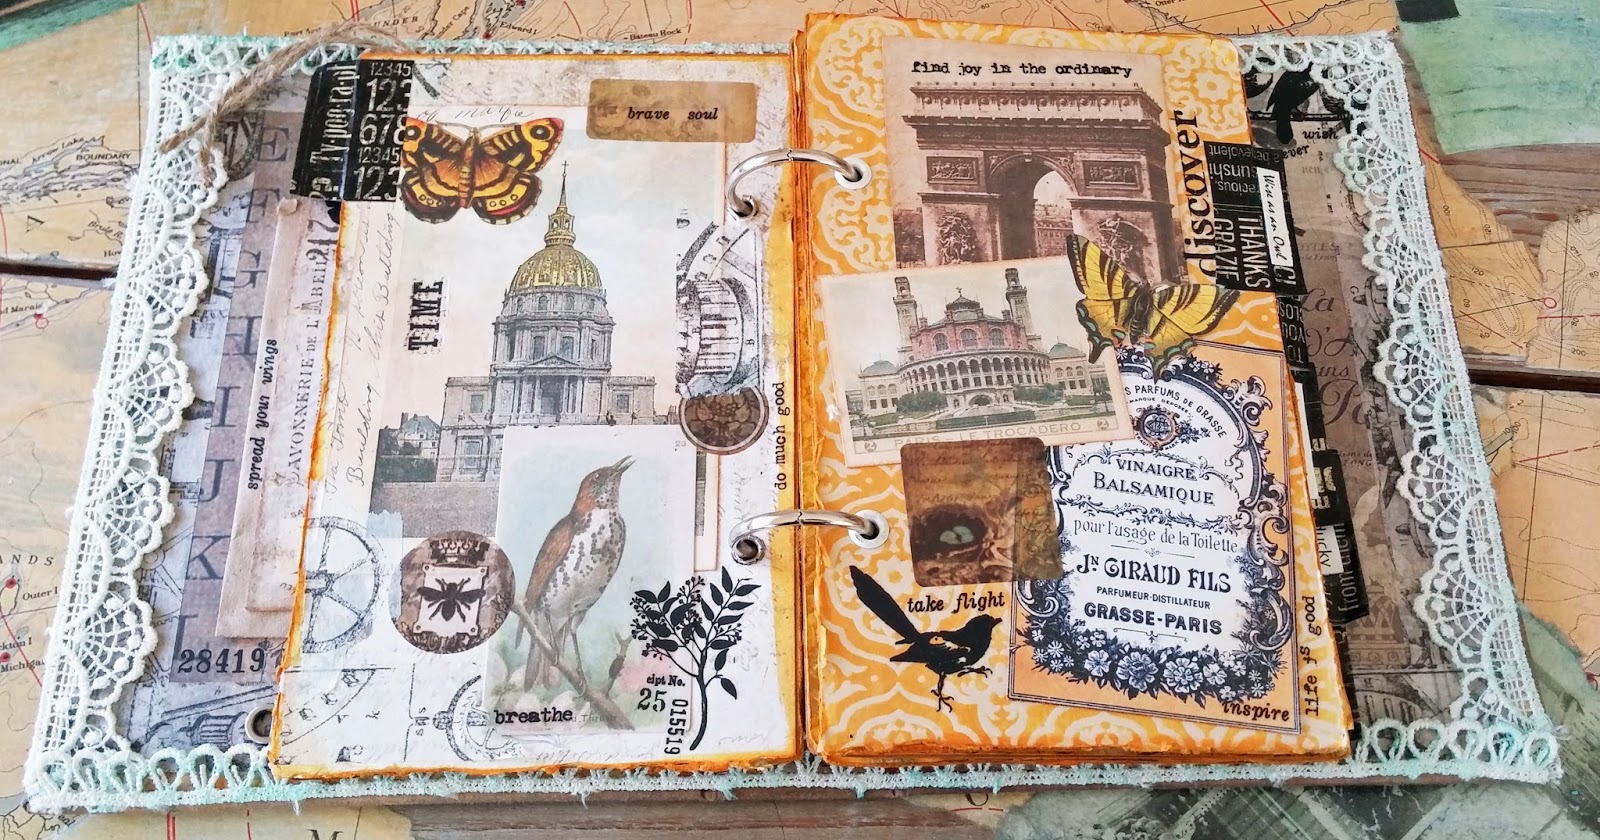
I could not wait to make this fun Spring Time in Paris Collage book.  It was so super easy with the help of my trusty goodies from Xyron.


I used a bit of Wild Honey Stain by Tim Holtz to unite the book.


To age the lovely crochet ribbon edges I actually added gilders paste to the material.  It cast a mild blue hue and I just love it.


Some of my left over Ice Resin tissue flowers ended up in my book.


The butterfly Dresden scrap made for a perfect addition.


Lots of Tim Holtz rub ons were used through out the project.  My secret is to try to use up the whole sheet so I don't have left overs.  That way I keep layering and layering them in as well.


The Tim Holtz ephemera made for great embellishments along with collage images from Alpha Stamps.


Cheers,

Rhea

Saturday, April 5, 2014

Cartographer Journey Journal


I was super excited to make this project for Alpha Stamps using all the newest Tim Holtz goodies alongside a lovely paper line called Cartographer by Prima.  Everything was made easy with the use of Xyron.  Here is a full supply list with all my goodies!  P.S.  There is a video tour at the end if you are so inclined.   


On the cover I used different forms of vintage photo to color my cover.  Even though Tim does a nice job of aging it, I love the effect of the watered down stain and ink.  The spinners still move around which adds a fun element.


Inside I used lots of travel themed ephemera and added lots of pockets.  It is my usual busy haphazard collage style.


I love the hot air balloon images.  There is something that intrigues me about these, perhaps I will have to take a ride some day.


This layout is filled with lots of images from Alpha Stamps.  The vintage Paris postcard collage sheet was a perfect addition to this project.


The new ephemera sets from Tim and the found relative cards are simply amazing and made for great vintage additions to my sturdy book.


Each page is actually made of chipboard to ensure stability as I like to layer lots of stuff and add embellishments.


The philosophy tags I added inside can still move as I matted them with stickers that came with the cartographer paper.  It makes me so happy to have interaction and movement in my work.


On the back I included lots of envelops and pockets to tuck things in.  This is yet another form of interaction that I often enjoy in my work.

I hope you found a bit of inspiration in today's entry.  This project is one of my favorites in a while, so I think I am off to make a video to add to this post shortly!

Cheers,

Rhea

And here it is, a real peek inside:


Tuesday, February 11, 2014

Sweet Sentiments Valentine Wreath


This project started out with a wooden wreath base I picked up at a local garage sale. I am always on the hunt for things with flat surfaces which can be easily altered or adorned with paper.   With the heart motif, it was destined to be altered with Graphic 45's Sweet Sentiments just in time for Valentines Day.  


Sweet Sentiments Heart Wreath
Sweet Sentiments 12x12 paper
May Arts Ribbon
Petaloo Flowers
Distress Ink and Stain in Tea Dye
Adhesive
Wooden Heart Wreath Base
Gesso


To create a nice base I painted on a layer of gesso and once it was dry, I aged it with Distress Stain in Tea Dye.  The paper was added in layers that were stitched together on a sewing machine.  I am not a seamstress by any means, but I do like to add thread as a design element from time to time. 


In order to make the edges of my central image disappear, I fussy cut small elements and camoflagued the edge.  This little trick makes such a huge difference.


Another trick used in this project was to age my ribbons from May Arts.  The ribbon was pink and white to start out.  I thought it was a bit too stark, so I simply wet the ribbon and then added some distress stain.  I love how the aged look really pulls it all together! 


So the next time your shopping around a garage sale or estate sale, be sure to keep your mind open to finding fun things to alter. 

Cheers, 

Rhea


Monday, January 20, 2014

Couture Letterbox Tray


Today I decided to celebrate my day off with an art project done just for me.  It has been ages since I have made art not intended for one of my design teams, and I have to say the project came together effortlessly.


I embraced the full color palate of the Couture paper line by Graphic 45.  It has some really lovely sentiments and messages that are good reminders as I am taking better care of my physical body.  Hopefully soon the efforts will be able to be seen in my own new style.  It is coming this year: 40...and I hope to be fabulous and not that other f word.


This "couture" stand is made from an old sewing machine part and a piece of Graphic 45 chipboard.  I just love using unique things in my stash to make a project have my own individual flair.


In the "classy" box above I used an old shoe clip to back the card stock sticker.  This made for great texture and added another great fashion themed embellishment.


I added a precious typewriter key along with a few black vintage snaps I had in my stash.  Again, the snaps made for a great re-purposed decoration in this assemblage.


In this cubby I added a bezel from Spellbinders I filled with Ice Resin.  I stuck this word right on top of the saying "Isn't she lovely."  It is a good secret reminder for me to remember and believe that sentiment.  A vintage button, a few more snaps and one of the great new shabby chic staples finished out this section of the piece.


More reminders to accept myself and remember by beauty.


I thought the crown was fitting for this saying from Coco Chanel.


To finish out my tray, I peppered in lots of color with a few bunches of paper flowers.  I think this element really makes the piece pop and gives the eyes places to wander. 

Thank you so much for stopping by.  It was so much fun to create something just for me!

Cheers,

Rhea

Monday, January 6, 2014

Favorite project from 2013: Typography Tray


I had fully meant to do a year in review post, but somehow I never got around to it.  I was super excited to be revived into some sort of memoir post from a prompt on Natalie Kalback's 2014 Creative Jump start. The task posed to all the "jumpers" is to share their favorite project from 2013.   It was tough to narrow down, but this Typography Letterbox Tray is my pick.


This project was previously featured on Paper Crafter's Library, so it is also nice to be able to document this project in my own little corner of the blogging universe.


The focal for this piece is the lovely Typography paper by Graphic 45.  I fell in love with this paper line for sure.


I like to incorporate unique junk into my assemblage pieces to create a story.  Here you can see an old typewriter key as well as a few old pen nibs.


Lots of flowers by Petaloo were used to add lots of color and texture to this collection.


The sentiments in this paper line are just perfect for the artist.


I love this embossed butterfly, dusted in gilders paste.  I also used it in copper along the edges of the box for yummy texture.  


More junk by the way of a jack, a key, some tags and wood block accents add more unique interest.


I just love the rich palate, so unlike my usual work but I embraced it!


The typewriter metal embellishment was a perfect fit for this project.  Assemblage continues to be my favorite art form to date.


I hope you found a little bit of inspiration along the way. Thank you so much for stopping by!

Cheers, 

Rhea