Showing posts with label book. Show all posts

Saturday, May 3, 2014

Spring Time Book for Alpha Stamps


I absolutely love all the new spring time goodies I got my hands on from Alpha Stamps!


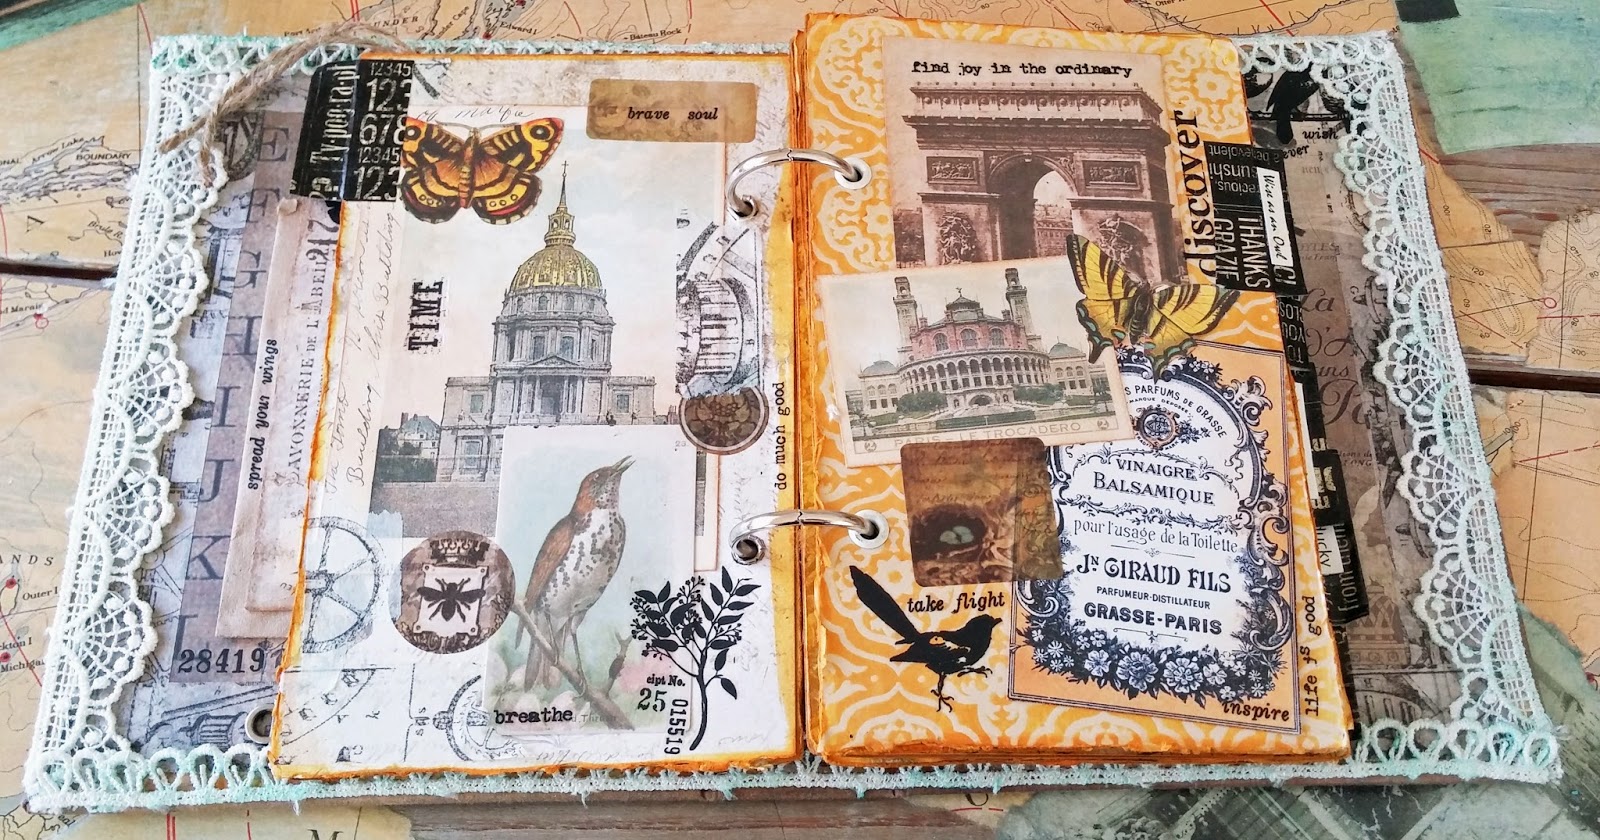
I could not wait to make this fun Spring Time in Paris Collage book.  It was so super easy with the help of my trusty goodies from Xyron.


I used a bit of Wild Honey Stain by Tim Holtz to unite the book.


To age the lovely crochet ribbon edges I actually added gilders paste to the material.  It cast a mild blue hue and I just love it.


Some of my left over Ice Resin tissue flowers ended up in my book.


The butterfly Dresden scrap made for a perfect addition.


Lots of Tim Holtz rub ons were used through out the project.  My secret is to try to use up the whole sheet so I don't have left overs.  That way I keep layering and layering them in as well.


The Tim Holtz ephemera made for great embellishments along with collage images from Alpha Stamps.


Cheers,

Rhea

Saturday, November 9, 2013

Fall Journal with Texture Tutorial


Fall is certainly my most favorite season ever.  For some reason, it just really inspires me.  With this in mind, I set out to create a fun Fall Journal to record my thoughts, memories and maybe even a few poems.


I will be sharing a few techniques along the way today as well.  On the cover you can see some great imagery from Alpha Stamps. For a full list of all the goodies I used from Alpha Stamps you can go right here. Another easy addition to this cover are French Country stickers from Graphic 45.


I love this cute little tiny oak leaf garland.  Also notice the great texture I got by layering stencils.  Here I used matte medium with my honey comb stencil and then aged it once the medium was dry.


Here you can see the detail of leaves I made with glossy card stock, alcohol inks and the tattered leaves stamps from Tim Holtz.


I started by choosing a few warm colors of ink.  I dropped them on the glossy paper and then blotted with a ink dabber doused with blending solution.


This is a few of the papers I made.  I did not mind that I still had some large spots on the paper, it ended up adding great interest to the finished leaves.


Here are the leaves after stamping them with permanent ink and then fussy cutting them out.  I am always happy when I can create my own embellishments from what I have on hand.


This tag below highlights the amazing texture you can get from using the different pastes that are now on the market.  Here I chose to use molding paste along with my stencil.


I started out by layering with my spray inks and stencils.


I then added layers of stain and inks. It helps to water down the stains before swirling the tags in the color.  I don't mind when my inks smear either, it adds interest to the piece.


 Another way to add a layer of color is with an ink pad and an ink applicator. This way it provides a softer and more reliable pattern.


Here are a bunch of my tags after playing with my inks and stencils. Notice I have gone back and added inks or stains to most of the edges of my pockets and tags.  This adds a great frame to any element.


Once there is a base layer of color and pattern, I take it a step further and add more texture with the paste. An inverted spatula works really well for this.


I like to use deli paper when I am doing this type of work.  I can mess up a sheet and easily clean up my spot with a quick toss.  Be sure to clean up your stencils promptly after applying pastes through them!


After the paste is dry I add more ink or gilders paste to provide yet another design element to the tag.


I am looking forward to curling up with a nice warm drink and journaling this past fall season.


I have entries planned for my recent Upper Peninsula vacation...


Perhaps a few fall poems...


And maybe even a doodle or two...


I hope you enjoyed this rather lengthy post of my Fall Journal filled with fun texture.

Cheers,

Rhea


Friday, October 25, 2013

Steampunk Spells Handmade Book Tutorial


This little Steampunk Spells book I made for Graphic 45 was so easy to alter and I am going to show you just how I did it, so be sure to check out the tutorial in my post. 


Supplies:
Old Book
Steampunk Spells 12x12 paper
Steampunk Spells 8x8 paper
Steampunk Spells Chipboard 1
Steampunk Spells Cardstock Stickers
Steampunk Spells Alphabet Stickers
Steampunk SpellsTags and Envelopes
Steampunk Spells Banners
Distress ink and Stain: Black Soot
Scor-Pal
Xyron Mega Runner
Seam Binding in Black and Spice
Craft Knife


For this project I was inspired to use the ribbon binding technique in yet another way.  This time I decided to upcycle an old book I had on hand.


To start out, I used a craft knife to remove the inside of the book.  Be very careful not to cut too deep.  Don’t forget to save the inside pages for other projects.  This text is in French, I think I forgot I even had this book in my stash. 


Next I chose a 12x12 piece of scrapbook paper for my cover. 


I cut the paper large enough for about an extra inch of paper surrounding the cover.  I have always been one to work around measuring. 


I used the Scor-pal to guide my creases for my folds to wrap the cover. 


A quick adhesive was used as I folded down all my edges.  I really love my recent discovery of “dry” adhesives!


Next I folded my spine to break it in a bit and I cut and scored my signatures. The paper will need to be just less than double the width of your desired page size.    The size will be dependent on your book.   You simply score down the middle of your paper so you can tie in your pages. 


For the last step, simply tie in each of your paper signatures.  I chose to use seam binding from Alpha Stamps.   This time I chose to go with classic bows instead of tying uniformly at the bottom.  I like the volume and texture the seam binding provides.   Now you have a fun altered book or photo album to document your spooky Halloween season.  


Happy Halloween folks, I hope you enjoyed and found a bit of inspiration. 

Cheers, 

Rhea

Saturday, June 15, 2013

Well Traveled Shadowbox Book


When these shadowbox books by Tim Holtz came out I knew I would absolutely have to make one.  Lucky for me, Alpha Stamps decided to carry them, so I got to create one just for them!


I love the brass frame I used to encase some random numbers.  The word "journey" was laid out with cirque alpha stickers. 


Throughout the project I used a ton of Tim's Elements Tissue Tape.  This worked really well for framing my front page out, as well as covering the edges of each little compartment. 


I went with the Well Traveled theme once again since it would compliment my selection of trinkets for the inside.


Sadly, this was the last on of my typo bulbs, they were fun while they lasted!


In these little cubbies you will find a cool brass arrow, a teeny tiny compass, and a perfect clock face to accent the theme.  The wood doors are a nice touch too, I just wish I made them with the ability to open.  Instead, I popped them out a bit by adding some foam behind them to add some depth.


The bigger compass is one of my elements in this project, as I believe it represents direction and purpose.  It was altered a little with the help of silver gilders paste.


The dream placket below has been in my stash for a while.  Again, I used a bit of silver gilders paste to add some age and dimension to the piece.  The word was in a bright blue that did not go with my color palate so this addition really helped it to fit in.


In order to get the words to show up on the word band above, white gilders paste was used .  


I hope you found a bit of  inspiration in my shadowbox book!  It was really fun to do assemblage work again, as this really is my absolute favorite way to go when it comes to art. 

Cheers, 


Rhea