Showing posts with label Valentine's Day. Show all posts

Wednesday, February 4, 2015

Timeless Valentine


This lovely card was made with lots of great stuff from Canvas Corp.  The base of the card was misted with red, pink and bronze Glimmer Mist and I also added lots of paper and embellishments from 7 Gypsies.


The challenge was to send a card to someone you usually would not send a Valentine to.  I had just had a nice long chat with my sister, so it was she that inspired this fun card that actually made it in the mail.


I crafted a layered heart with burlap, paper as well as some 7 Gypsies tissue paper that had been covered in Ice Resin.  I love the translucent look of this element.


I stumbled across an old clock die cut that was coated in gesso, embossed and later distressed and sanded that added nice compliment to the heart focal.  Sometimes having a messy work space helps my process unfortunately.


I added some 7 Gypsies paper tape to bring in more of the vintage colors and add more texture to the background.


Finally, I used my favorite pins, also from 7 Gypsies to attach my sentiment.  In order to add more fun to the recieving of this card, I enclosed it in a quickly made handmade envelope as well.

I am excited to surprise my sister with an old fashioned snail mail hello!

Cheers,

Rhea

Friday, February 14, 2014

Sweet Sentiments Mini Shadowbox Tutorial


There is lots of eye candy to be had, so please enjoy.  Be sure to scroll down to the bottom to see how I made this step by step as my Valentine gift to you.  Cheers!


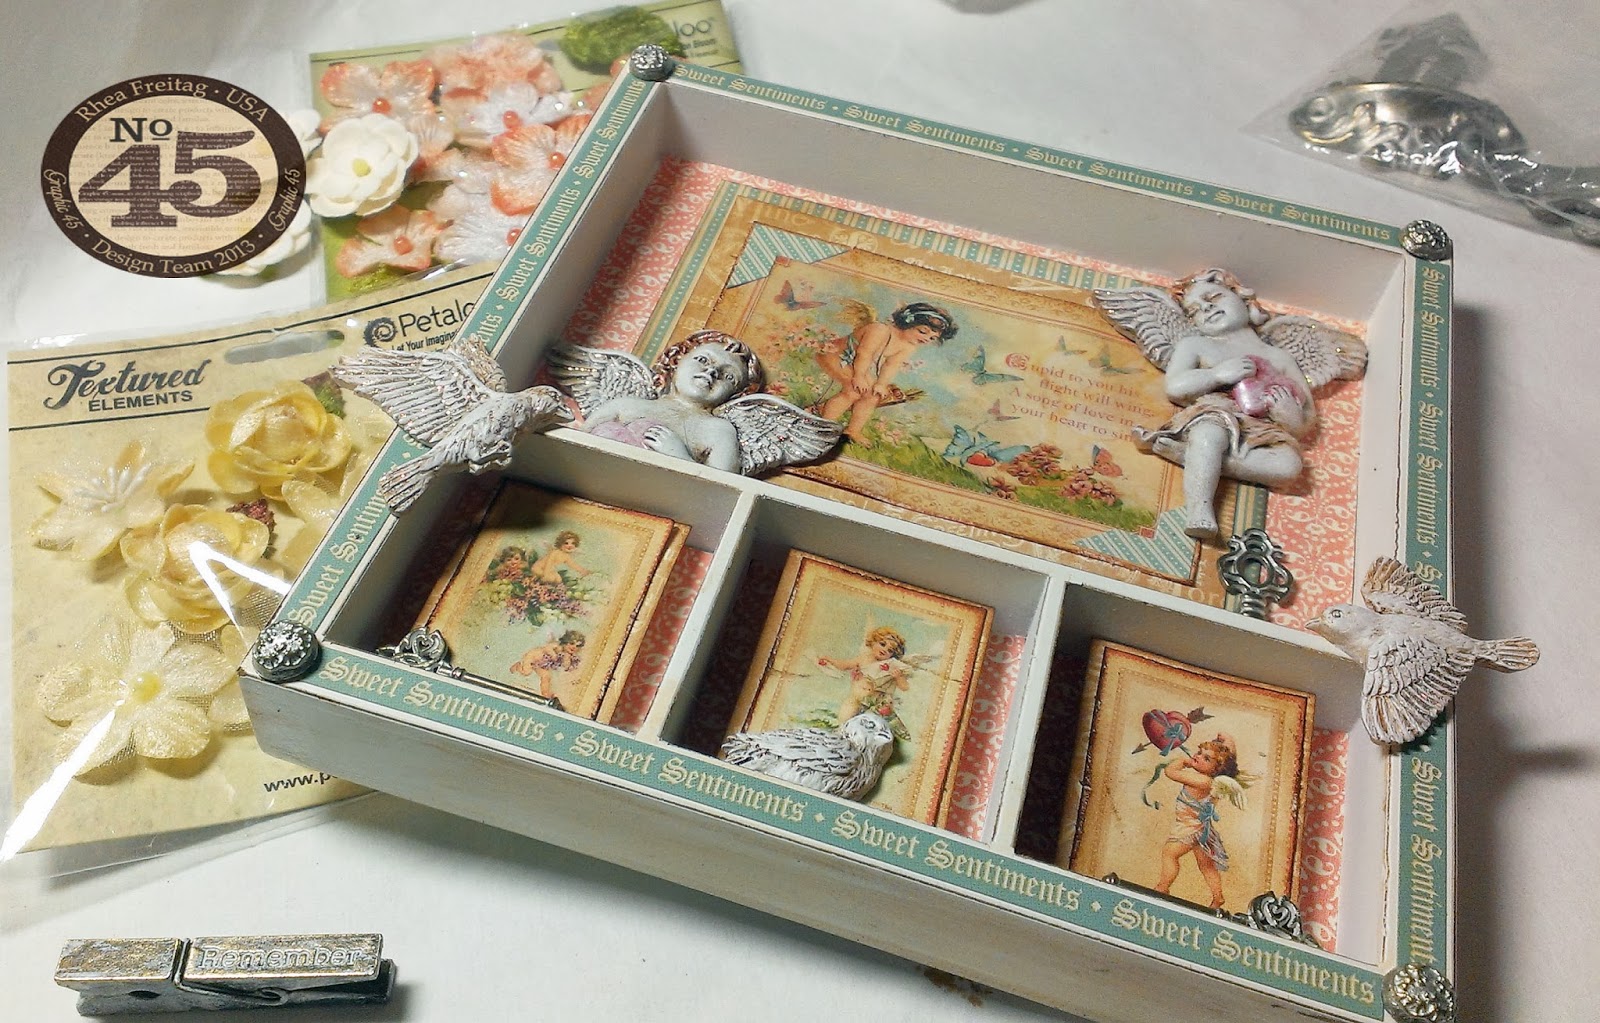
Sweet Sentiments Mini Shadowbox with tutorial
Sweet Sentiments 8x8 paper
Sweet Sentiments Cardstock Stickers
Shabby Chic Ornate Metal Brads
Shabby Chic Ornate Keys
Metal Clothespin
Petaloo Flowers
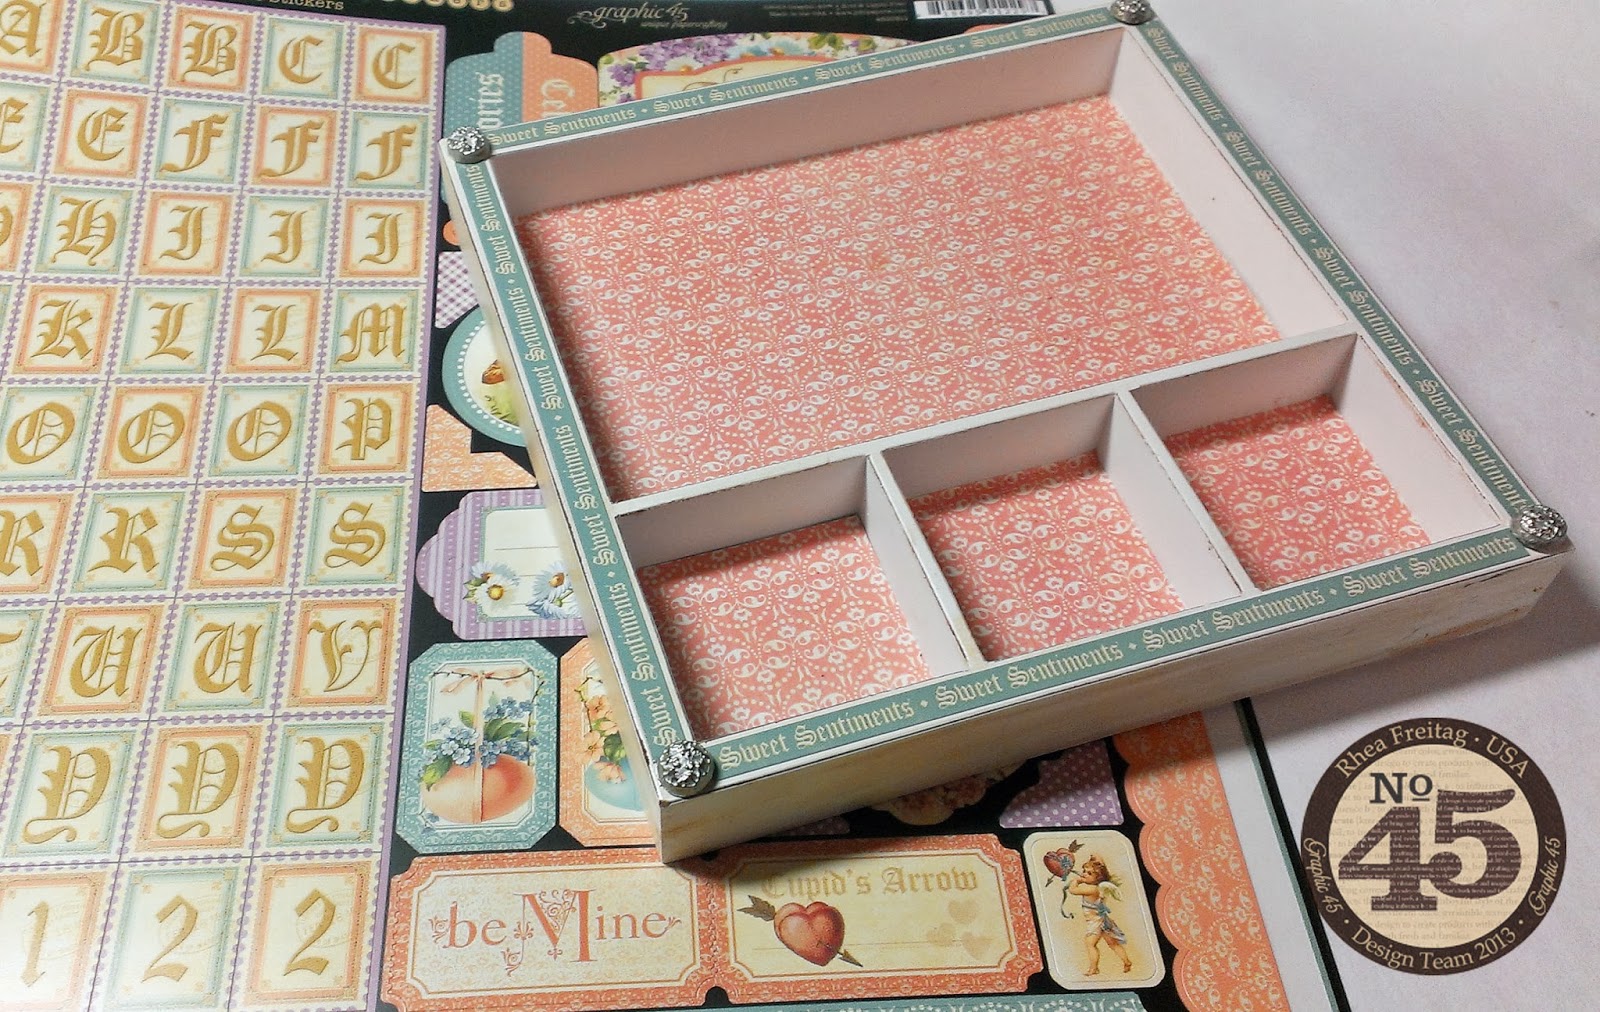
7 gypsies Solo Shadowbox Tray
Distress Ink in Tea Dye
E6000
Xyron Glue Stick
Resin Embellishments by Prima
Perfect Pearls
Burnt Umber paint

I was inspired to make this project from rooting through my little collection of “alterables.”  I have a stash of items I pick up on sale or at garage sales or estate sales.  When I don’t know what I want to make, I will simply start moving things around and inevitably something will call out to me. 


I started out by creating my background and using a glue stick to adhere my paper.


Next I got busy altering my elements.  I used basic distress techniques like roughing up and inking the edges.  I also embellished my resin birds with several layers of mixed media products.  I just kept layering until I was happy with the results.  These types of touches always make a project stand out.


Here you can see I was experimenting with my layout.  It did not end up exactly like this, which often happens, but I do like to plan out my major embellishments by auditioning.


To add interest to the frame of the shadowbox, I used the sticker border and studded the corners with brads. 


It may be hard to see, but on the bottom squares, I popped up my images by using some foam I had on hand.  This added a bit of dimension and depth.


I started to layer in my embellishments with a heavy duty glue.  I tend to use E6000 For this task. 


A few of the new Shabby Chic Ornate Keys were added.  These were so hard to use up, but they were just perfect for the project.


For the final touch, flower embellishments were added.  Again, I played around a bit before adhering to ensure the correct choice.  Once again, my flowers changed from my original shot.


Another great element I added at the end was a metal clothespin.  To make it look nice and shabby I pounced a bit of white acrylic paint on it, let it dry a bit, and then scratched some of the paint off. 


I hope you are now inspired to make your own little shadowbox! It is is super easy and fun.  

Cheers, 

Rhea

Tuesday, February 11, 2014

Sweet Sentiments Valentine Wreath


This project started out with a wooden wreath base I picked up at a local garage sale. I am always on the hunt for things with flat surfaces which can be easily altered or adorned with paper.   With the heart motif, it was destined to be altered with Graphic 45's Sweet Sentiments just in time for Valentines Day.  


Sweet Sentiments Heart Wreath
Sweet Sentiments 12x12 paper
May Arts Ribbon
Petaloo Flowers
Distress Ink and Stain in Tea Dye
Adhesive
Wooden Heart Wreath Base
Gesso


To create a nice base I painted on a layer of gesso and once it was dry, I aged it with Distress Stain in Tea Dye.  The paper was added in layers that were stitched together on a sewing machine.  I am not a seamstress by any means, but I do like to add thread as a design element from time to time. 


In order to make the edges of my central image disappear, I fussy cut small elements and camoflagued the edge.  This little trick makes such a huge difference.


Another trick used in this project was to age my ribbons from May Arts.  The ribbon was pink and white to start out.  I thought it was a bit too stark, so I simply wet the ribbon and then added some distress stain.  I love how the aged look really pulls it all together! 


So the next time your shopping around a garage sale or estate sale, be sure to keep your mind open to finding fun things to alter. 

Cheers, 

Rhea


Sunday, February 19, 2012

A Charming Vintage Valentine

I had intended on getting this post up on Valentine's Day, but alas, I have been under the weather and whatever I have is really lingering.  Today I pushed through and mustered up the energy to snap some shots of a really cool collaborative project.  The chunky book pages are the results of a Vintage Valentine swap over on All Things Tim. I made a simple cover and back with really pretty paper I picked up at Altered Art Addicts.


An interesting addition to this chunky book, are all the wonderful art charms.  I was lucky enough to win a contest in my art charms group and received this lovely set of love themed charms.  It arrived as a necklace, but I knew it would become journal jewelry as soon as I realized I had the perfect opportunity to combine all of my Valentine loot. 


I used several of Tim Holtz's charm clips to add my charms to my books.  These are the perfect tool for doing this task, I am saddened that they are discontinued.


I really love the page shown above.  The little bunting is just perfect and the imagery and embellishments are just darling. 


I have to say that our group is a really talented one.  Each page has so many elements, I see something new to enjoy each time I flip through the book. 


This page is interactive.  The little paper doll can be removed and her closet on the back of the page opens.  I really appreciate this kind of work as I love art that engages the observer. 


Here is another page with a tuck in.  You can pull the little Valentine out of it's cute little envelope.  I also love the rosettes and pretty trims. 


I am going to enter my little book in this week's challenge over at Simon Says Stamp and Show.   Two weeks ago, I was lucky enough to win their weekly drawing for a $50 gift certificate.  I had a blast shopping and I can't wait to use the goods I purchased with my winnings. 

Cheers,

Rhea

Sunday, January 22, 2012

Vintage Valentine

As part of my adoration of Tim Holtz and his product line, I am involved with an online community called All Things Tim.  From time to time there are chunky book swaps to participate in,  I jumped on board with the Vintage Valentine offering.  I am also entering this into this week's challege of "anything but a card," over at Simon Says Stamp and Show.

My pages are 6x6 and mounted on very heavy chipboard.  I used Tim's images from his seasonal paper stash as my focal.  Many other of his goodies were used as well:  antique linen distress stain, his new tissue paper and of course tissue tape.


The backs are adorned with faux postcards I made from some kraft paper.  Some of them actually have burnt edges for interest. 


I also added these cute little faux wax seals as a decorative element on the back.  I learned how to do this from a crafty pal, Angela in her first online tutorial.  Thanks for your inspiration Angela!


Each front layout is a little bit different.  I used a new die cut my mom picked out for me for Christmas on her own, she did great!  I am not sure I would have chosen it on my own, and I absolutely love it. 


Another element you can see on this page are these darling square doilies.  Another crafty pal resource here, thanks Cathwren!  I aged them a bit with a few hits of distress stain. I had a different plan for them, but they were just too pretty to cut up.  Spray adhesive was the secret to a durable page with no pesky loose edges.   


I also used, gasp, stickers!  The hearts were from Martha and have a delicious texture.  They were a bit too pink for me, which I attended to with a little vintage photo ink. 


I had a two different paper selections for the back.  I love the clever use of an old postage stamp and a vintage air mail stamp.  I just adore all things postal!  I am also very grateful for the inspiration this little group provides me. 

Thanks ATT!

Cheers,

Rhea


Friday, January 13, 2012

A little more love

I am still turning out a few Valentine's Day pieces.  It is funny to me how much I have gotten into the holiday themes since really getting into mixed media.  I was never one to really embrace holidays previously. I love how there are different flavors and sources of inspiration for each of the different days. 

These both fit into the theme over at Simon Says Stamp and Show.  I am bound and determined to either win a gift certificate, or nudge my way onto their design team over there so I can get more crafty supplies!  The theme this week is a "red letter day," so these little signs fit the bill since Valentines Day was my inspiration. 


These were very simple to create.  I used several of Tim Holtz's dies to get my shapes.  Most of the coloring was done with distress stains, have I told you how much I love these...amazing!  I did add a bit of wire, stickels, rub and buff and a few eyelets to give the project the mixed media feel I was after.


I extended the above project off the chipboard base by adding eyelets and attaching a piece of grunge board with jump rings.  It also adds movement to the piece, and I love movement in  my work. 

Hopefully this post inspires you to use some of those die cuts you have laying around!

Cheers,

Rhea

Sunday, January 8, 2012

The mechanics of love

As some of you may have noticed, I recently made some Valentine's Day themed items. As I was creating them, my muse struck in major way. I literally stopped my project in motion to make this little guy, even knowing the name of blog post as I crafted away. 

The thought was to make a fortune teller.  After all, most people want to know about love and relationships when seeking esoteric advisement, and the season of love is upon us.  Well, I started out with the intention to try and keep it a bit more feminine and frilly.  As you can see the first one did not come out that way, my love for steampunk took over.  I could not believe I found this key with the heart in my stash, talk about a perfect score.  I was also surprised at the little pair of angels I located. 


This project is worthy of the theme this week over at Simon Says Stamp and Show, is for something old and something new.  The old here is represented in the vintage key and clock gear. The new is the distress stains.  I received a bunch more colors for Christmas, and I am addicted.  It is right up there with my tissue tape addiction. 

I am off to make a few more of these for a little local shop.  I will hop back on and add a few more photos when I get them done.  I think this idea would translate well for you card makers out there too. 

Cheers,

Rhea


Saturday, January 7, 2012

Bunting Love

I have wanted to make one of these trendy little buntings for a while.  I took inspiration from the upcoming season of Love, Valentine's Day. 


I had to do some problem solving to get everything to hang right.  I had a few versions of this before I ever added the pennants that were unsuccessful.  I love the use of eyelets, jump rings and simple twine for hanging. 


On this set the backing is a tag from Martha Stewart.  I wish I picked up more of these when I was recently at a discount store, as they fit perfectly behind the rosettes.  I also did something unusual for me, I kept it simple!

I am sending these off to a little shop, where hopefully they will find a new home.

Cheers,

Rhea