Showing posts with label journal. Show all posts

Saturday, March 14, 2015

Tangled Journal Page


This project was completed for Canvas Corp and their recent Tangled challenge.


My focal here is from the Journey Tangled Pack and it was really easy to create.  I layered on lots of products, including some Tattered Angels S.W.A.K. mist, to give it a mixed media feel.  I was sure to add some of my own doodles and marks to make my page unique to me. 


The sentiment was taken from the new Gypsy Moments paper.  I love how the ink bled through the words making them blend into the background a little bit.


I also challenged myself to use some craft supplies that had been neglected.  It is my goal in 2015 to use up the good stuff!  To that end I used some butterfly rub ons as well as the paper flower borders which had been lying around forever.

I hope this post inspires you to use some of those old supplies as well.

Cheers,

Rhea


Saturday, May 3, 2014

Spring Time Book for Alpha Stamps


I absolutely love all the new spring time goodies I got my hands on from Alpha Stamps!


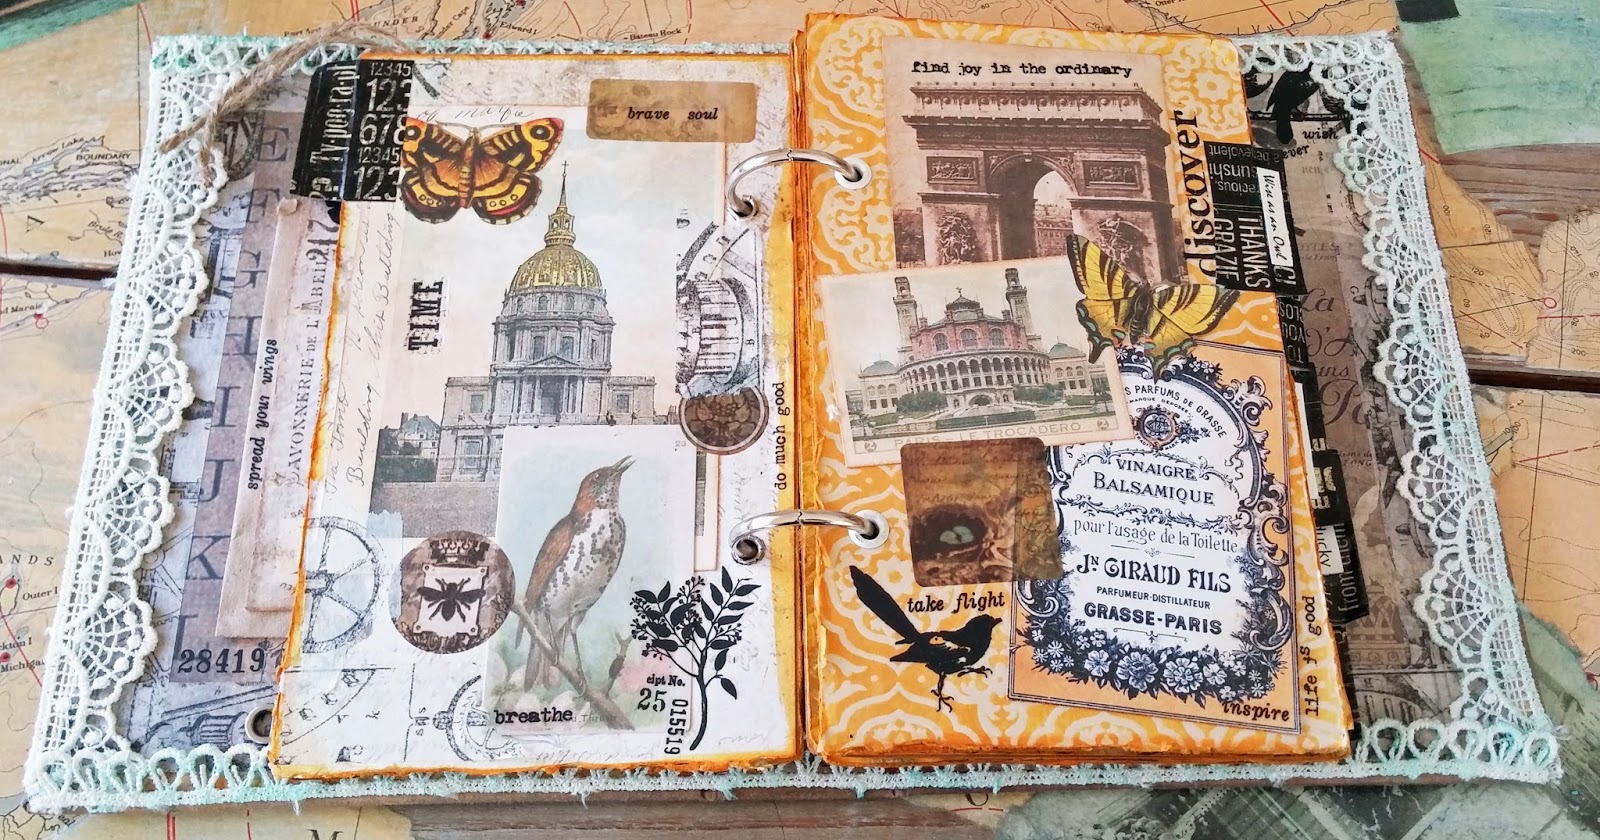
I could not wait to make this fun Spring Time in Paris Collage book.  It was so super easy with the help of my trusty goodies from Xyron.


I used a bit of Wild Honey Stain by Tim Holtz to unite the book.


To age the lovely crochet ribbon edges I actually added gilders paste to the material.  It cast a mild blue hue and I just love it.


Some of my left over Ice Resin tissue flowers ended up in my book.


The butterfly Dresden scrap made for a perfect addition.


Lots of Tim Holtz rub ons were used through out the project.  My secret is to try to use up the whole sheet so I don't have left overs.  That way I keep layering and layering them in as well.


The Tim Holtz ephemera made for great embellishments along with collage images from Alpha Stamps.


Cheers,

Rhea

Sunday, April 20, 2014

Wooden ATC Book


I decided to whip up this little baby with my left over kit supplies from Alpha Stamps along with lots of my swag from Xyron.  I even made a Snapguide to show you how I put it together.  Here is a link to all my supplies.  


Inside there are lots of fun evelopes and pockets.


You can see that the stain gives the cover a nice uneven look.  I like that it makes each and every piece unique.


I cut up a bit of scrap paper from Graphic 45 to embellish my pages.  I found stuff to decorate this book in all kinds of unlikely places.


I am addicted to the little glassine envelopes.  I just love how you can see through them.


I like to use rub ons as opposed to rubber stamping.  I find that these are so much more reliable!


This envelope has the coolest pattern.  I tucked a bit of map inside which you can barely see.  The ATC cards are really perfect for this quick project.


I used a bit of the new Tim Holtz ephemera through this book as well.  It blends right into what I have going on.


More secrets tucked inside envelopes.


The rub ons work really nicely on the envelopes as well.


I hope you found a bit of inspiration in today's post!  Be sure to check out the Snapguide for the how to!

Cheers,

Rhea

Tuesday, January 7, 2014

Jumping In with Journal52: Week One


I am happy to be starting 2014 off with a few new art adventures.  The first is Journal52, which is a weekly online art prompt and the second is called Creative Jumpstart 2014.  So with the first creative prompt of "up, up and away" and with some inspiration from "jumping," I created my first journal spread of 2014.


I used a journal I had on hand.  In order to keep the book sturdy I plan to reinforce each page with tape.  I think it will end up pretty thick as things progress.  The tape shown here is hot new product from Graphic 45.  I am absolutely in love with it.


I tried to get the texture thing going on this page with layers of ink, molding paste by Liquitex, distress stain, stickels and a few drips of alcohol inks.  I also buffed on some gilders paste, edged my pages with stain and used pencil to make marks and scribble.


The circles were from prints I made on a friends gelli plate a few weekends ago.  I was happy to put one of my freshly made images to use in my journal.  Lots of details and marks were added with markers, paint pens and even water.  I love playing with the distress stains, you can achieve some great texture with this product since it interacts with water.  Here is where I used Natalie's prompts from Creative Jumpstart, using household items to make my marks.


My goal in this book is to actually journal!  This is a tough one for me...one.  Not only do I have to be open to commit words to a page, I have to scribble my handwriting all over the page, which while it may seem simple, for me it is a daunting task.  

Let's see if I can keep this momentum grooving!

Cheers, 

Rhea


Saturday, November 9, 2013

Fall Journal with Texture Tutorial


Fall is certainly my most favorite season ever.  For some reason, it just really inspires me.  With this in mind, I set out to create a fun Fall Journal to record my thoughts, memories and maybe even a few poems.


I will be sharing a few techniques along the way today as well.  On the cover you can see some great imagery from Alpha Stamps. For a full list of all the goodies I used from Alpha Stamps you can go right here. Another easy addition to this cover are French Country stickers from Graphic 45.


I love this cute little tiny oak leaf garland.  Also notice the great texture I got by layering stencils.  Here I used matte medium with my honey comb stencil and then aged it once the medium was dry.


Here you can see the detail of leaves I made with glossy card stock, alcohol inks and the tattered leaves stamps from Tim Holtz.


I started by choosing a few warm colors of ink.  I dropped them on the glossy paper and then blotted with a ink dabber doused with blending solution.


This is a few of the papers I made.  I did not mind that I still had some large spots on the paper, it ended up adding great interest to the finished leaves.


Here are the leaves after stamping them with permanent ink and then fussy cutting them out.  I am always happy when I can create my own embellishments from what I have on hand.


This tag below highlights the amazing texture you can get from using the different pastes that are now on the market.  Here I chose to use molding paste along with my stencil.


I started out by layering with my spray inks and stencils.


I then added layers of stain and inks. It helps to water down the stains before swirling the tags in the color.  I don't mind when my inks smear either, it adds interest to the piece.


 Another way to add a layer of color is with an ink pad and an ink applicator. This way it provides a softer and more reliable pattern.


Here are a bunch of my tags after playing with my inks and stencils. Notice I have gone back and added inks or stains to most of the edges of my pockets and tags.  This adds a great frame to any element.


Once there is a base layer of color and pattern, I take it a step further and add more texture with the paste. An inverted spatula works really well for this.


I like to use deli paper when I am doing this type of work.  I can mess up a sheet and easily clean up my spot with a quick toss.  Be sure to clean up your stencils promptly after applying pastes through them!


After the paste is dry I add more ink or gilders paste to provide yet another design element to the tag.


I am looking forward to curling up with a nice warm drink and journaling this past fall season.


I have entries planned for my recent Upper Peninsula vacation...


Perhaps a few fall poems...


And maybe even a doodle or two...


I hope you enjoyed this rather lengthy post of my Fall Journal filled with fun texture.

Cheers,

Rhea


Thursday, June 13, 2013

Kraft Book Tutorial with Graphic 45


I was inspired to make this small handmade book for my dad for Father’s Day.  He is an antique dealer and he always keeps a small notebook to record what he pays for his treasures.  I thought it would be nice to make him a something with a writing utensil attached, along with pockets inside to add price tags or receipts.  


As I completed the base of the project, I was so tempted to embellish it like crazy in my usual style, but since this was for my dad, I held back on the ribbons and charms for once. 


Supplies:
Kraft Reflections 12x12
Chip board
Score Tape
May Arts Black Twine
Metal Staples: Keyhole
Vintage Photo Distress Ink
Cinch Binding Machine and Coil
Tim Holtz Glassine Envelopes, ATC sized
Recycled Paper for inside of book (think:  old notebooks, scrap papers, graph paper, ledger paper)


I started with two pieces of chip board, 4” by 5”.  They were covered with the Kraft Reflections paper and adhered with Scor Tape.


Hint: Trim corners on a diagonal for clean edges when folding your paper over.


Once the front is covered in paper, line the inside with a paper that compliments the book. 


And the covers are complete, simple really!


Ink up the edges, this simple trick adds age and dimension.


Line up your paper for the inside of the book.  Here I chose to use an old notebook from a garage sale, along with one package of Tim Holtz Glassine Envelopes. 


Punch holes for your binding method.  I chose to use my Cinch.  I love this thing.  I do a test run before punching into my covers; this was learned the hard way.


Add your covers, envelopes and paper to the coil. 


Cinch the book to create closure. 


Plan your embellishment.  I like to get out a small array of options and audition each piece.  Often I use gilders paste to add texture and age to metals; it is a stand by in my artsy arsenal.


The pencil was added with a bit of twine.  This relic makes me think of my dad because it is a vintage pencil from my very first auction.  The lead advances when you turn the clear acrylic top and it writes really smooth. 


The binder clips helped the project to be level as the glue dried on the key hole that I added. 


I think this will be handy book for my dad to keep in his van, which is always packed with lovely treasures and ready for a thrifty adventure.  

Cheers, 

Rhea