Showing posts with label skull. Show all posts

Wednesday, October 31, 2012

Sweet Sugar Skulls and Texture Tutorial


Recently I made some delightful replicas of sugar skulls.  The base of  these pieces has a really nice crackle texture, which was achieved with a fantastic product called Kroma Crackle. It is a product that is hard to find, but Alpha Stamps was able to source it.

In this post, I will break out each step to achieve the texture, once I have covered that, the decorating is on you.  Yes, I know it is hard to see the crackle effect, but with so much good stuff from Alpha Stamps, I could not help decking these gals out!  You will see some testure close ups later in the post.  There are lots of great supplies from this tutorial for your very own projects here.


And here are a few more cuties!


To start off, I gave my pieces a good thick coat of gesso.  This helped to give each piece a bit of tooth and made for a good white base to work off off.  Tip:  Use a good artist quality gesso.  There are some really affordable ones out there, but I would pass them by, because you just don't get good coverage with the cheap stuff.


Once you have your gesso down and it has dried, it is time to paint.  Choose the color you want to show through the crackle.  Again, here, white was the best choice for me.  Now the manufacture label advises to use high quality acrylic paint.  I followed suite and used Golden Titanium White, but I have to say I have used this stuff with cheap acrylics and it worked just fine.  


Of course I did not realize I missed painting a few spots on the teeth until I wrote this...  That is a good artistic tip by the way, if your wondering how composition is going on a project, take a picture and look at it.  You will be able to see right away if there are areas that need to be edited or spots that need a bit more embellishment. I can't tell you how many times I need to re-shoot images for my blog because the photos revealed scale issues, glue blobs and all kinds of errors. 


Now it is time to get crackling.  Add a layer of Kroma Crackle to your dry pieces.  The thicker you apply, the larger your cracks will be. You will notice in the picture above that the smaller skulls appear to have color changes.  I think that the product reacted with Masonite in some way.  I did not mind because I was going to be getting them all grungy anyway. 

Please note, this product does take a long time to dry.  There is an "instant" way to crackle that has been made famous my Michael deMeng as outlined here.  I have yet to try it out for a silly reason, I always forget to buy Elmer's school glue...


Here is a close up of the crackle texture on a different project I am working on.  This is a book and the only base I have on this is gesso, I totally forgot to put the acrylic paint on it...but it still worked!  You will notice in some areas, where it was perhaps too thick, the crackle is curling.  It is possible that some of the texture could come off, therefore no matter what, you need to use some sort of sealant at this point.  Use dry brushing with layers of paint to add color.  Or on the book below, I used spray inks.  Again, you would not want to use too much of anything thick as you would lose that yummy crackle.  

The next step is to seal with something pretty fluid as you don't want to lose all of your hard work.  The manufacturer advises to use acrylic fluid medium.  I watered down regular gel medium and it worked just fine.  I also got creative with sealing on the book pictured above as you will see below.   


It occurred to me that there had to be another way to seal the crackle.  I have been on such an UTEE (Ultra Thick Embossing Enamel) kick, that I thought this may be the answer and indeed it was!  I added lots of layers of clear embossing powder with a bit of gold embossing powder sprinkled in as well.  Now I wonder what this little book is going to turn into...stay tuned in to find out.


I hope you enjoyed this little tutorial on texture.  My intent is to always inspire and share my love of good fun products with you.  I hope I achieved that goal today!

Cheers, 

Rhea


Sunday, September 2, 2012

A Retro Halloween

It was almost exactly one year ago that I discovered the joy of Retro Cafe Art and their amazing Coffee Break Designs. I had gone to an art retreat in Chicago and they had a booth there.  I went nuts on all their Masonite goodies and developed quite a stash.  Recently when I saw on their Facebook page that they were having a Halloween art contest, I knew I would celebrate by using some of my coveted supplies.


The first entry features two images from RCA's current free collage sheet.  I made the moon peek over the side of the house and I love the altered cabinet card witch.  


I used mica and glitter to line the inside of a smaller cigar box.  The sandy paste I have used in other projects. In fact, this was left over from this post.  You can hop on over there if you would like the details on how to make the paste. 


Other items used on this project from Retro Cafe Art are: picket fence cut outs (these are so handy people), guilders paste and the wonderful star washi tape.  I am a sucker for designer tapes!  The lace was actually cut from a doily and the house base was found at a rummage sale.  A fun project indeed.  

The second little assemblage I put together is also filled with RCA supplies.  I started with a three hole cubby.  This was altered with guilders paste and decorative tape.  You can also see the use of those fences again.  All of the Masonite products accept the guilders paste very well.  


I used their tiny heart shrine, two sizes of red cotton spun mushrooms as well as a Halloween paper cut out.  I was a little surprised at my Retro craft stash!  


I guess this is the official start of the holiday season in my crafty world!  Here we go!

Cheers, 

Rhea


Friday, September 30, 2011

More Spooky Stuff

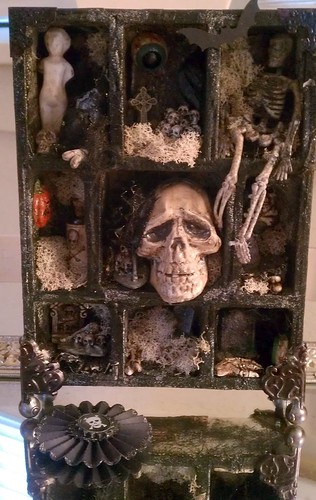
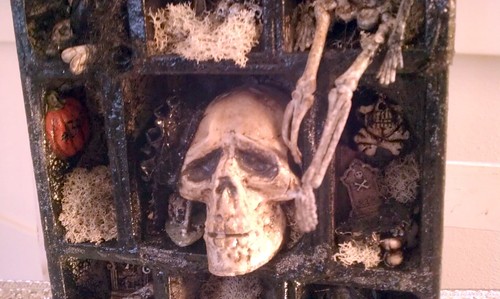
I am still gaining inspiration in the Halloween theme in my mixed media art.  It is so fun to embrace the creepy, grungy look of the holiday.  I knew, once I had become comfortable with the creep, that I would have to do an assemblage, so here we are.


I started with one of Tim Holtz's configurations boxes.  These are a staple for the assemblage addict, like me.  I layered all kinds of scrap paper,decorative tape and ephemera before spraying the piece with lots of inks and spray webbing. While you can't see much of what is underneath, I do think it is important to layer your background in order to create interest and texture. 


I used all kinds of goodies scored at the local big box store to add to my piece.  There is so much Halloween stuff out there to gain inspiration from.  Lots of different techniques and inks were used to grunge up my stuff and make it look old.  One solution I used was given to me by someone at work and it is amazing!  I have no idea what it is as it is an old homemade Mexican antiquing solution, but I absolutely love it.  Thanks Monica!


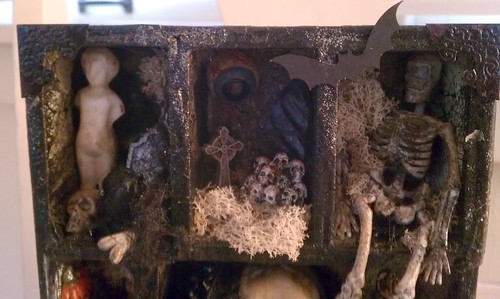
Another element I added, and really love, is all the moss.  I have a large bag I purchased and it has really come in handy.  The texture it adds is divine, and I think it also has a tiny bit of a spooky look about it.  I had planned on putting resin over this piece as I did in the ones I blogged about recently, however, a new product called Goosebumps stopped me.  This simple spray does not achieve the same look as resin, however, it does provide a nicw glossy sheen and another great layer of texture. 


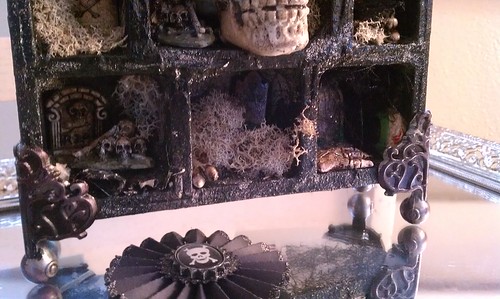
The feet and decorative corners are also from Tim Holtz.  The color was off and they looked too new, so I used alcohol ink in pitch black to age them a bit. It is so fun to alter things to suit your needs.   

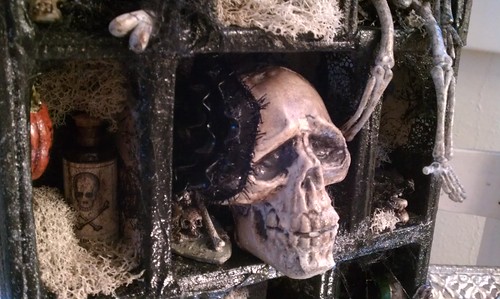
You can see a variety of things stuffed into each compartment, sometimes in unique spots. I am always careful to look at my work in progress from several angles in order to be sure that my composition is sound.  


'


I just love the focal skull.  I added a head piece to jazz it up a bit, and add a feminine touch.  I am really into the Day of the Dead art right now.  Stay tuned for another project I am working on in this theme, I can't wait to reveal that one!

I hope you enjoyed another chapter of creepy art, I know I sure did.  I am posting this on Artists in Blogland, this is a great community of inspiration.  Check it out if you are curious!

Cheers,

Rhea