Showing posts with label jewelry. Show all posts

Saturday, November 8, 2014

Traverse City inspired Necklace Suite


I recently traveled to Traverse City, Michigan for a conference for work.  While I was there I stopped in a delightful bead shop that I usually check out when I am in town Nawbin Beads.  They have the most lovely shop.  


I was really attracted to several strands of jasper and jade.  They reminded me of the fall leaves combined with the beachy nudes and blues.


I purposely made several necklaces, meant to be worn layered or singly.  I even tried out asymmetry on the one above, which is always a challenge for me. It actually turned out to be my favorite one.


The focals on both of these statement necklaces were what started the whole project.  I simply found beads to compliment and match.


This last piece is more of a complimentary necklace, meant to be worn with one of the other two as a layer.  It certainly could be worn alone as well.


And here is the entire suite!  Super fun to get back to my jewelry roots.  It has been a while.

Cheers, 

Rhea

Thursday, October 17, 2013

Ice Resin Bee Necklace


I have been so excited to use the bezels Spellbinders sent me as they are a product partner for Graphic 45.   One of the focals I created includes this amazing Victorian bee brass stamping from Alpha Stamps.


In the background I have layered some text, which really ended up obscured by the mica I added.  I did manipulate the mica a bit to add texture, it really adds depth and dimension that is hard to see in this photo.


On the bee I used many products: gilders paste, Vintaj onyx patina, stickels and permanent marker.  The centerpiece was sealed with Ice Resin.  I had to do this in two settings to achieve the doming effect I was after, and get all of the body of the bee under resin.


I added the focal to a simple chain.  When I wore it for the first time today, this was how I styled it.  I can also chose to wear it in the center.  I tried to add several different elements, but I always ended up editing them out.  Sometimes it is good to keep things simple. 

It was so fun to get back to my jewelry roots, I suspect there is a bit more of that to come now that my dining room table has been transformed into a jewelry making station.

Cheers, 

Rhea

Saturday, August 24, 2013

Etched Cuffs with Kristen Robinson


So here is the day two installment of my wonderful retreat with Kristen Robinson last weekend.  The subject of the day was etching, something I tried out once before in a group setting. We had the opportunity to make two bracelets and here you can see my outcome.


I chose to keep one of them on the simple side and "not mess it up."  I had a bit of a struggle in this class, not only with my stamping, but with the distress soldering technique.  Soldering is something I am so interested in, but it will take a while to master.


I think my favorite part of this cuff are the secret words tucked inside.


Here is a better image of the etching.  I was hard pressed to get a decent stamp, due to the curve of the black.  I ended up embracing imperfection and the design still came out pretty.


The bezel on my second cuff is layered with filigree.  Inside the bezel I stacked paper, a transparency and a snippet of text and covered with resin.  I will be playing with resin more in the future, that is for certain.

Well I have one more class to show off and I think it was probably my favorite, although it is hard to pick! Stay tuned for the last installment, plus a few more Graphic 45 treats.

Cheers,

Rhea

Wednesday, August 21, 2013

Adorned Relics with Kristen Robinson


I was blessed to have the opportunity to take three workshops this past weekend with Kristen Robinson at a super cool spot called Smitten Dust.  The first class I had was called Adorned Relics.  Here we learned how to create beautiful faux mercury glass while playing with resin.  I absolutely fell in love with Ice Resin!


In order to add some of my usual touches, lots of gilders paste was used along the way...surprise, surprise...


A lot of trinkets, charms and filigree used were from Alpha Stamps as I have been designing for them for some time now.  I am so grateful for their support, especially when I am rooting through my amazing Alpha stamp stash!


I think this one is my favorite because it is so different for me.  I think you can really see the faux mercury glass well in this necklace too.  The stone used is picture jasper, there are so many lovely patterns and colors within each and every bead.


This is another bezel that I was excited about.  I simply added paper rhinestones and a Graphic 45 ornate key.  It made for a fantastic focal that was perfect for some vintage embellishments.


I took apart an old three strand necklace and re purposed bits and pieces to create a new necklace.  Bits and bobs were also added to the bottom for balance and movement.


The top portion of this necklace had already been made.  It was not laying correctly with the last focal I had attached.  I was happy to be able to simply add the focal and shore up the chain and I had a finished piece.


On this last one I kept it simple by adding a chain to my enhanced bezel.  I tried my hardest to make something asymmetrical out of these centerpieces, but for whatever reason, my meticulous brain has a hard time not making my jewelry balanced.


I actually have many more bezels to show off, so stay tuned for more art inspired by this class.  I will also be posting from my two other classes from Kristen soon. 

Cheers, 

Rhea


Tuesday, February 5, 2013

Northern Lights


They are a magical sight, the Northern Lights.

The Norther Lights was the given prompt for this month's design challenge over at Vintaj.  I just could not help but enter with this theme in mind and all kinds of Vintaj stuff on hand. There is a ton of eye candy to be had so stop over and vote for your favorite, there are some beauties.  And, I must say, if you are a fan of their products, these challenges are a blast.  Please consider joining in the fun.


My earrings are simple.  I started with some of the Vintaj patinas and two discs of their art metal.  I made sure to sand the color off the edges so that some of the lovely copper color comes through.  A celestial pattern was stamped with permanent ink and the stars were touched with glitter via a gel pen.  I added some of the Vintaj glaze to seal in my handiwork.

Of course I have to share my personal inspiration...


This photo of the Northern Lights was taken by my sister, Sarah Freitag, deep in Copper Country.  She recently started a blog Copper County Homestead where she along with her boyfriend Jason, document all kinds of fun farmy happenings.  You can read all about chickens, nature, canning, how to make random stuff and yummy farm fresh food.  Feel free to check it out, if you are so inclined!

Sending you some blog love Sarah!

Cheers, 

Rhea

Thursday, January 10, 2013

Our Love Story


Well I am at it again folks, I could not help but partake in another design challenge sponsored by Vintaj.  With the amazing prize package they just sent me I suspect there will be a few more challenges in my future too.

I just love having a trigger or a prompt for art, I do find that can really inspire me.  The theme this month is "Our Story."  I just happen to have a delightful new story in my life unfolding right now and so I chose to chronicle it through this piece.  Each and every little do dad has a thought or personal meaning behind it.


VOTE HERE (if you want)
#7 Our Love Story


The small blanks I altered from Vintaj are delightful.  I stamped a background with permanent ink and then layered text on top.  Some of them I made domed by thoughtfully adding on the Diamond Glaze, others were kept more even and flush.


You can see below that I added other inclusions to some of the metal blanks as well.  


I was so super excited to find a use for the etched metal tiles that were added.  I happen to be blessed with an amazing clan of local art ladies.  During one of our meetings last year, Beth from Vintage Sweets, taught us how to etch on metal.  When I heard the theme for the challenge I knew I wanted to use these.  I added them to represent sweet nothings, love letters and the secrets new lovers share.  


I hope you enjoyed partaking in this little bit of my new story.  Thanks for all of your continued support and readership.  It really does mean the world to me.  Hopefully this piece will also trigger the full on creative mojo return.

Cheers, 

Rhea


Tuesday, October 2, 2012

Radiant Raven: Vintaj


I came across another Vintaj challenge that piqued my interest, so I decided to make a little something for the "Radiant Raven" contest.  My intent was to take simple filigree pieces from the Vintaj line and use them to make something that resembled a raven.

Please consider voting for my piece HERE. Mine is #9, there are some really amazing pieces that will be tough to beat!


The wings were embossed with a spiral pattern and I used guilders paste to grunge them up a bit.  


The head of the raven is a piece of filigree that I simply folded in half.  Eyes were added with headpins, bead and Vintaj bead caps.  I love how it gives it a bit of a clockwork look. 


Some of the elements used in this piece were from Alpha Stamps.  They have a delightful selection on all kinds of jewelry stuff.

Thanks for stopping by and taking the time to vote for me!
Cheers, 

Rhea


Friday, August 10, 2012

Gypsy Necklace

I was thrilled to be asked to create a bit more gypsy jewelry.  I just cannot get enough of this theme.  All the yummy jewelry stuff at Alpha Stamps makes it really easy to make good stuff.

My start was with this fantastic crescent moon focal. I immediately envisioned a bunch of gypsy junk hanging off of it, although that is not how the project turned out.  I found that it got too busy, so I edited it a bit to keep it simple.


So to start I chose my chain and my clasp.  These were very easy to add by just opening a link on the chain.  


Tip:  when opening a jump ring or bit of chain, you always want to use a back and forth motion.  In other words don't "spread" the link, as it will mar the wire and make it look deformed. 


Now to embellish the centerpiece.  I decided to use fancy star bead caps as they are so super cute.  In my opinion, you really can't go wrong with any bead cap!


I wanted this to be symmetrical, so I worked from the outside in.  I was sure to use an odd number of links in each dangle as well.  Odd numbers tend to work better in art. 


You could always add more stuff if you were going for the eclectic look...more dangles, charms, bits of chain, anything really. 


I hope these easy instructions inspire you to make a focal with all kinds of dangley goodness!

Cheers, 

Rhea

Friday, July 6, 2012

The bead soup is simmering

I am happy to report that my bead soup has arrived and I am totally up for another challenge.  My partner, Tanya Wiles at Tenebrous Hollow Studio, is a fiber artist and she makes some really interesting pieces.  She also hand forged the tiny little clasp!  The focal is really unique and I have never worked with anything quite like it.  This should be an adventure once again. 


Here is another shot after I stirred my soup.  Look at all that handy work in the flower, really neat. There are so many interesting little bits and pieces, an idea is beginning to brew...  If you have no idea what this event is all about, please hop on over to Lori's blog and read all about the fun.   


Now that Tanya has her parcel, here is a picture of what I sent to her.  I can't wait to see what she comes up with, and the blog hop is always fun. 


The reveal date for my group is August 11, so be sure to come back and check out the results of this fabulous exchange.

Cheers,

Rhea

Sunday, June 24, 2012

Making some Bead Soup

I have had so much fun the last two times, I decided to play once again in the Bead Soup Blog Party, hosted by Lori Anderson. 

This time around my partner is Tanya Wiles.  Her blog can be found here.  I am excited to see what she sends as her personal style is still a mystery to me.  I hope she can find use in this little batch of beady soup!  Here is a teaser that I will reveal once she gets her parcel.


The whole idea is to send some bead soup (a focal, a clasp and some complimentary beads) to your partner, make something from what they send you and then show it off on a blog hop.  It is such an inspiring exercise.  You never know what you will get and it really helps you work outside of your traditional supplies.   Here is what I conjured up the first time around.  To read more about it the post is here.


The second round was really tough, but I was up for the challenge.  I really learned a lot from my second round.  To read about my doughnut saga read here.


I hope you will all tune in to see what this year will bring for both me and my partner.  This round there are three reveals and mine will be on August 11th.  

Cheers, 

Rhea

Thursday, May 31, 2012

Amulets and Talisman Charms

I have said it before, and it is so true, I am addicted to charm making right now.  It is so quick and gratifying and they are especially fun to swap.  A new swap for Amulet and Talisman charms in my group was too good to pass up.

 My first set started out with a really great product called Style Stones.  I purchased them at a close out sale at a steep discount, as it is typically a pricey product.  They are made from actual stone and they accept many mediums very well. 


I started out by using neutral toned alcohol inks on both sides.  The edges were coated in Inka Gold which I simply applied with my fingers.  A stamped script holds the perfect words for the owner of this tiny talisman.  On the other side is a spiral marking that was imprinted with a stamp I hand carved.  The spiral represents evolution and holistic growth; letting go, surrender release and connectivity with divine energy and source.

A small copper ring dangles from the hand embellished stone.  The copper holds characteristics such as love, balance, feminine beauty and artistic creativity.  The ring  is a nod to wholeness, unity, revolution and completion. 


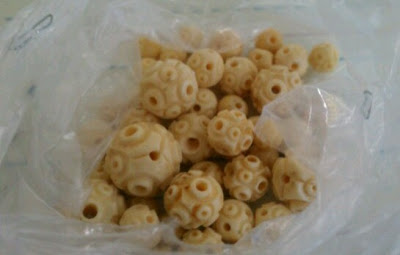
The second set were made from beads I purchased at an estate sale.  Here is a picture of what they looked like before I altered them with my magic potion.  This picture was never intended to end up in a blog post (it was from a text message)...but I thought I would showcase what they looked like before.  There were quite a few larger beads which I kept to make some different pieces with.


My magic potion is this amazing aging solution that was given to my by one of my employees.  Since it is meant to age a product, we could say that it will add the element of wisdom to this talisman.  It was also used in these Day of the Dead skulls I made last fall.  It gives the beads, which I am pretty sure are bone, wonderful depth and character.  Bones represent the foundation of the self, the inner truth.  They can also represent death and rebirth. 


I added another dangling element off of my charm more movement, in this case a small red glass flower.  The red representing love and the flower opening up.  A Chinese coin was also attached to add good fortune.  Again the circle is prevalent in this charm with the jump rings as well as the patterns on the beads representing wholeness.    

In writing this post, I also realized I had not shown these ocean themed charms off.  They were made for my local art group.  I love using the picket fence stain  and Guilders Paste on metal with a bit of sealer. 


I am excited to see the return on the Amulets and Talisman charm swap, it will be an amazing charm bracelet I do believe!  I will be showing off what I did with a few of my Springtime in Paris charms soon.  I have been working on a big project and I am really excited to start showing it off.

Cheers,

Rhea