Wednesday, May 9, 2012

Down the Rabbit Hole: Part II

So I was called long ago by my inner artist to revisit this piece and it seems the moon and the stars aligned to make this happen.  Alpha Stamps is the sponsor this month for the challenge over on The Altered Alice blog, which is a really fun place to explore. Everyone who enters in the monthly challenge will get a free collage sheet too!   

Have you ever made a project and called it complete, only to keep fantasizing about what else needed to be done to it?  That was the situation with this assemblage.  It was one of my earlier pieces and it was intended as a swap, but it never left my possession as I fell in love with it, and with the story.  You can read more about the first version here.


It was a good exercise to look back at this post and this piece and evaluate my growth.  I think the quality of my pictures has vastly improved.  
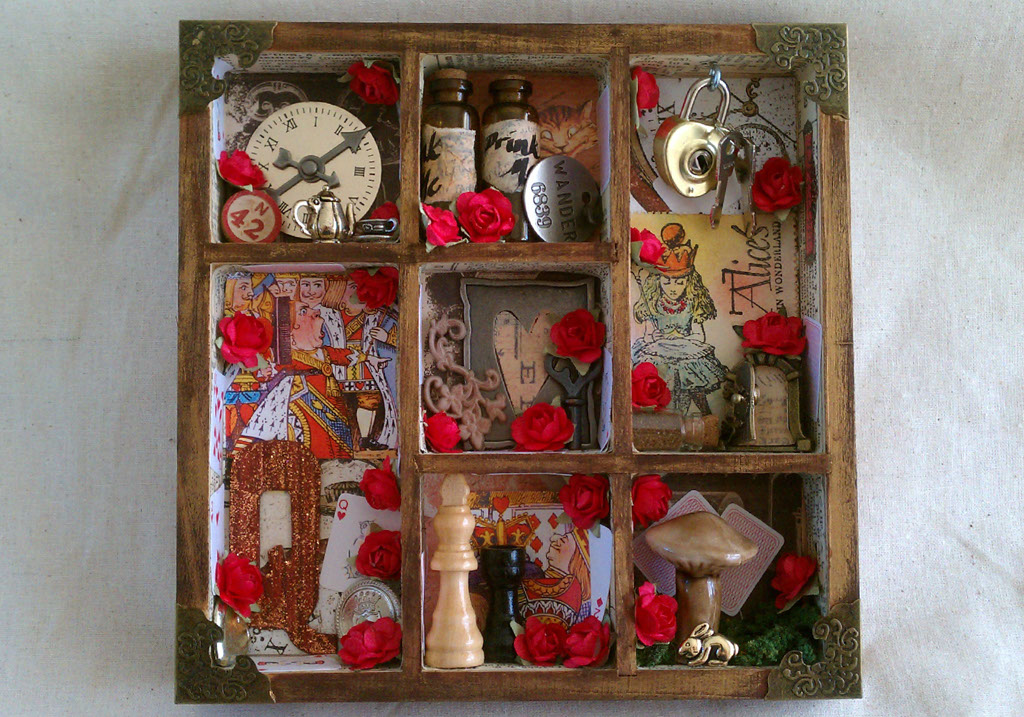


Quite a nice pick me up, if I do say so.  First off the color reflects the vibrancy of the Alice story so much more now.  I added dozens of red paper roses and used the mini playing cards to hide my glue and wire.  My old shrine was missing a nod to the Cheshire Cat.  Using the Red Queen Collage Sheet took care of that and added a good bit of that color with new imagery in other areas too.  


A few new trinkets were added to the project as well.  I have been wanting this tiny tiny teapot with hinged lid ever since I laid eyes on it.  I absolutely adore it. Notice too that the tiny door opens.  I just adore movement in my work.   


The gold rabbit bead was a nice addition to the area with the mushroom.  In the first run, there was a spot open where the bunny was that I thought needed to be filled.  Unfortunately I had run out of the particular color of mossy stuff that I used. The rabbit covered this issue up nicely.  


You may also notice the change in the wood color.  I used vintage photo distress stain and stained the whole thing.  I do not recommend doing this after an assemblage is complete, by the way, it was a bit challenging.  A few roses are now a bit aged! The stain warms up the piece considerably and goes well with the new vibrant tones.  


Thanks for joining me on my re-do.  I hope this post inspires you to revisit that piece that you often look at thinking it needs just one more...

Cheers, 

Rhea


Tuesday, May 8, 2012

Bathing Beauties

My very first design kit from Alpha Stamps was a beachy delight.  This month they are sponsoring a "Wish you were here" postcard swap.  You can find more information about it here.  I made several samples, delighted with all the fun imagery. 


I absolutely adored the travel adhesive borders.  I did not even use them as intended, I left them on the card stock backs as I did not realize until later that they were stickers.


On the back of the card on the left I used this cool wire mesh to capture some shells and glue it on my card.  The product is kind of like a tube of mesh, so I was able to tuck things inside.  


I really love this card.  I used lots of Dresden borders in a nice shell motif. I love this image too.  


I kept this once pretty simple.  I really liked the imagery.  Here are more of the adhesive travel borders, along with a sticker from the Tropical Travelouge line from Graphic 45.  


The last one is really fun.  I just freely collaged from all of the images I cut out when I got my design kit.  Sometimes it is freeing just to put stuff down and not be attached to the outcome.  I think this is why I am really loving collage journaling right now.   

Stay tuned for more beachy goodness on my blog.  I have a tutorial coming soon with Alpha Stamps! 

Cheers, 

Rhea

Thursday, May 3, 2012

A visit to Pixie Hill

One of the best benefits about being involved in online crafty communities is the ability to connect with others and share inspiration.  I learn so much from my fellow bloggers and artists.  Being a part of Alpha Stamps Yahoo group, provides tons of benefits.  There are secret sales, great swaps, challenges and a wealth of inspiration being shared among very talented artists.  Once of them is Nichola Battilana, of Pixie Hill.  Her work is stunning. She creates teeny tiny bits of assemblage that will attract fairy folk from near and far.  Nichola generously shared with the Alpha Stamps Yahoo group how she makes these lovely treasures and I wanted to share what I was able to make.


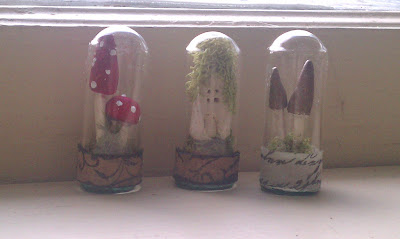
I made a ton of items to use in my domes.  Unfortunately, many of them were too large to squeeze inside these tiny Domed Apothecary Bottles from Alpha Stamps.  I know I will find a use for them though.  Nichola's must be even tinier.  She has some houses and mushrooms inside the same tiny space!  Mine are a bit crowded, but I love them anyway.  


I borrowed a nest from one of my birds to make a quick little fairy town to show of  the rest of the elements I made.  I could have made mushrooms for days.   


I adore the red mushrooms.  My polka dots are wonky and not the same consistent size, but oh well.  Embrace imperfection!  I also should have done two coats of red paint.  I am really impatient for an assemblage artist.  


Pretty darn cute in my humble opinion!  Thank you so much to Nichola for sharing her expertise.  The Yahoo group is open to anyone, so feel free to stop by and join us for some inspiration, great swaps and great product.  


Cheers, 

Rhea