Saturday, March 31, 2012

Feather your nest

I am so excited to be hosting a swap in my Art Charm group.  The theme is "Feather your nest" and the idea is to create art charms inspired by birds, wings, trees, eggs, nests, houses, feathers etc.  A perfect genre for spring.  Sign ups open tomorrow and we will be swapping in groups of fifteen.  Anyone can participate as long as your part of the Yahoo group and you follow the swap guidelines.  Check it out if you are interested!  The group was founded by the authors of Making Mixed Media Art Charms and Jewelry.  Both Peg and Chris are amazing!


I have been scouting for materials for this swap ever since I read one of the swap previews.  I love how the owners of the group let us know what is coming so we can find good deals. 


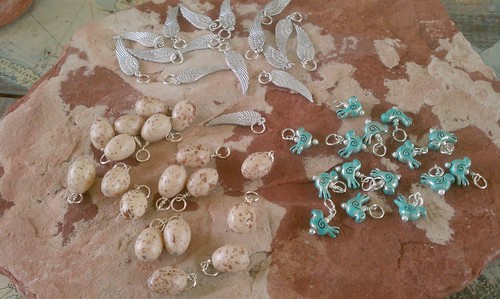
I found these cute little birds on clearance at a big box store.  I wanted to jazz them up a bit so I decided to play with my favorite new product from Alpha Stamps, Guilders Paste.  This is a wax based medium that can be used on wood, metal, clay, ceramics etc.  It is very easy to apply and adds great color and depth.  I highly recommend it to my Art Charm pals, as this was a quick way to make my charms stand out and make them unique.
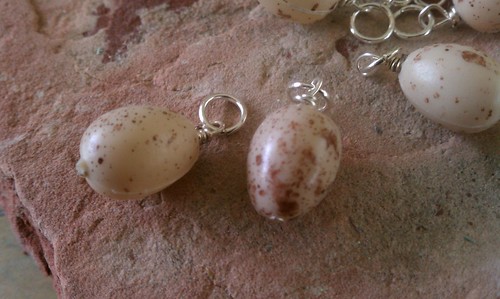


Now, I knew I wanted to also have some egg charms to trade.  I searched high and low in my local stores, but could not find a true egg shaped bead.  I almost picked up some pearls, but the shape just was not right.  Then I had a flash of insight and headed to the floral department.  These little plastic eggs were super cute.  I used a candle to heat up my head pin and poke holes and make them into a bead.  It is so fun to find a way to alter a product and use it outside of the intended purpose. 


These were so super simple to put together, I really did not do any construction.  I actually forgot I had all these wings, but when I was seeking some other stuff in my crafty mess I came upon them and knew they had to be a part of this swap.  Again, I wanted to add some interest, so I dabbed on a bit of pearl color acrylic paint.  Sometimes simple can be a good thing.
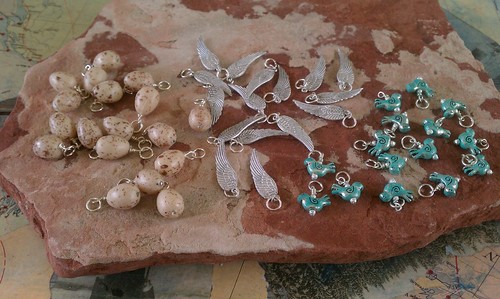


This looks like a great beginning of a wonderful swap.  I think a charm bracelet may be on the horizon. 

Cheers,

Rhea


Sunday, March 25, 2012

Big news and a tiny specimen

My dear followers,

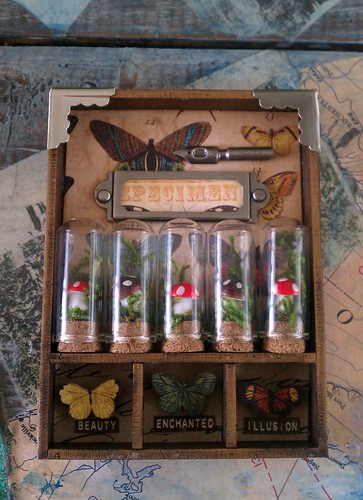
I have been sitting on the most amazing news for over a week now, and it has been excruciating.  I have been accepted to Alpha Stamps Design Team!  This company is so very special, and I can't believe I can say I am a part of their team.  They have an amazing online store, a wonderful supportive Yahoo community and they engage their customers with the most wonderful  and creative art swaps.  I assure you they have top notch customer service and a wonderful staff as well!  

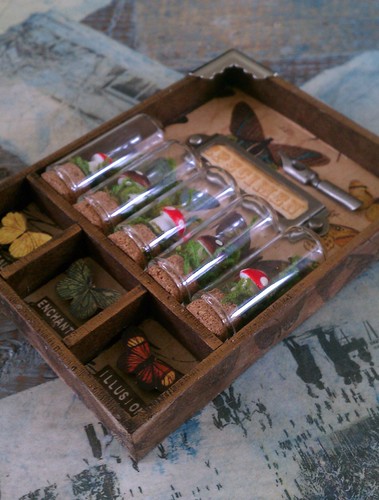
This project actually features some great products available at Alpha Stamps.  I started with a shrine kit and the cutest tiny mushrooms I purchased from Retro Cafe Art.  I added apothecary domes, paper from Graphic 45's Old Curiosity Shoppe, as well some other embellishments I had on hand.


I used rub and buff to add some shimmery interest to the edges of the shrine.  I really appreciate the texture this adds.


I wanted to show a image that included the edges.  Here I used a bit of tissue tape from Tim Holtz to add some visual interest. Distress stain along with a bit more rub and buff was added to this element to ensure that it blended in with my chosen palate.  You can also see that the butterflies on the bottom add some dimension.  I added a bit of foam from a kids door hanger to pop the images from the background.  I had a use what you have moment there!


I finished off the project with some metal embellishments and trinkets I dug out of my stash and I am pleased with the outcome.  Once again, I had to coax myself into cutting into that Graphic 45 paper as it is just so pretty. 

I can't wait until my first Design Team kits arrives!  I am sure it will be filled with tons of crafty inspiration which I look forward to sharing with all of you.

Cheers,

Rhea
Thursday, March 22, 2012

A Sweet Salvage Story

So sorry I have been off the map folks!  My mojo has been hiding from me of late.  To inspire me once again, I invested in taking a class from Kari McKinght-Holbrook.  The class was called "Sweet Salvage Stories" and it was a ton of fun.  I traveled to the class with some of my artsy pals, so that also made for a special day.


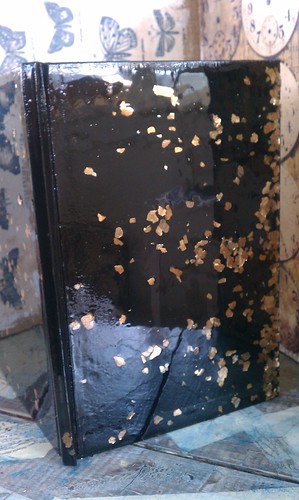
Can you believe that this was once a Bernstein Bears book!  The cover has a bit of an issue.  I tempted fate and covered it with resin.  For my first time ever, I must not have mixed my resin properly.  It does not seem to have set up, so the cover accepts dents and fingerprints.  My plan is to try and add another coat of resin as I have no other idea of what to do.  If any of my online art friends have an answer for me, I am all ears!  It did turn out nice looking, I love the mica flakes I embedded in the resin. 


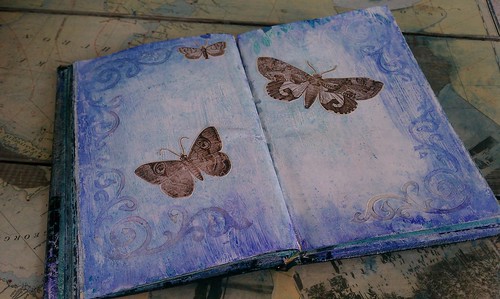
All of our pages were covered in amazing texture.  This one above was one of those "happy accidents."  I used wax paper in between pages and I used a heat gun to dry things due to impatience.  I ended up with a pretty serious wax resist, which was not intended.  The birds seen are Kari's custom stamps.  I wanted the set so bad, but since I did not indulge in buying them, I did stamp a few images to preserve in my book.  The one above was colored with distress stain before being added to my journal.


This is the start of a very large art journal.  There are about forty pages in my book, none of them complete but I wanted to share at least a sample.  Here I used a stencil to mask the tree and then followed up with some smooch inks add color. 


Here are a few more of Kari's birds. Love!  In class the background of the stamped image just disappeared for the instructor, unfortunately I was not able to achieve the same results when I tried it at home.  Kind of reminds me of going to the hair dresser...I can never get my hair dresser's techniques to work either! :)


The embellishment here, some of Tim Holtz's stickers I had on hand.  Some of them (not pictured) I colored with stains before adding to my work in process.


I adore the texture here.  If you look closely, you can make out a faint image of some of the graphics that lie underneath my background art.  This imprint is another one of the instructor's special stamps.  She has giant beautiful stamp sheets with the most wonderful textures.  I did not get the chance to try some of the really neat lettering techniques she demoed, but I look forward to trying it out as I add to my book. 


Here is another shot of that lovely, but still sticky, resin cover.  Please, please art friends, advise if you have a solution, please share!

Sunday, March 11, 2012

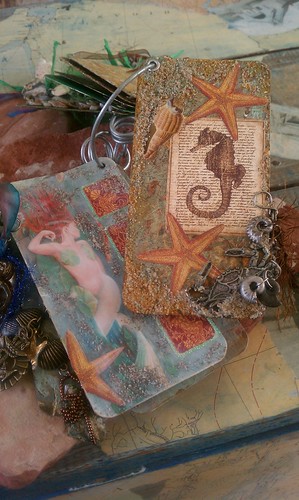
Mermaid Metal Deck

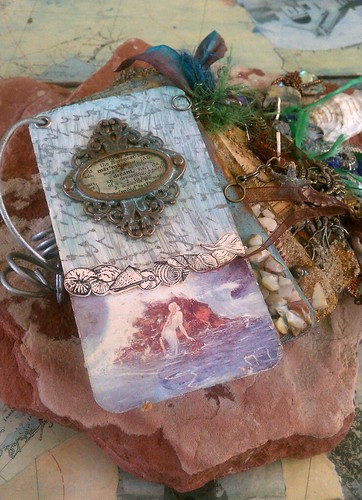
I have to say that my Steampunk Metal Deck is probably one of my favorite creations to date.  When I took this class from Leighanna Light I was so inspired, I purchased another blank deck with the intention to make a mermaid themed project.  I am so very excited to finally have the chance to show it off.


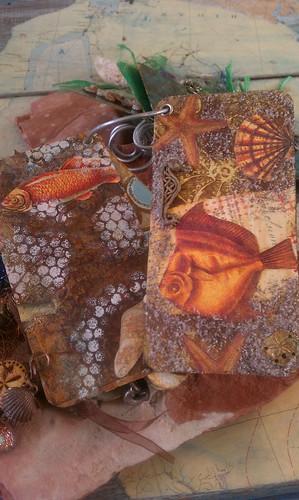
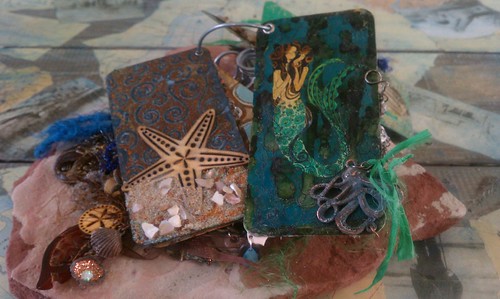
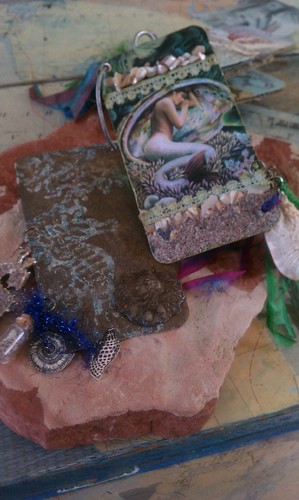
This book is quite heavy and has lots of flotsam and jetsam.  By using all kinds of charms, found objects and trinkets I was able to add the element of movement to this book.  It was difficult to find wire similar to what we had in class for the binding.  I finally scavenged some from a construction site I walk by near work.  The gauge was really too heavy for the project, but I just had a make it work moment.


I used lots of gesso, stamps and stencils when making the backgrounds of each page.  Texture was the intended goal.  The carved mermaid trinket below was given to me by my cousin Gail.  I am so glad to have finally found a use for it.  I added a bit of paint and rub as well as rub and buff to bring out some of the intricately carved details. 


This was one of my favorite pages.  I love the look of the real sand as well as the rusted mermaid with her filigree backdrop.  The texture of the wavy page is delightful too.  The sand used here was from Mud Puddles.  I ran out of it quickly though and had to improvise on a few other pages. I was surprised at what I was able to achieve with a bit of experimenting. 


This is another top notch set of pages.  The one with Graphic 45's Botanicabella has to be my favorite.  I affixed my altered crab a bit off the page and then managed to use the holes by his legs to attach more junque.  There is also lots of texture made with my very own sand mixture. 


The stencil I used here reminded me of bubbles, fitting in with the underwater idea.  I love the big carved fish too.


Lots more stuff that I rusted is on display here.  I just love putting age on items and transforming them into little relics.  Here I also tapped into some old German scrap that I have been hording.  I had an entire sheet of really interesting fish and shells. 


This art stamp is on that I really enjoy so I was happy to find another application for it.  I also used many random fibers I had on hand to add to the flotsam and jetsam.  Some of them were bits of silk that I hand dyed as taught to me by Joanne Huffman.  I thought the color palate of the fibers fit well with the project, while adding antother textural element. 


The patina on this seahorse took a few times to get it right, working with this medium is very unpredictable at times. 


The image on this card is by Sheila Wolk. She has some really pretty mermaid imagery in her work. I had been hanging on to this greeting card for quite some time.  This special project called me to use it and I have no regrets. 


The waves from this stencil made for another appropriate background.  I used a heavy duty glue to attach many of my precious trinkets to my deck.


Obviously this was an amazing class if I am still using and applying my knowledge almost a year later.  Leighanna is teaching again nearby soon, perhaps I will need to indulge in another class from her! 

Cheers,

Rhea

Sunday, March 4, 2012

A Charming Day

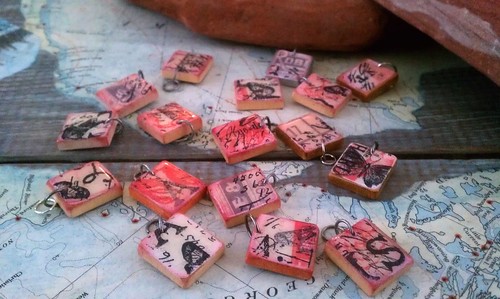
It seems I have found a few simple projects that have got my mojo flowing a bit.  I spent the day making charms for one of my favorite little Yahoo groups.  The first set is for a Springtime in Paris swap.  I have a few more tiles that need jump rings still, I ran out and for once, I was not in the mood to shop. 


These were simple altered Scrabble tiles.  A bit of 7 gypsies paper, a French stamp, a smidge of ink and some glossy accents made for a cute little charm.  Stay tuned for another set, I have these really wonderful acrylic discs I plan to alter. 

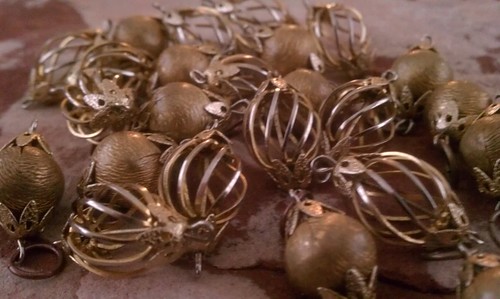
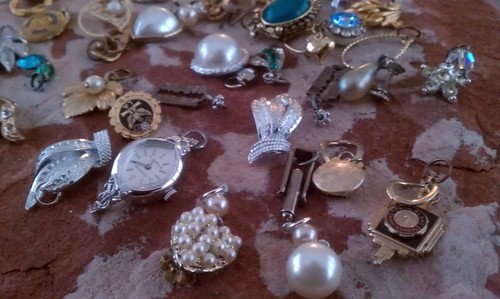
Check out these little embellishments made from a vintage necklace.  It was so simple to take this apart and just add a jump ring to the existing loop.  The caged ones are so neat.  I wonder if I could tuck something inside.


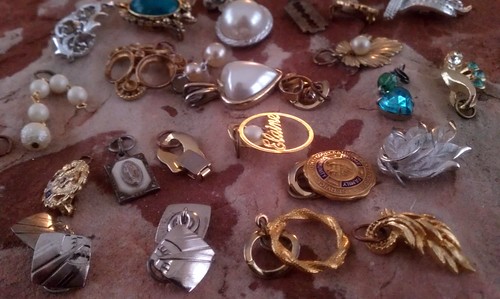
The set above, as well as the ones below are for another charm swap.  This one is themed around junque jewelry.  I had a ton to sift through and I managed to find a few treasures.


Some of these charms are made from the strangest little bits.  High school pins, broken earrings, clasps, chain links, cuff links make up this motley little crew of junky bits. 


If the other participants in this swap have as eclectic charms as I do, this will be an interesting swap indeed!

Cheers,

Rhea
Saturday, March 3, 2012

Time for the Bead Soup Blog Party!

Hey there loyal followers and hopefully some new ones! 

Welcome to my little corner of the Bead Soup Blog Party (BSBP).  I am super happy to post my big reveal for Lori Anderson's BSBP.  Please head over to Lori's blog for a full list of participants in order to be able to fully enjoy the experience of the hop. 

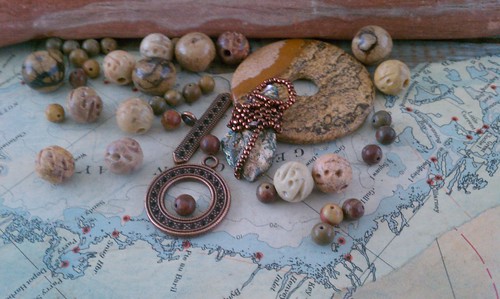
Here is a picture of what my partner Cory sent along to inspire me.  I have to admit, this was a major challenge for me!  She sent me lots of items that were of a larger scale than I typically work in.  Also, in the past, I have not necessarily embraced the gemstone donut as a viable centerpiece.  I love how this exchange offered me the opportunity to stretch myself creatively.


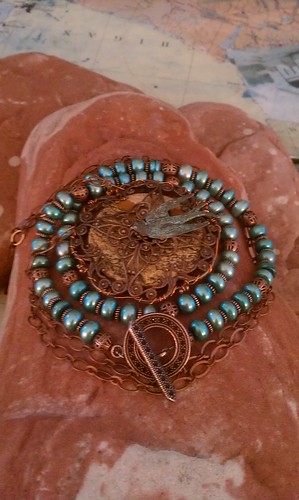
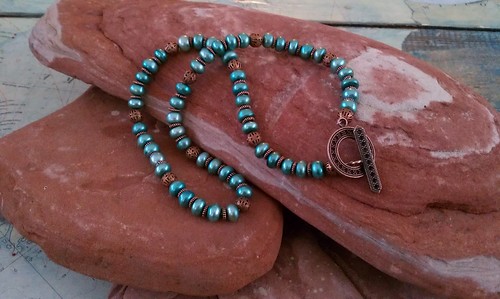
My favorite part of my soup was the clasp she sent.  I am not used to working with metals in a finish other than silver, I love how this experience pushes us to try new things.  I did decide that I was going to make something that could utilize this clasp as a focal, so here is what I made.


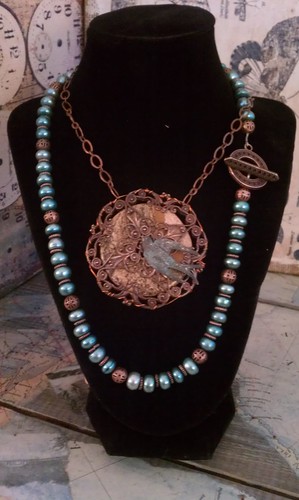
I really love the color combo on this piece.  Again, this is not something I would usually do in terms of color palate.  Typically I have been wearing this piece with the clasp in front but off center, but I could easily wear the clasp in the back for a different look.   I was amazed at how difficult it was to find beads with a copper finish in the mainstream shopping experience.  I had to seek out a local specialty bead shop in order to find adequate supplies.   


And then there was the donut...I am not going to lie, for me this was difficult to use.

I was able to use the focal by utilizing lots of other fun materials from Vintaj.   Again, I was stumped on size.  After lots and lots of consult with my artsy friends, I embraced my giant modified focal and added a simple chain.  The necklace is quite long as I used 36 inches of chain. 


And here, a nice close up of my focal.  I really love the look of the patina on the bird.  This little detail also actually ties the two pieces together quite well. 


Here you can see how nice they look together.  Surprisingly, they coordinate very well.


I still have some left over soup to continue to challenge me.  I really love those cream colored carved beads, but everything I tried to make with did not work due to the size issue.  I do not give up easily.  I am confident my extra beads will end up in a project soon.  There is a special place I am going to use Cory's handmade bail, so stay tuned to see the completion of a really cool mermaid project soon.  

Thanks as always for stopping by!  I hope you will use the links provided above to visit other blogs on the hop!

Cheers,

Rhea